
Showstopper Snow Day! That’s what I dubbed the day we got about six inches of snow and my office was closed. It worked out great, because I was just about to get started on my first showstopper challenge—the hidden design cake!
I’ve been thinking about making this cake ever since I first watched this episode of the Great British Baking Show (2012 season, episode 1). You might even say it was my initial inspiration for this blogging adventure. I love a challenge, and figuring out how to embed a design inside a cake in such a way that it would be visible in every slice is something I’d never thought of before (except maybe those checkerboard cakes that you can buy special pans for).
As soon as I saw John cutting a heart-shaped cavity out of a round white cake with a cookie cutter and inserting heart-shaped pieces of red cake into it, my mental wheels started turning. How would I do that? What design could I make that would be unique but simple enough for me, an amateur baker, to pull off?
I loved what Victoria did with her Blackbirds Baked in a Pie cake, but I haven’t done a lot with fondant, so creating a cake that looks like a pie or some other shape seemed out of my realm.
But I wondered if I could do a hybrid of the two. Something like, but not quite like, what John and Victoria did. My mind began racing. What about an egg? It’s a simple design—basically a circle within an oval. Following Victoria’s theme of telling a story, I thought of the goose that laid the golden egg. If the goose were sitting on top of the cake, the egg would be in the middle of the cake. But how?
Rather than squishing flavored cake crumbs into a cavity carved into the middle of a cake, like Sarah Jane and Cathryn did, I wanted to assemble mine of two different cakes, using different but complimentary flavors. For contrast, I decided to make a chocolate cake as the base, since eggs are white and I wanted my design to stand out. And what is whiter than coconut? I also thought a coconut egg inside a chocolate cake would be reminiscent of those chocolate-covered coconut eggs we used to get in our Easter baskets. To make the egg golden, I chose to give it a marzipan yolk and enrobe it in gold-colored marzipan, hoping the marzipan coating would be noticeable enough when the cake is cut into.
With this plan in my head, I made a quick sketch (nothing like those cool sketches they do on the show, but still) and started making a list of all the elements I would need to execute my first showstopper. (I have boldfaced those items in the next few paragraphs.)
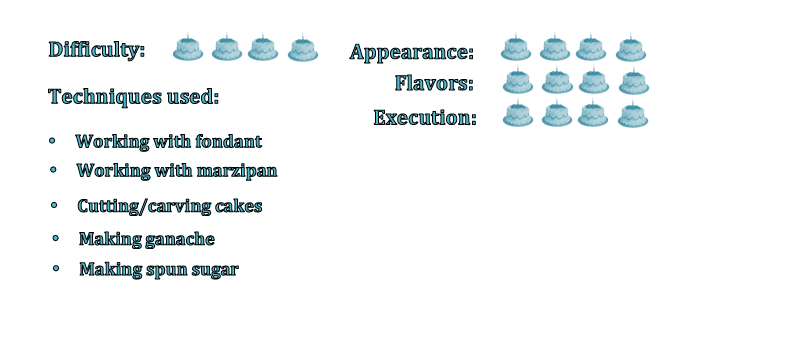
I decided to make the goose out of fondant. While I have made fondant in the past, I’ve never really modeled with it. I only rolled it out to make ribbons and small roses. Learning to model a goose out of it would be my first hurdle.
Instead of making a layer cake, I thought I would bake the cake in my Pampered Chef batter bowl—the old-style one I used to use to make Barbie cakes when my girls were little. The egg would fit nicely inside of it, and rather than deal with multiple layers, I could just cut it through the middle and create a hole just the right size for the egg.
Then I would need an egg-shaped pan. I had a tin that I used for making Easter cakes once, but they were more the size of petit fours, and I needed something bigger. I found one online made of silicone that had five cavities about the size I was looking for. Thank you, Amazon Prime!

Since I was planning to make fondant from scratch, I decided to use store-bought marzipan and simply color it to my liking. One less headache to deal with. I also made sure I had gel food coloring in the colors I needed: gold for the egg, orange for the goose’s bill, black for the eyes and green for leaf decorations. (The leaves were an afterthought, which meant a last-minute trip to the craft store for green gel!)
Next came the recipes. Scouring the internet, I found a recipe for a chocolate pound cake that had coffee added to it. I find that coffee enhances chocolate and gives it a darker, richer flavor. I also figured that a pound cake would be sturdy enough to hold up to all the cutting and scooping and filling without crumbling to pieces.
Then I found a coconut cake recipe using coconut milk as well as a little coconut extract. I halved the recipe and decided to add flaked coconut to improve the flavor and give it a little more texture, as well. For icing, I used a coconut buttercream to “glue” the two halves of the egg together, and a chocolate ganache to seal the top and bottom of the cake as well as enrobe the outside of the cake.
Using a fondant recipe I’d tried before, I made a batch and left it in the fridge overnight. The next day I took it out and started molding it into a goose shape. That’s when I realized I had no idea what I was doing! The fondant grew soft in my hands and started drooping. I realized I needed help from the experts, so of course I turned to YouTube!
After about an hour of watching YouTube tutorials on molding fondant, I learned a few tricks—like using lollipop sticks for support (It’s like giving your figure a skeleton!) and making each part of the body separately and then sticking them together with toothpicks and water. I didn’t want to spend a lot of money on fancy “fondant tools,” so I scrounged my kitchen drawers and used things like bamboo skewers, a Tupperware citrus peeler and an X-Acto knife. I also found this tutorial helpful.
Referring to online images of geese—both photographs and cartoons—as a guide, slowly, gradually, my goose began to take shape. I realized it was going to take some time to dry, so I propped it up as best I could and left it alone for a good 24 hours.
After I made the cakes, I left them in the freezer overnight. The next day, I was ready to start assembling my showstopper creation. Here, step by step, is the process I went through., which you can follow if you want to recreate my cake design.
Step 1: Make coconut icing. Because I wouldn’t need a lot, I cut the recipe to a third.
Step 2: Color marzipan a nice golden yellow color. Form one piece into a round ball for the yolk. Sprinkle work surface with powdered sugar and roll out the rest of the marzipan into a ¼-inch-thick circle to cover the egg cake. Cover marzipan circle with damp cloth until you’re ready to use it so it doesn’t dry out.
Step 3: Remove two halves of the egg cake from the freezer. Cut off the rounded top of each half to make two flat surfaces that will fit together nicely. Scoop out half a sphere from each half of the egg to make room for the marzipan “yolk.” Spread each half with coconut icing, insert yolk and stick the two halves together.
Step 4: Spread a thin layer of icing over the entire egg cake. It’s okay if the cake shows through in places. This is called a crumb coatand will help the marzipan stick. Let it sit for about 15 minutes.
Step 5: Carefully cover egg cake with marzipan. I used an X-Acto knife to cut wedges out of the circle so that it would fit over the egg better. Then I used a smoothing tool (a small spatula or the back of a spoon should work), dipping it in water occasionally, to smooth out wrinkles and seams. Set the egg down on your powdered sugar–dusted work surface until you’re ready for it.
Step 6: After removing the chocolate cake from the freezer, measure how many inches from the bottom you want to cut it in half. It should be right about where the widest part of the egg will sit inside the cake, making sure there will be a little cake above and below the egg. This turned out to be trickier than I thought, since the egg, once covered with marzipan, was almost the same height as my chocolate cake!
Insert toothpicks every few inches around the cake at that height to guide you as you cut the cake in half. With a serrated knife, start making cuts all around the cake, sawing into the cake a few inches at a time and then moving to the next section. Once you’ve made the initial cuts around the outside, then saw through the middle of the cake. (If your cake isn’t frozen solid like mine was, you may be able to cut through it all at once.)
Step 7: Using a spoon or ice cream scoop, scoop a hole out of the middle of the bottom half of the cake. Start small and gradually increase the width and depth of the hole—making sure it is centered in the cake—until it’s large enough for the egg to sit in. With the egg sitting in the hole, measure how much of the egg is sticking out of the top to see if it will fit within the top half of the cake. If it’s still a little too tall, dig out more of the bottom half until the part of the egg that’s sticking out is a little shorter than the height of the top half of the cake. (Using a toothpick, I measured to see how much cake was left under my egg—about 3/8 of an inch.)

Step 8: Repeat Step 7 with the top half of the cake—keeping in mind that the top half of the egg is slightly skinnier than the bottom—scooping out a hole for the egg to fit in. Again, I had to dig to within a half inch of the top surface of the cake. I was cutting it a bit close—literally!
Step 9: Once both holes are dug (Reserve cake scraps for snacking on later!), make the chocolate ganache. I’d never made ganache before and was surprised at how simple and versatile it is! Let it cool a little; then drizzle it onto the bottom layer of the chocolate cake and spread it around so it will glue the two layers together. Carefully place the top layer over the egg and bottom layer.
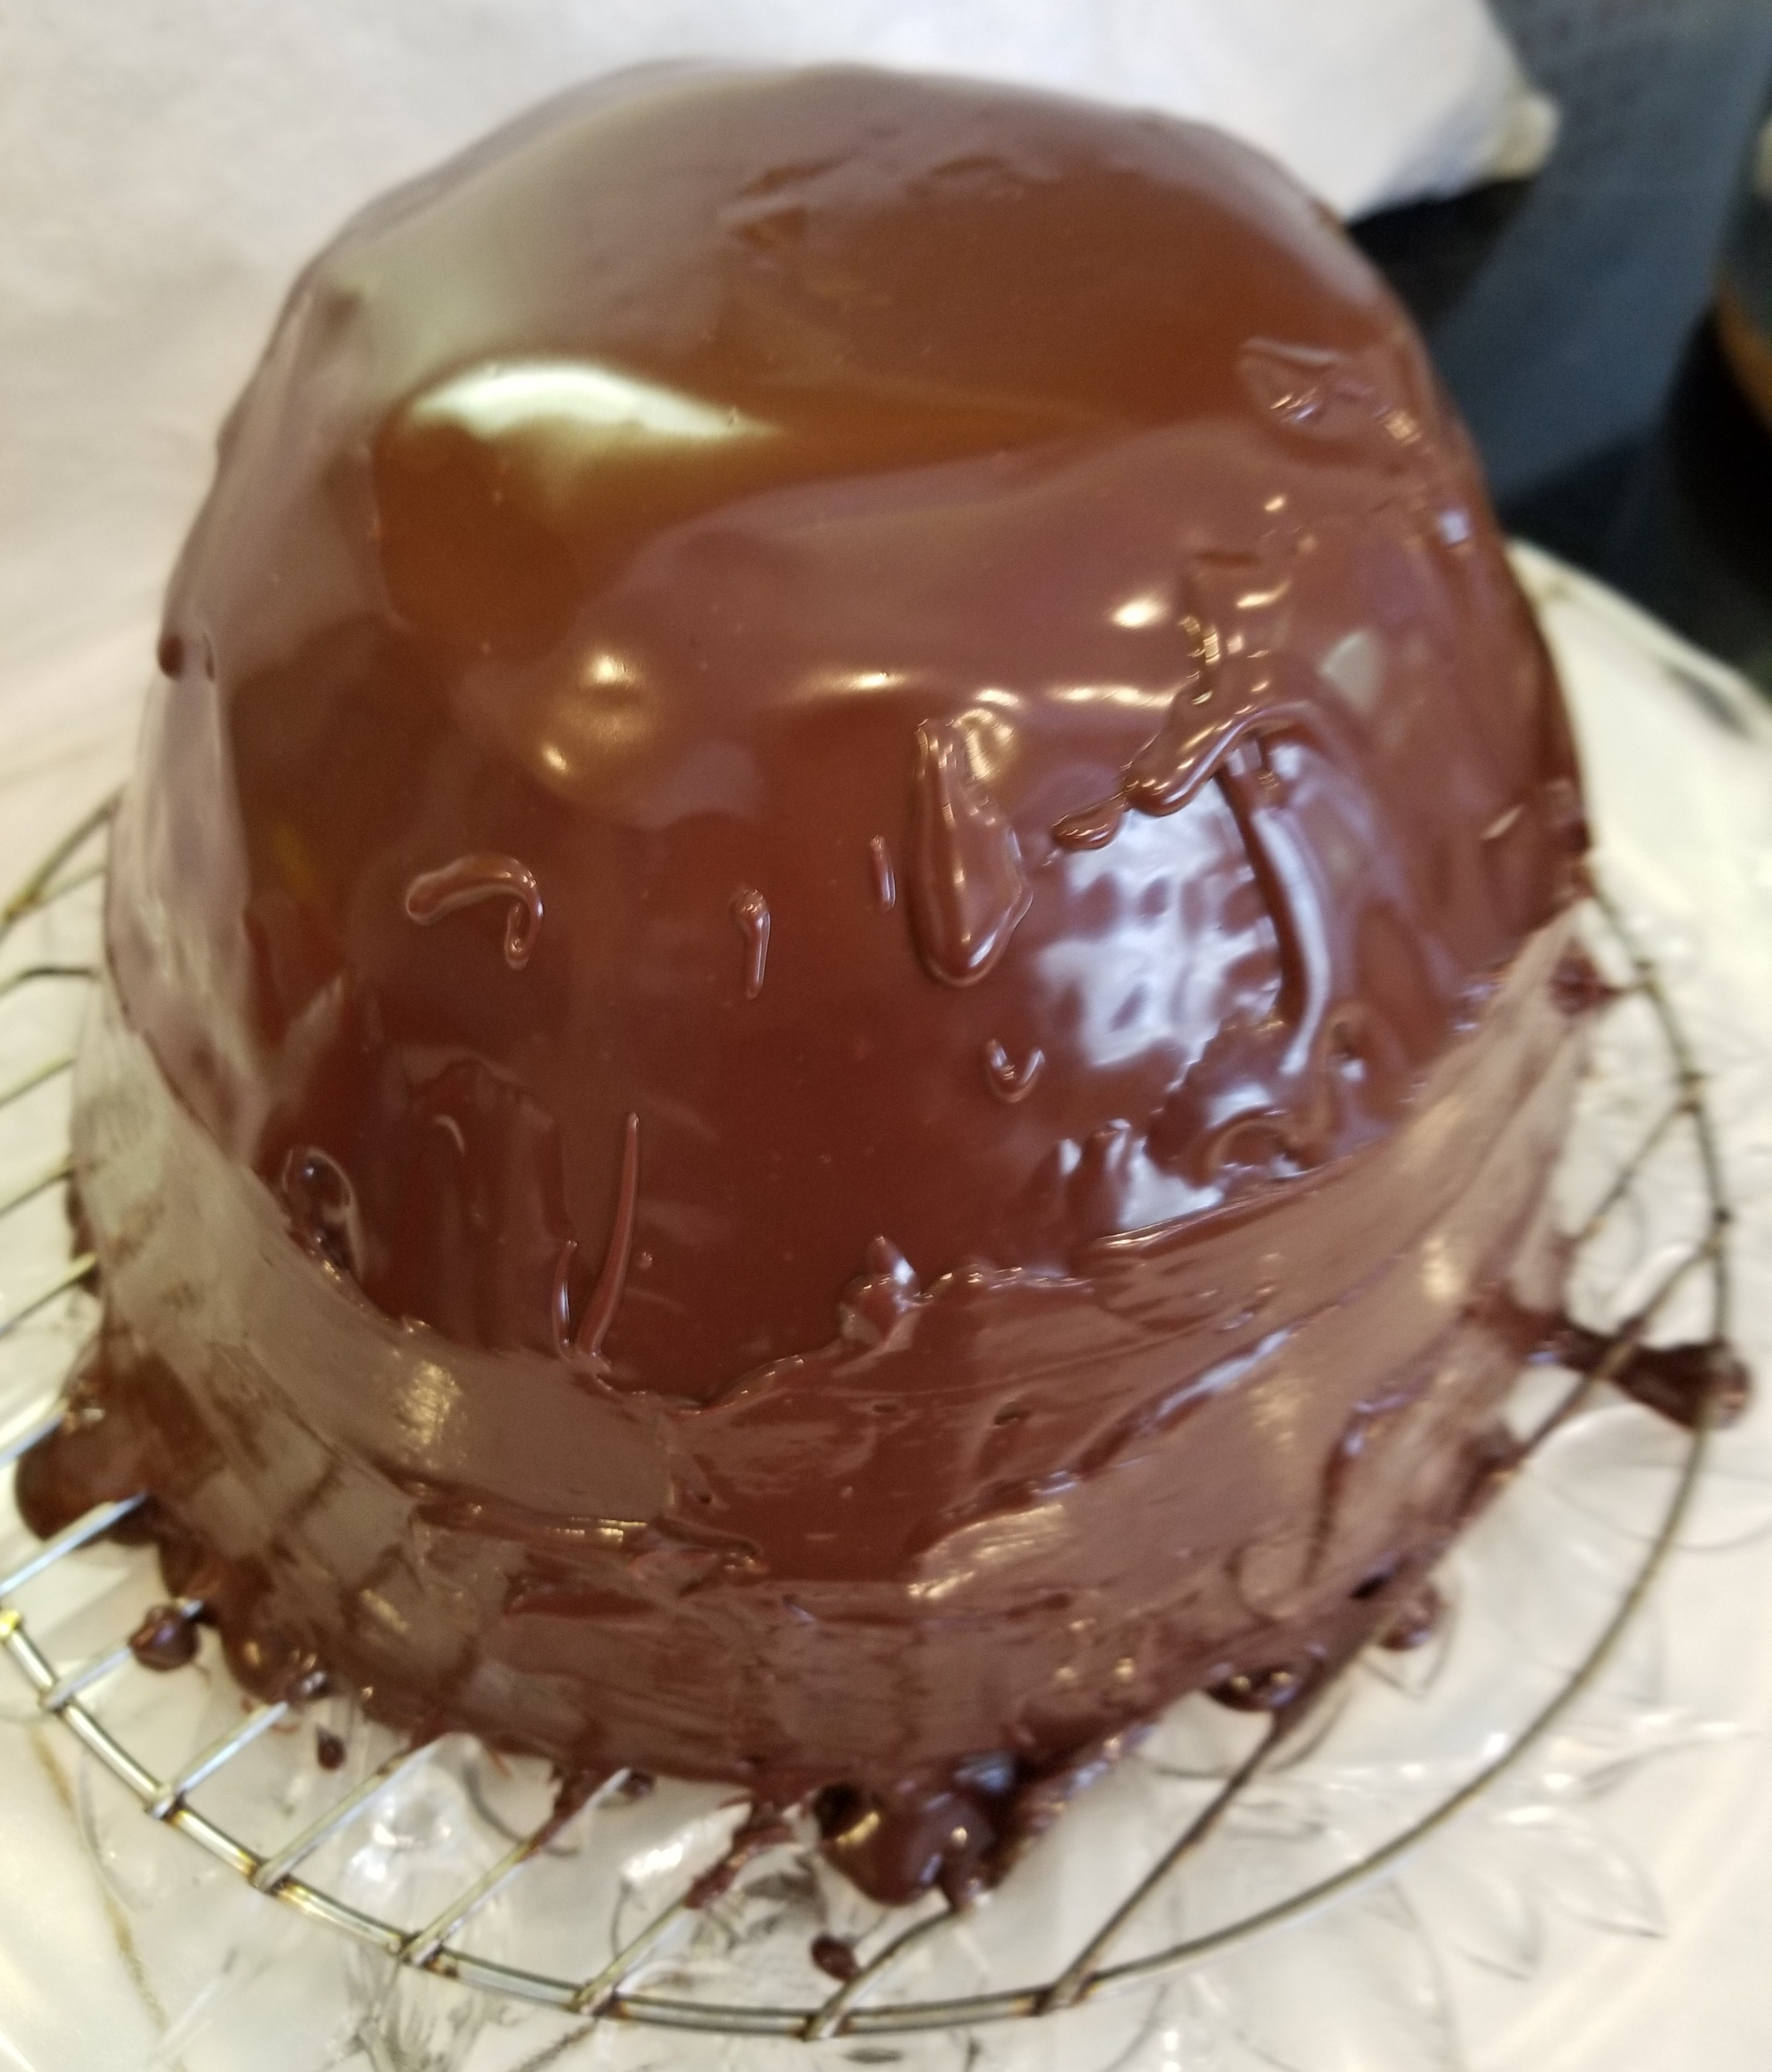
Step 10: Placing the cake on a rack over a platter to catch the drips, drizzle the rest of the ganache over the whole cake. I waited about 15 minutes for the ganache to cool before drizzling, but I wish I hadn’t waited quite so long because it started hardening before reaching the bottom, so I didn’t get quite as smooth a finish as I wanted. To counteract this, I set my oven on warm and stuck the cake—rack, glass platter and all—into the oven for a few minutes to see if the ganache would warm up enough to flow again. It wasn’t completely successful, but it did soften enough that I was able to spread it around the bottom of the cake to cover it completely.
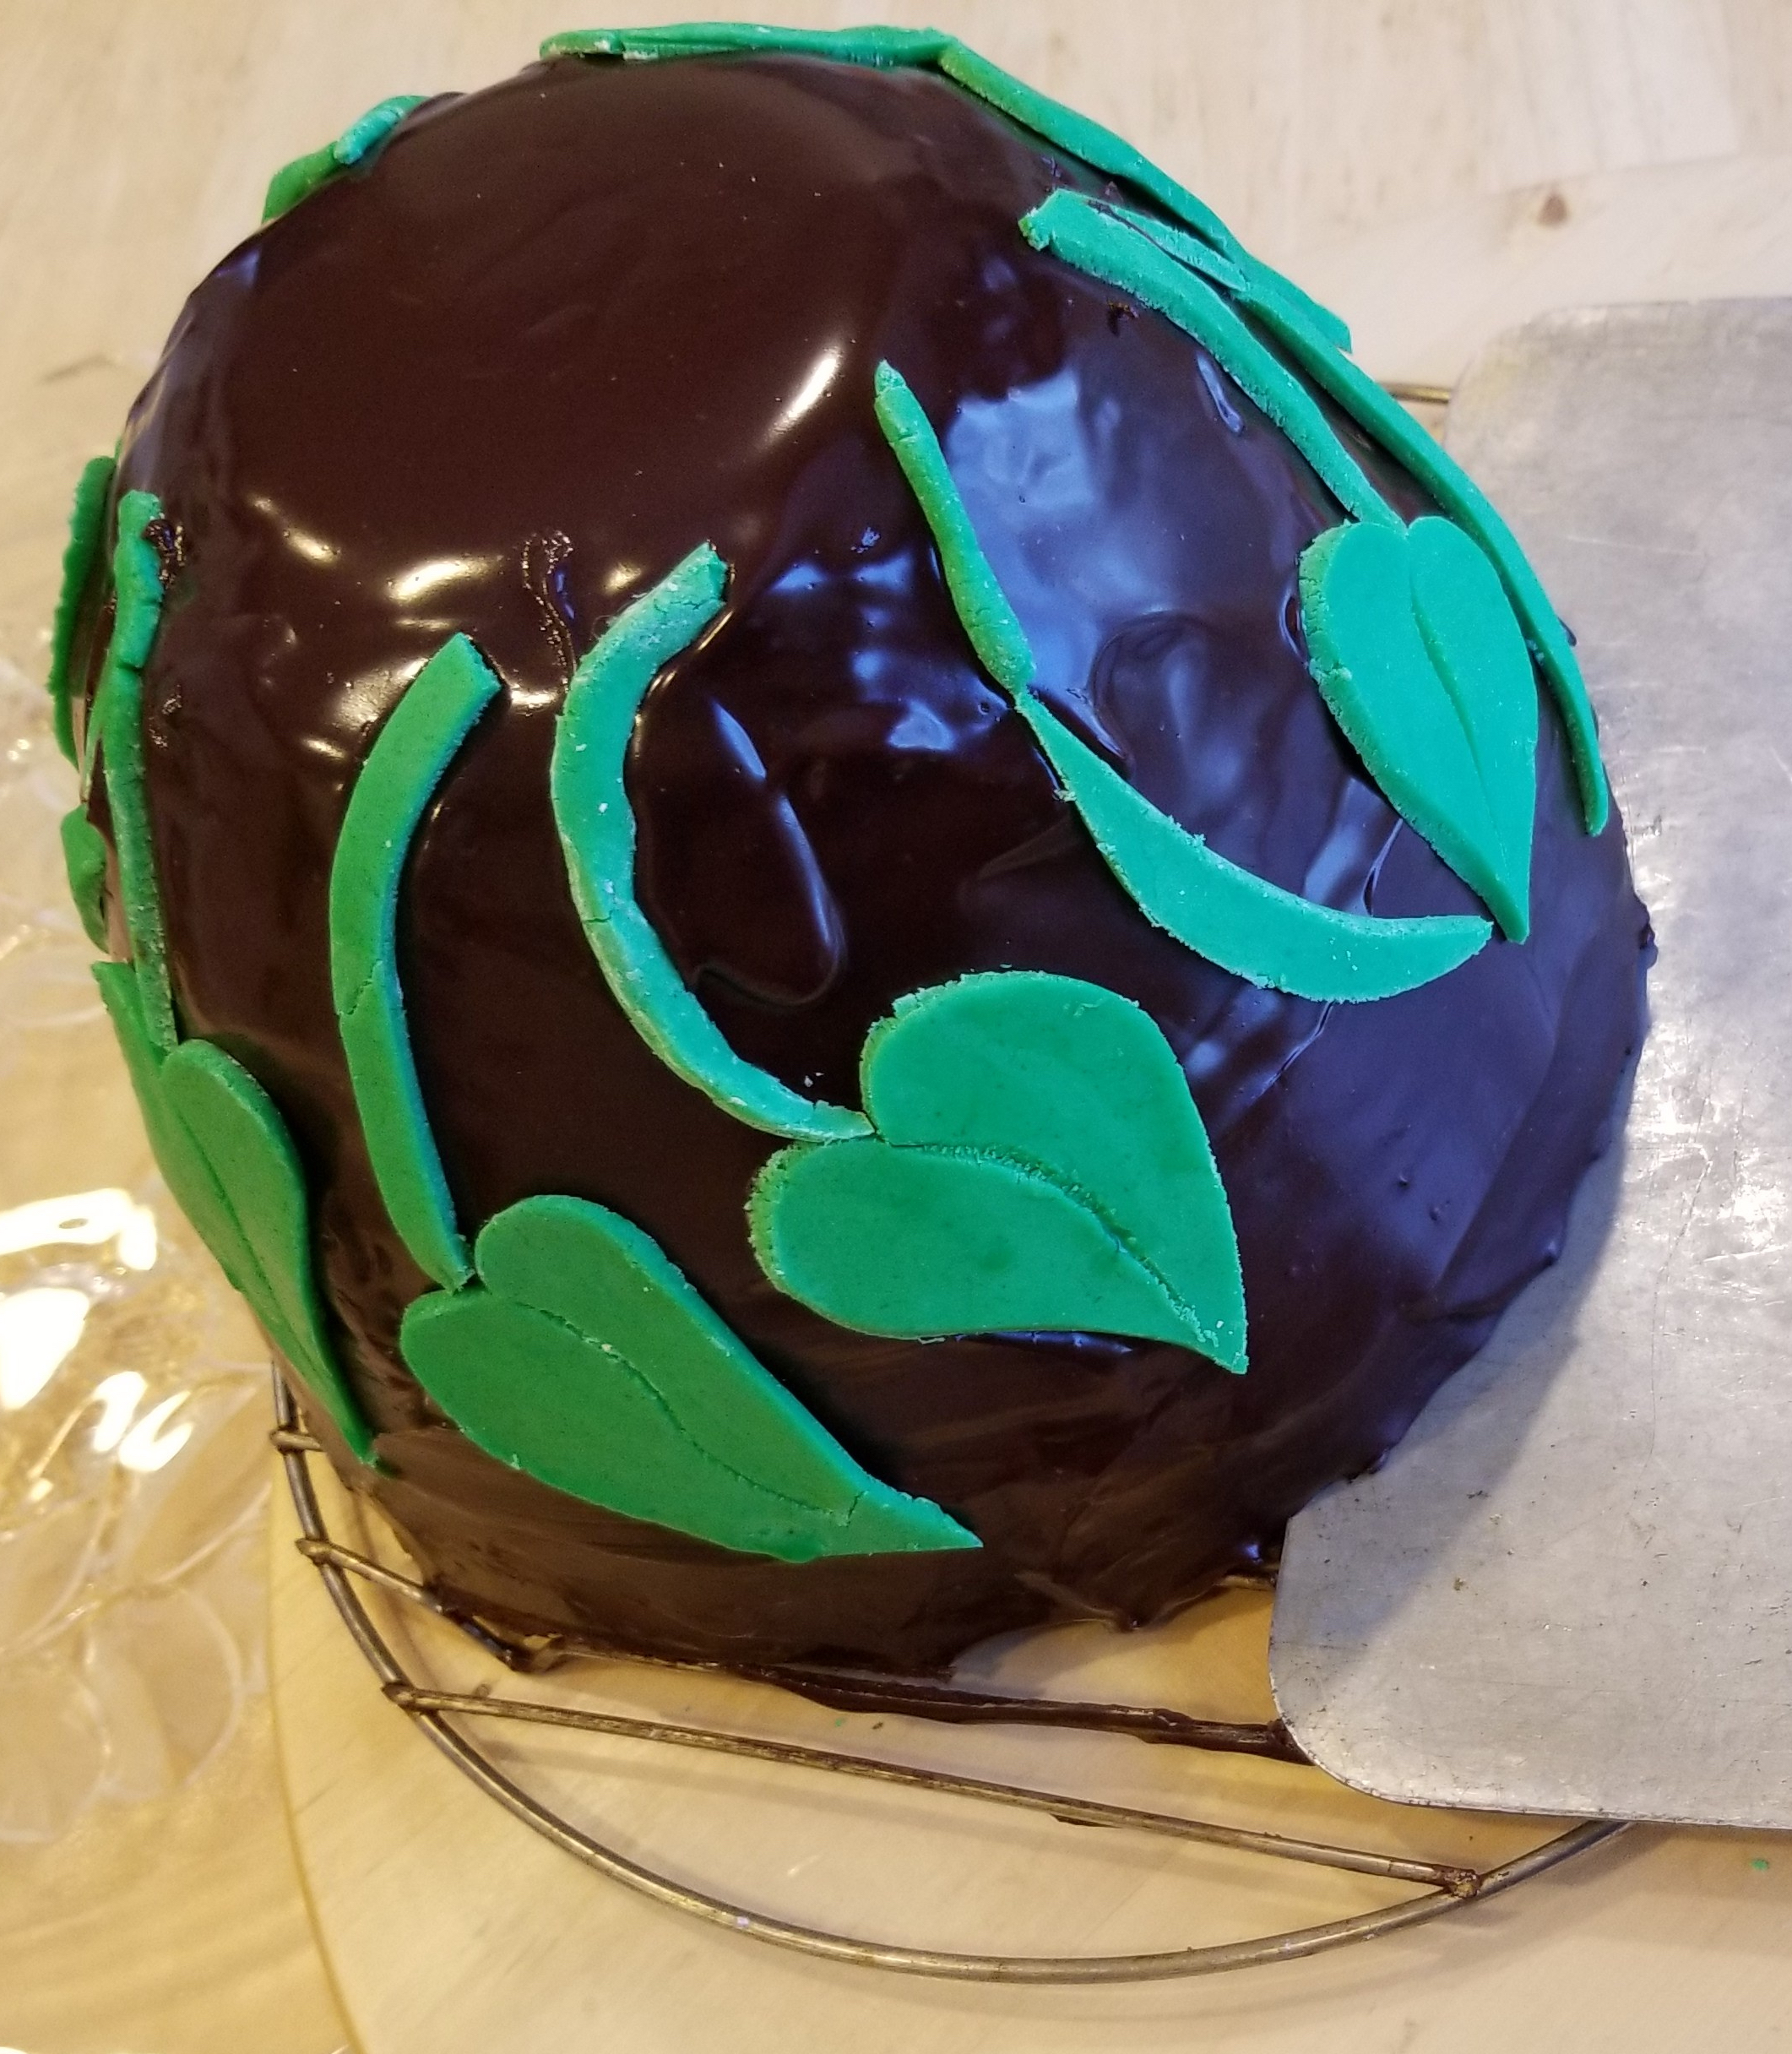
Step 11: While waiting for the ganache to harden, you can use a bit of leftover fondant to make leaves and vines to decorate the cake. Remember, the goose that laid the golden egg was on top of the beanstalk that Jack climbed, so I colored a small amount of fondant green, rolled it out to about 1/8 inch thick and cut it into shapes of leaves, stems and beans. I wanted to do curly vines as well, but it was starting to dry out, perhaps from being handled too much, and broke when I tried to roll it into thin enough ropes.
Step 12: When the ganache is pretty well set but not completely hardened, place the leaves and beans around the sides of the cake, attaching them to fondant stems.
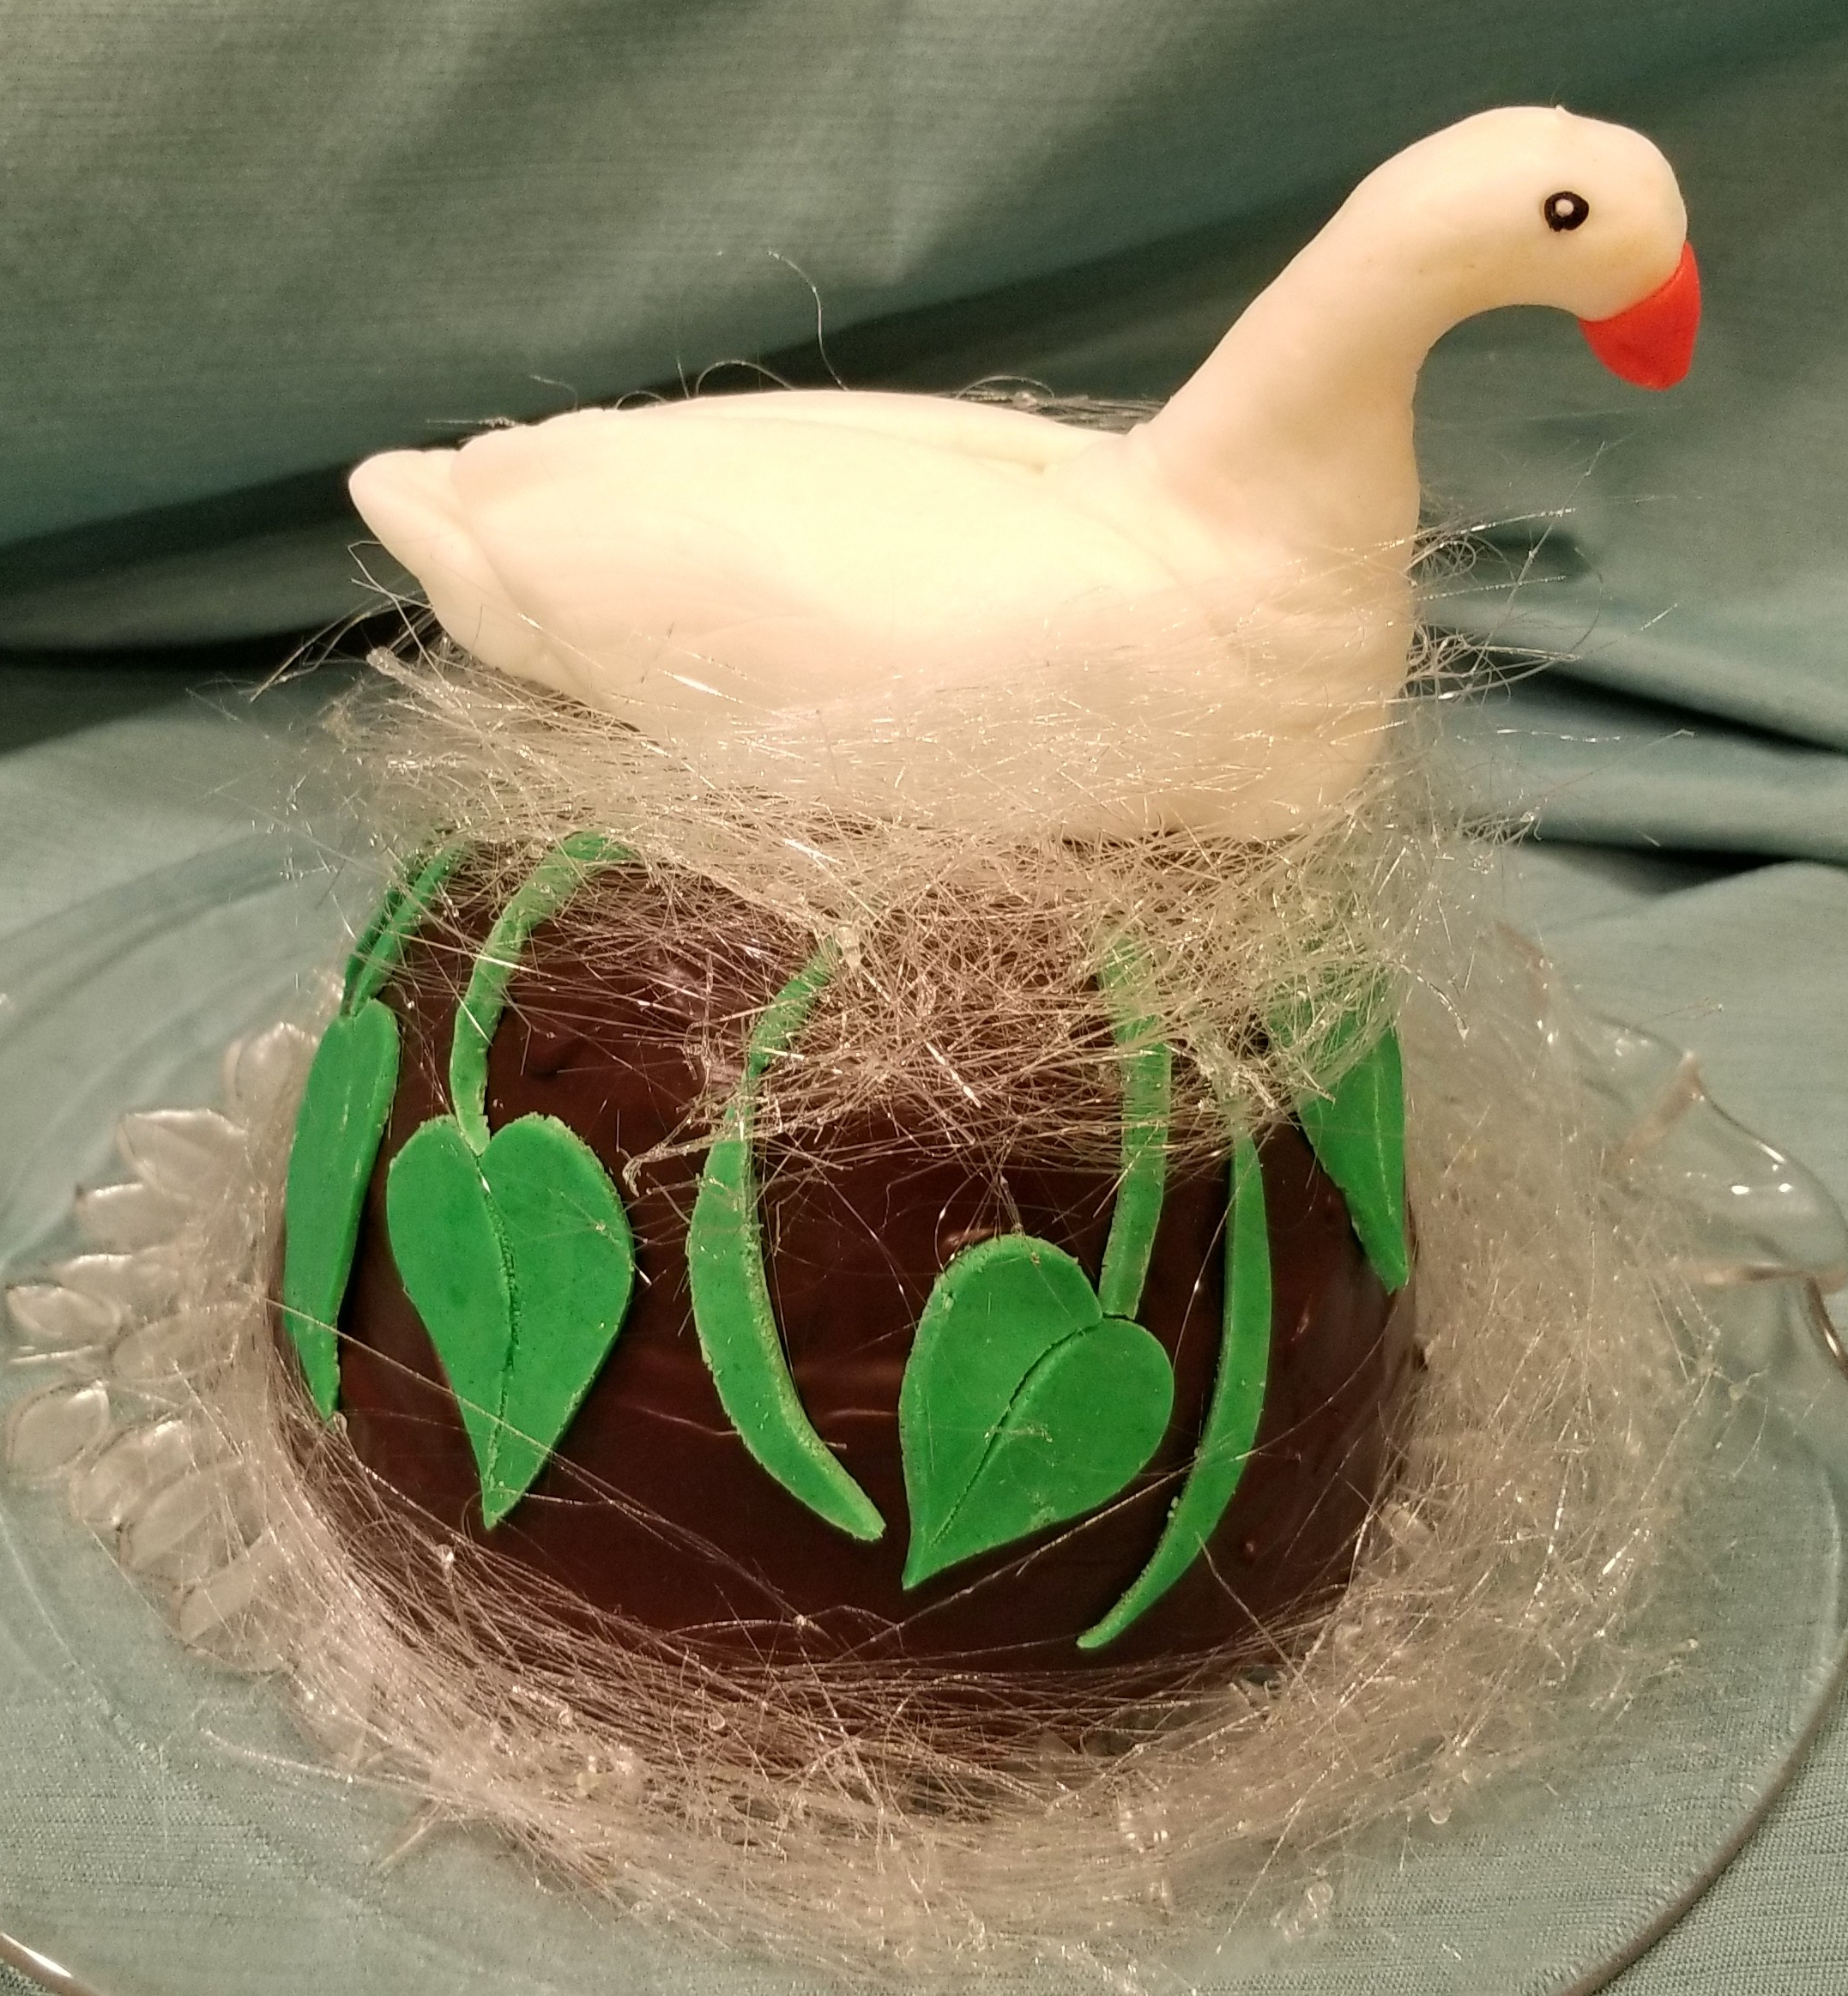
Step 13: If you’re feeling brave, make a spun sugar nest! About an hour before I planned to serve the cake—we had company coming—I tried my hand at spinning sugar for the first time! Using this helpful tutorial from The Spruce Eats, I was successful enough to create a nest for my goose to sit in on top of the cake and to place a ring of spun sugar around the bottom of the cake to hide my ganache imperfections. I was quite pleased with the results, but found Paul Hollywood’s method of using a knife-honing steel to catch the sugar threads easier than the pan handles that The Spruce Eats suggested. (For Paul’s method, see The Great British Baking Show Masterclass, Season 5, Episode 1, on Netflix.)
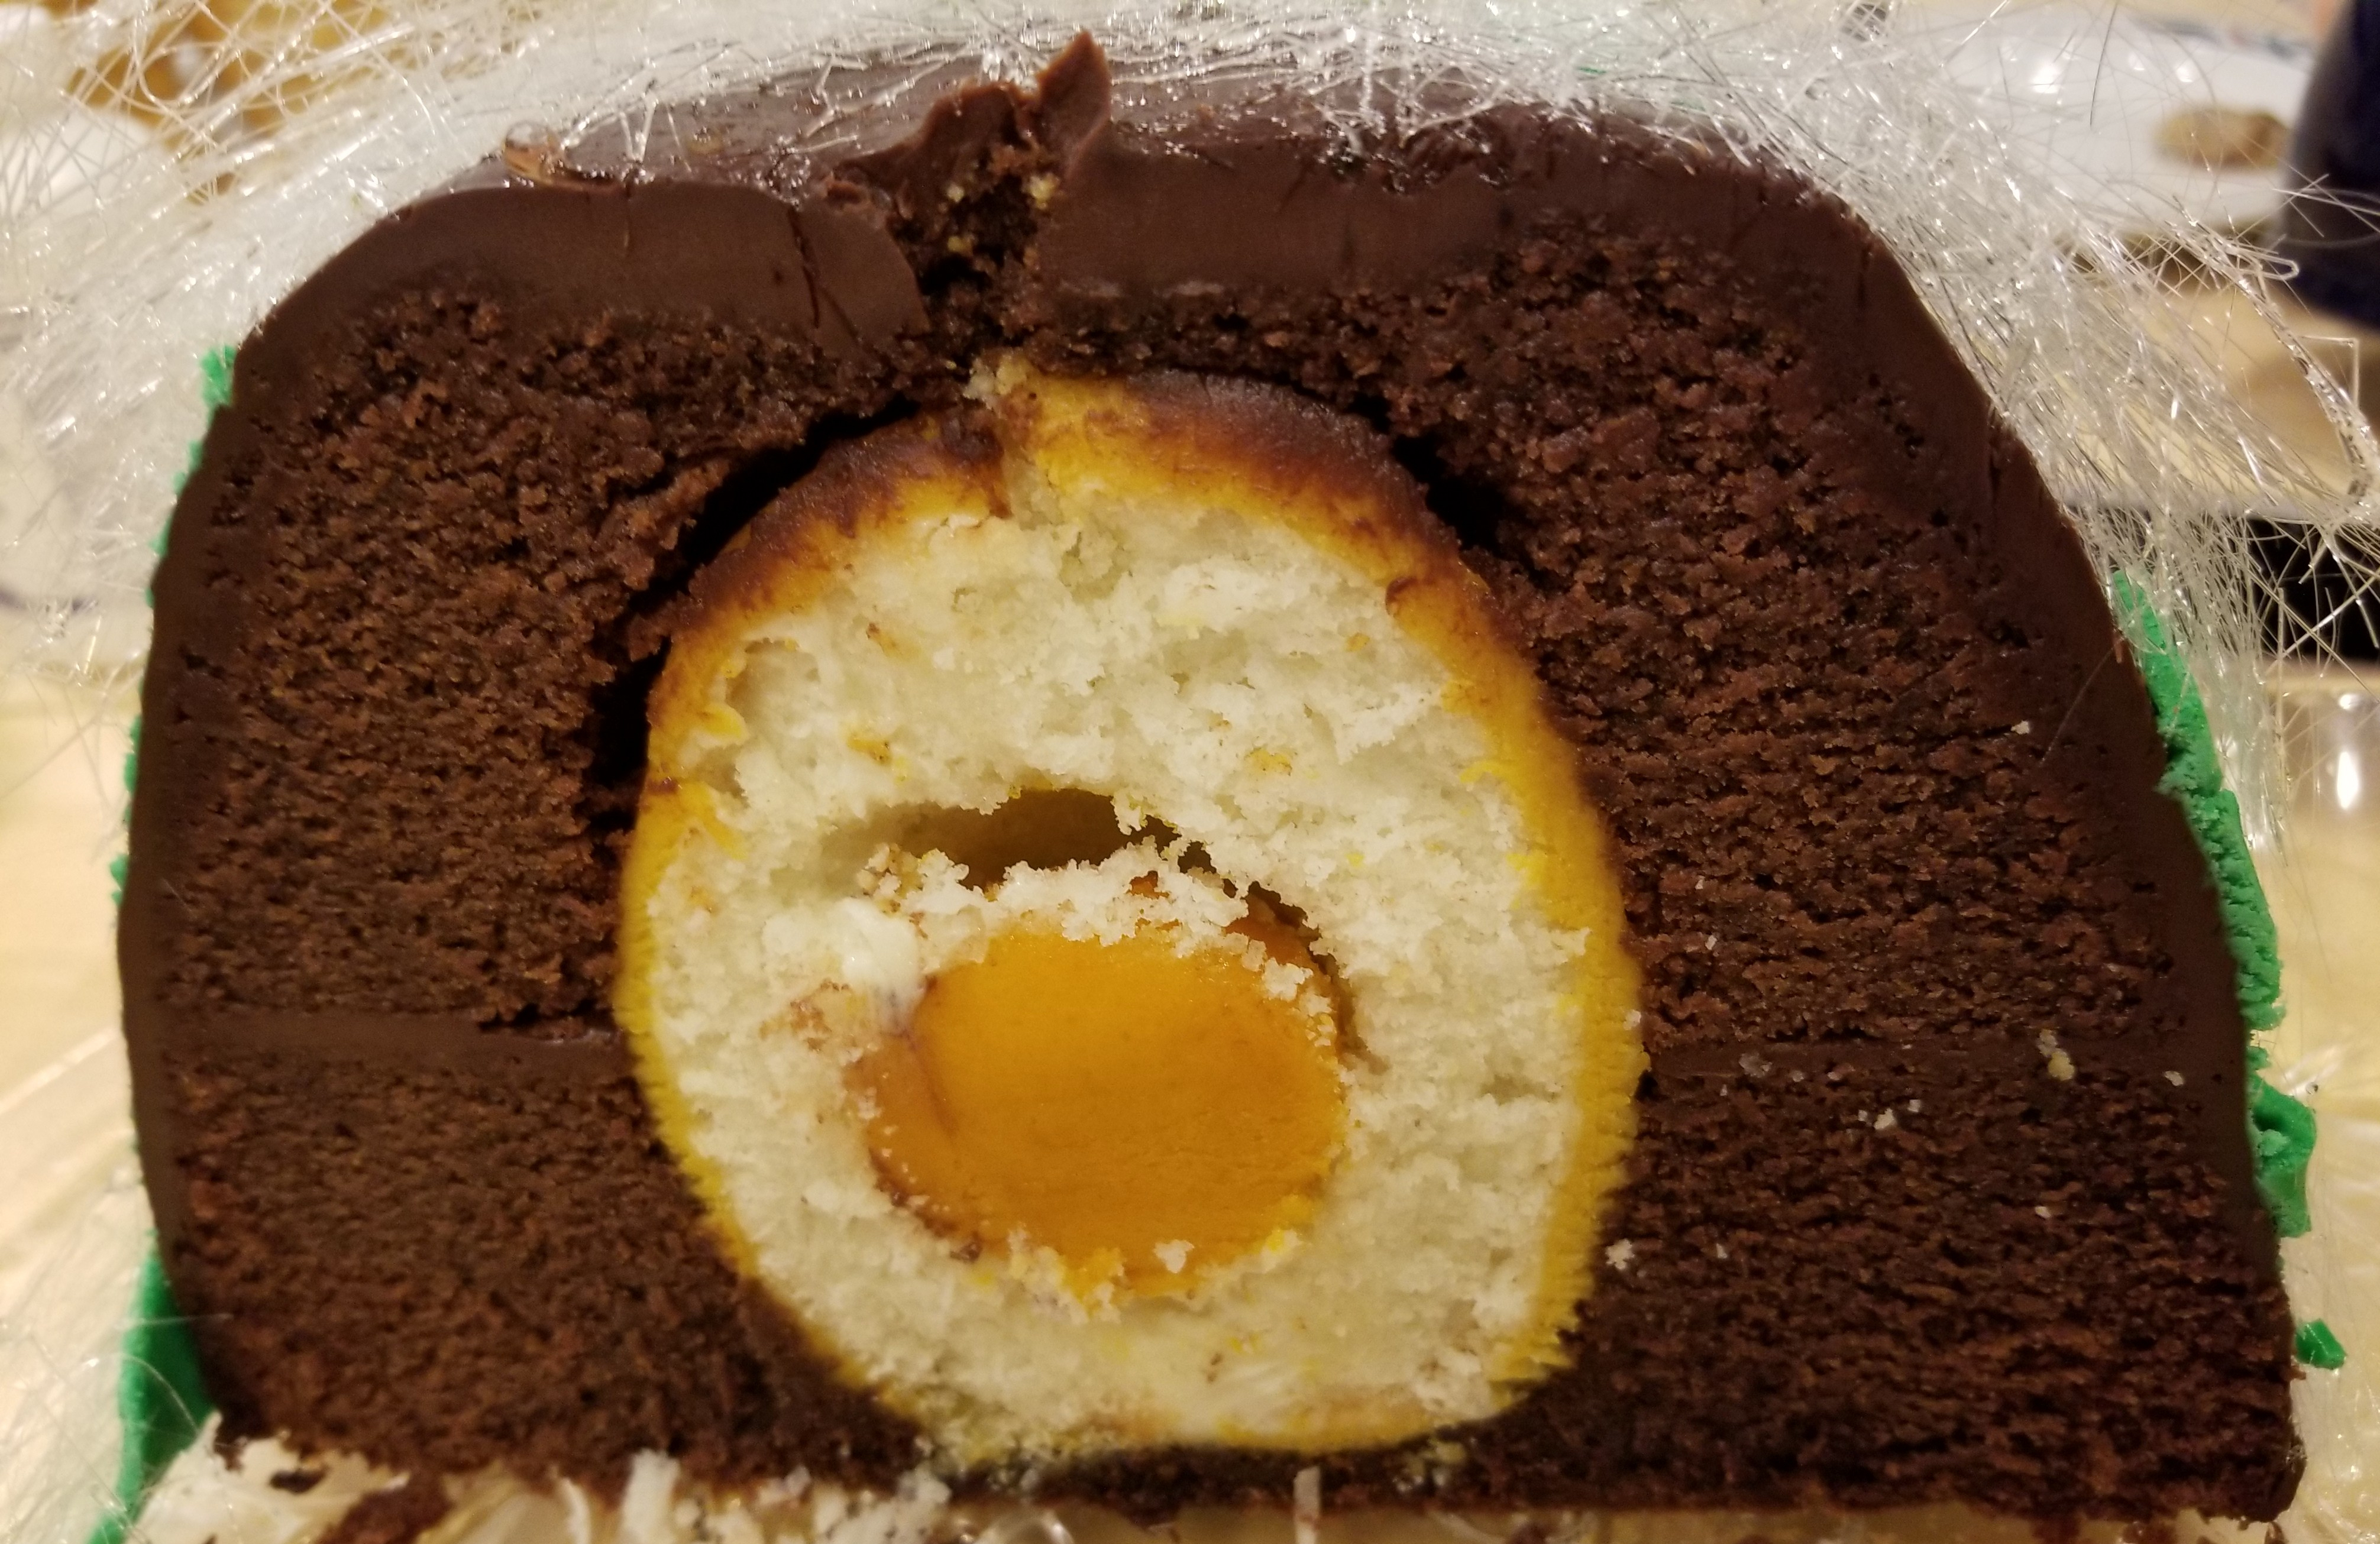
Overall, I was quite pleased with how it turned out, but of course the proof is in the pudding! The first test came when we cut into it. Voila! The egg was clearly visible and recognizable (although Paul might not have been pleased with the gaps between the cake and the egg). We found both cakes to be moist and flavorful. The mocha and coconut flavors went really well together, and the marzipan added a subtle nutty flavor not unlike an Almond Joy candy bar. At least my guests seemed impressed!

It was even more impressive ( and delicious!), in person!
LikeLiked by 1 person
Thanks, Lori! So glad you could share it with us!
LikeLike
It’s beautiful! Love the presentation.
LikeLiked by 1 person
Hey, nicely done! Very creative! Wonder how it would work with having the entire egg be marzipan? Regardless, very cute!
LikeLiked by 1 person
I thought about that, Kristy, but I was afraid it would be too dense and not keep its shape when cut into. It might work, though. Let me know if you try it!
LikeLike