
When my kids were in school, every time it was their turn to bring treats to class, whether for their birthday or a holiday party, they’d request my mint chocolate brownies. I have to admit, they were one of my favorites, too. I mean, what’s not to like? A layer of thick, fudgy brownie topped with minty buttercream topped with a thin coating of butter-enriched chocolate ganache.
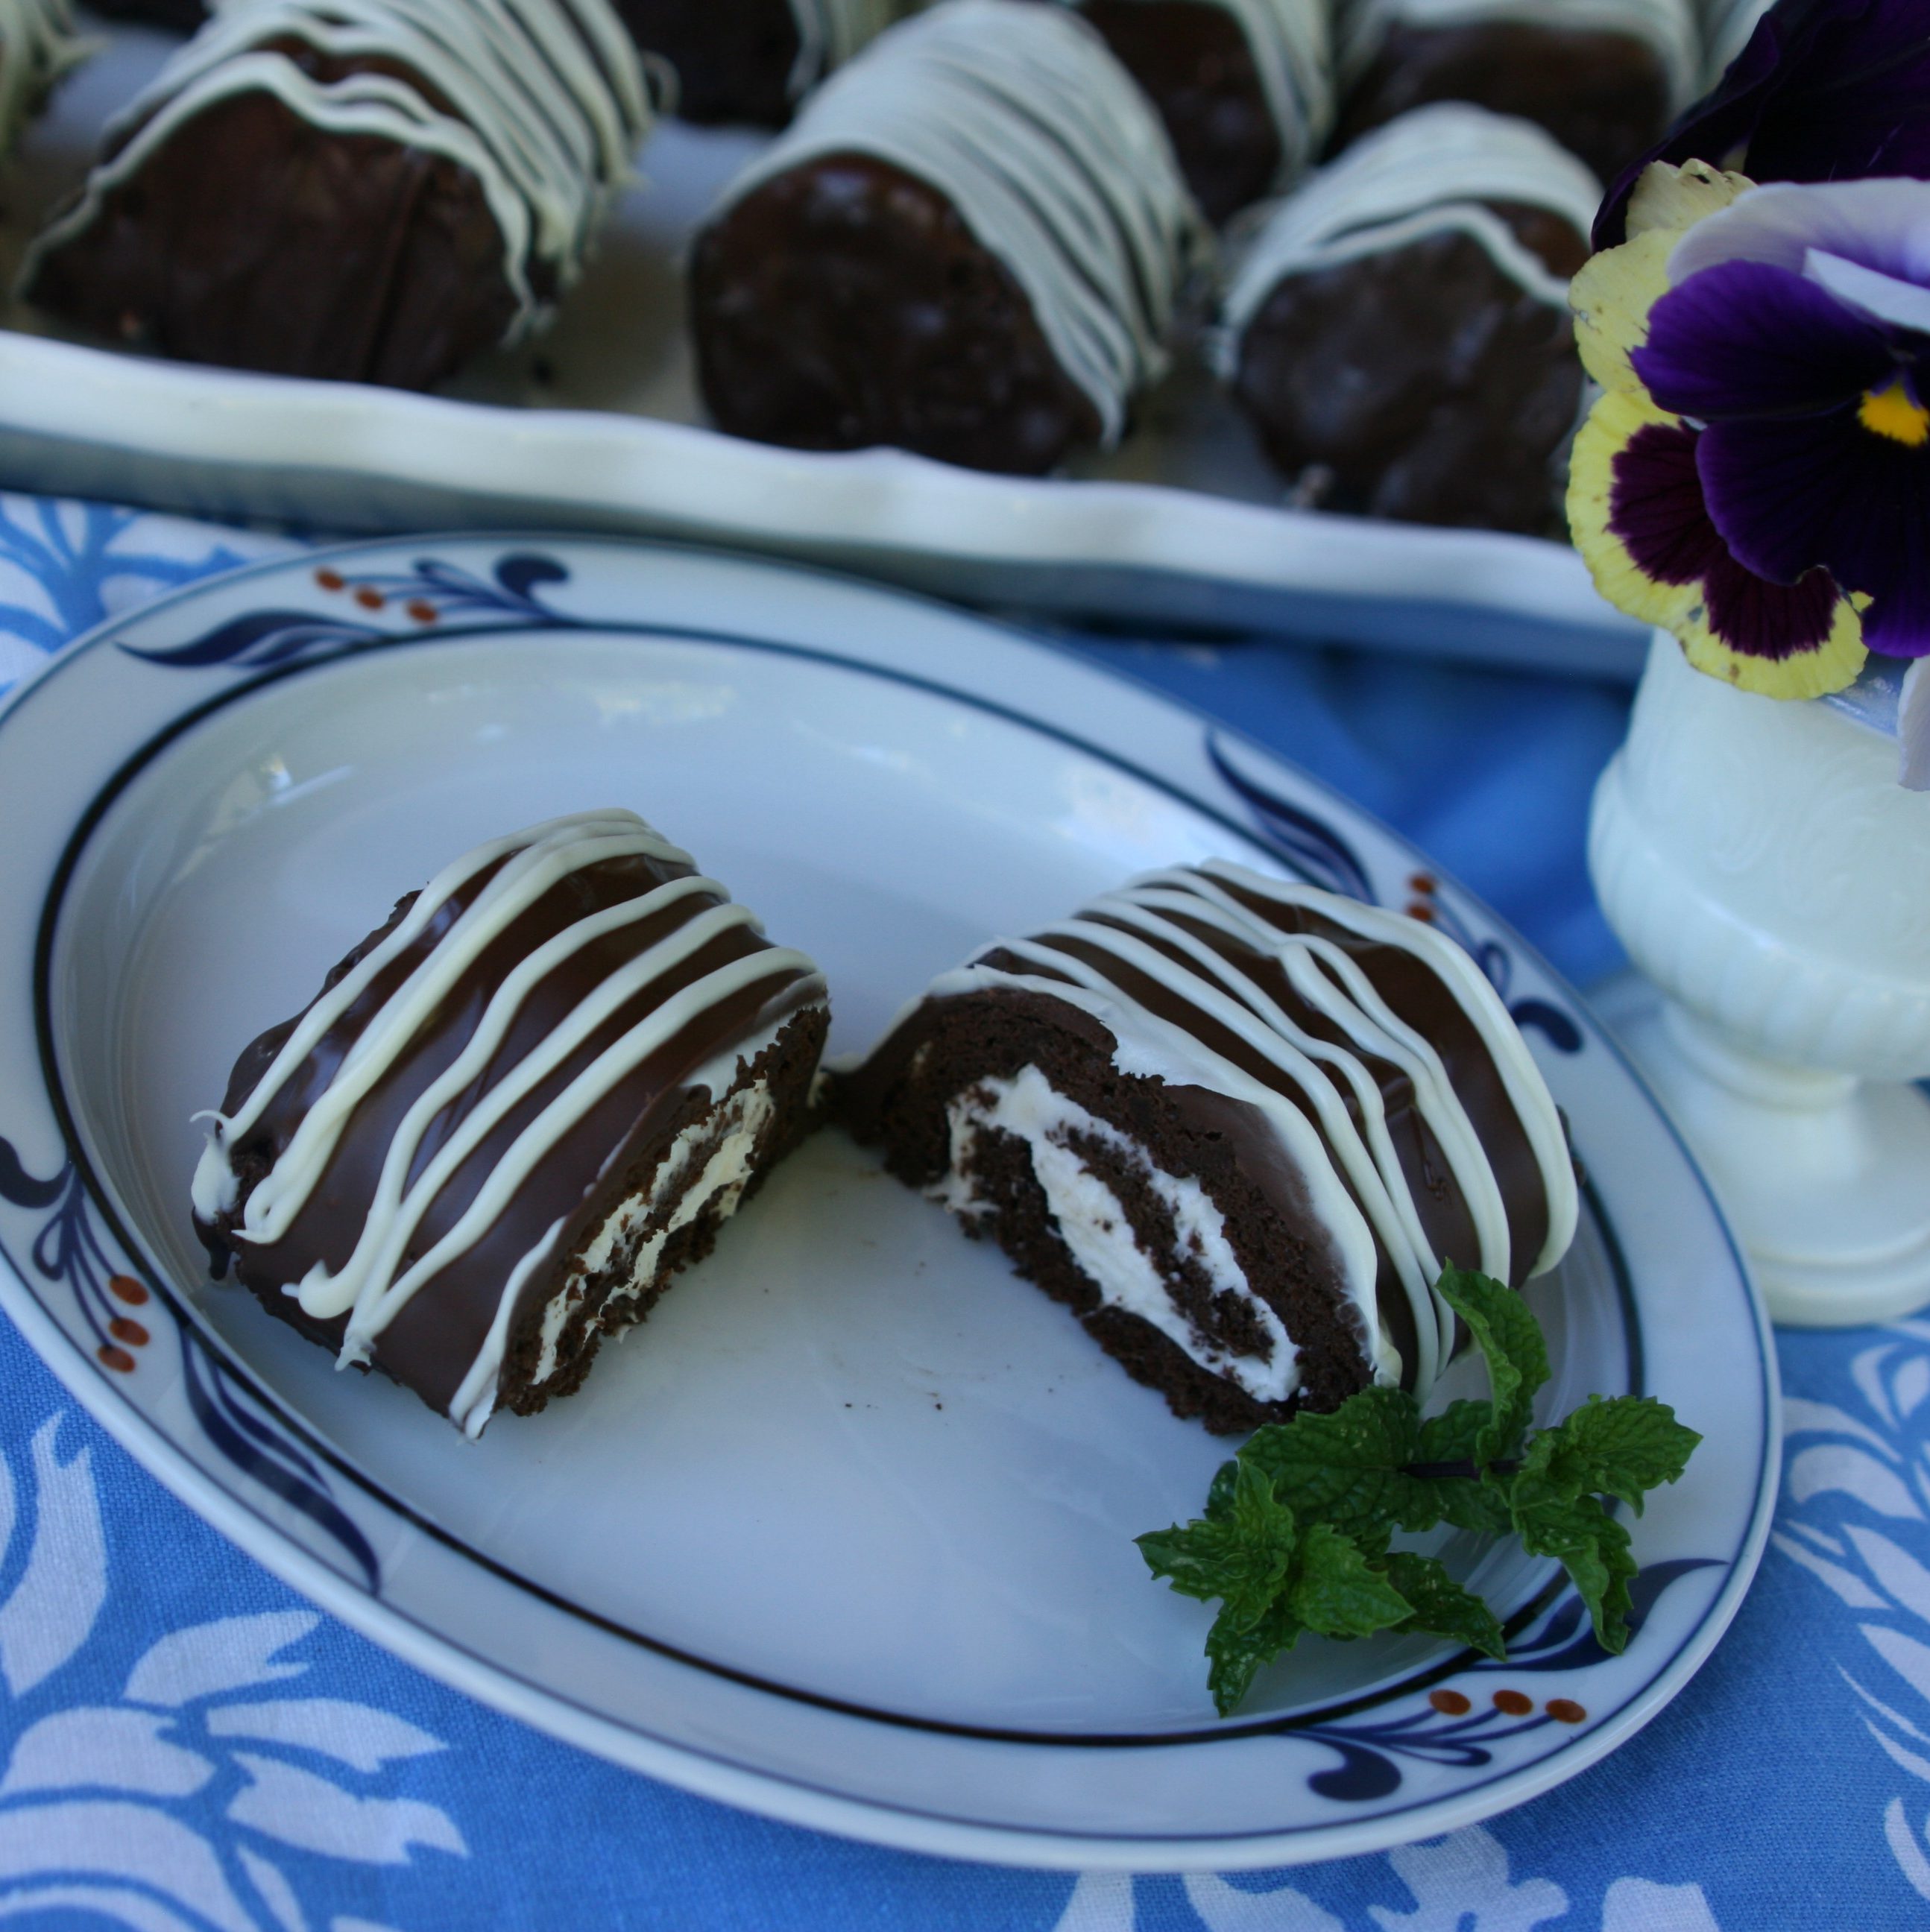
If you take that concept, swap out the brownie for a thin, chocolatey, light sponge, spread it with mint buttercream and roll it up like a tiny Swiss roll before enrobing it in melted chocolate, you’ve got a pretty good idea of what Prue Leith’s chocolate mini rolls are all about. They’re modeled after the classic Mini Rolls marketed by Cadbury in the UK and, here in the U.S., Little Debbie Swiss Rolls or Hostess Ho Hos, but with the added kick of peppermint!
The base for Prue’s mini Swiss rolls is a modified chiffon cake that uses melted butter instead of oil. It contains no leavening other than the whipped egg whites that are folded in at the end. It also contains no flour, just a healthy portion of cocoa powder, which makes them naturally gluten-free — as long as you choose a brand that clearly states it’s gluten-free, in case it’s processed in a plant that also processes wheat products. (Unfortunately, I couldn’t confirm that the Nestle Toll House brand I used was certified gluten-free, as it says nothing on the packaging or its website. According to the Hershey’s website, however, both its Naturally Unsweetened cocoa powder and its Special Dark cocoa powder are gluten-free.)
In Prue’s recipe, the cocoa powder is mixed with boiling water, vanilla extract and melted butter before being stirred into the egg yolk and sugar mixture. Then the egg whites are whipped to the stiff-peak stage, and a little sugar is added to make a French meringue. At the end, the meringue is folded into the batter in two parts to keep as much air in the mixture as possible.
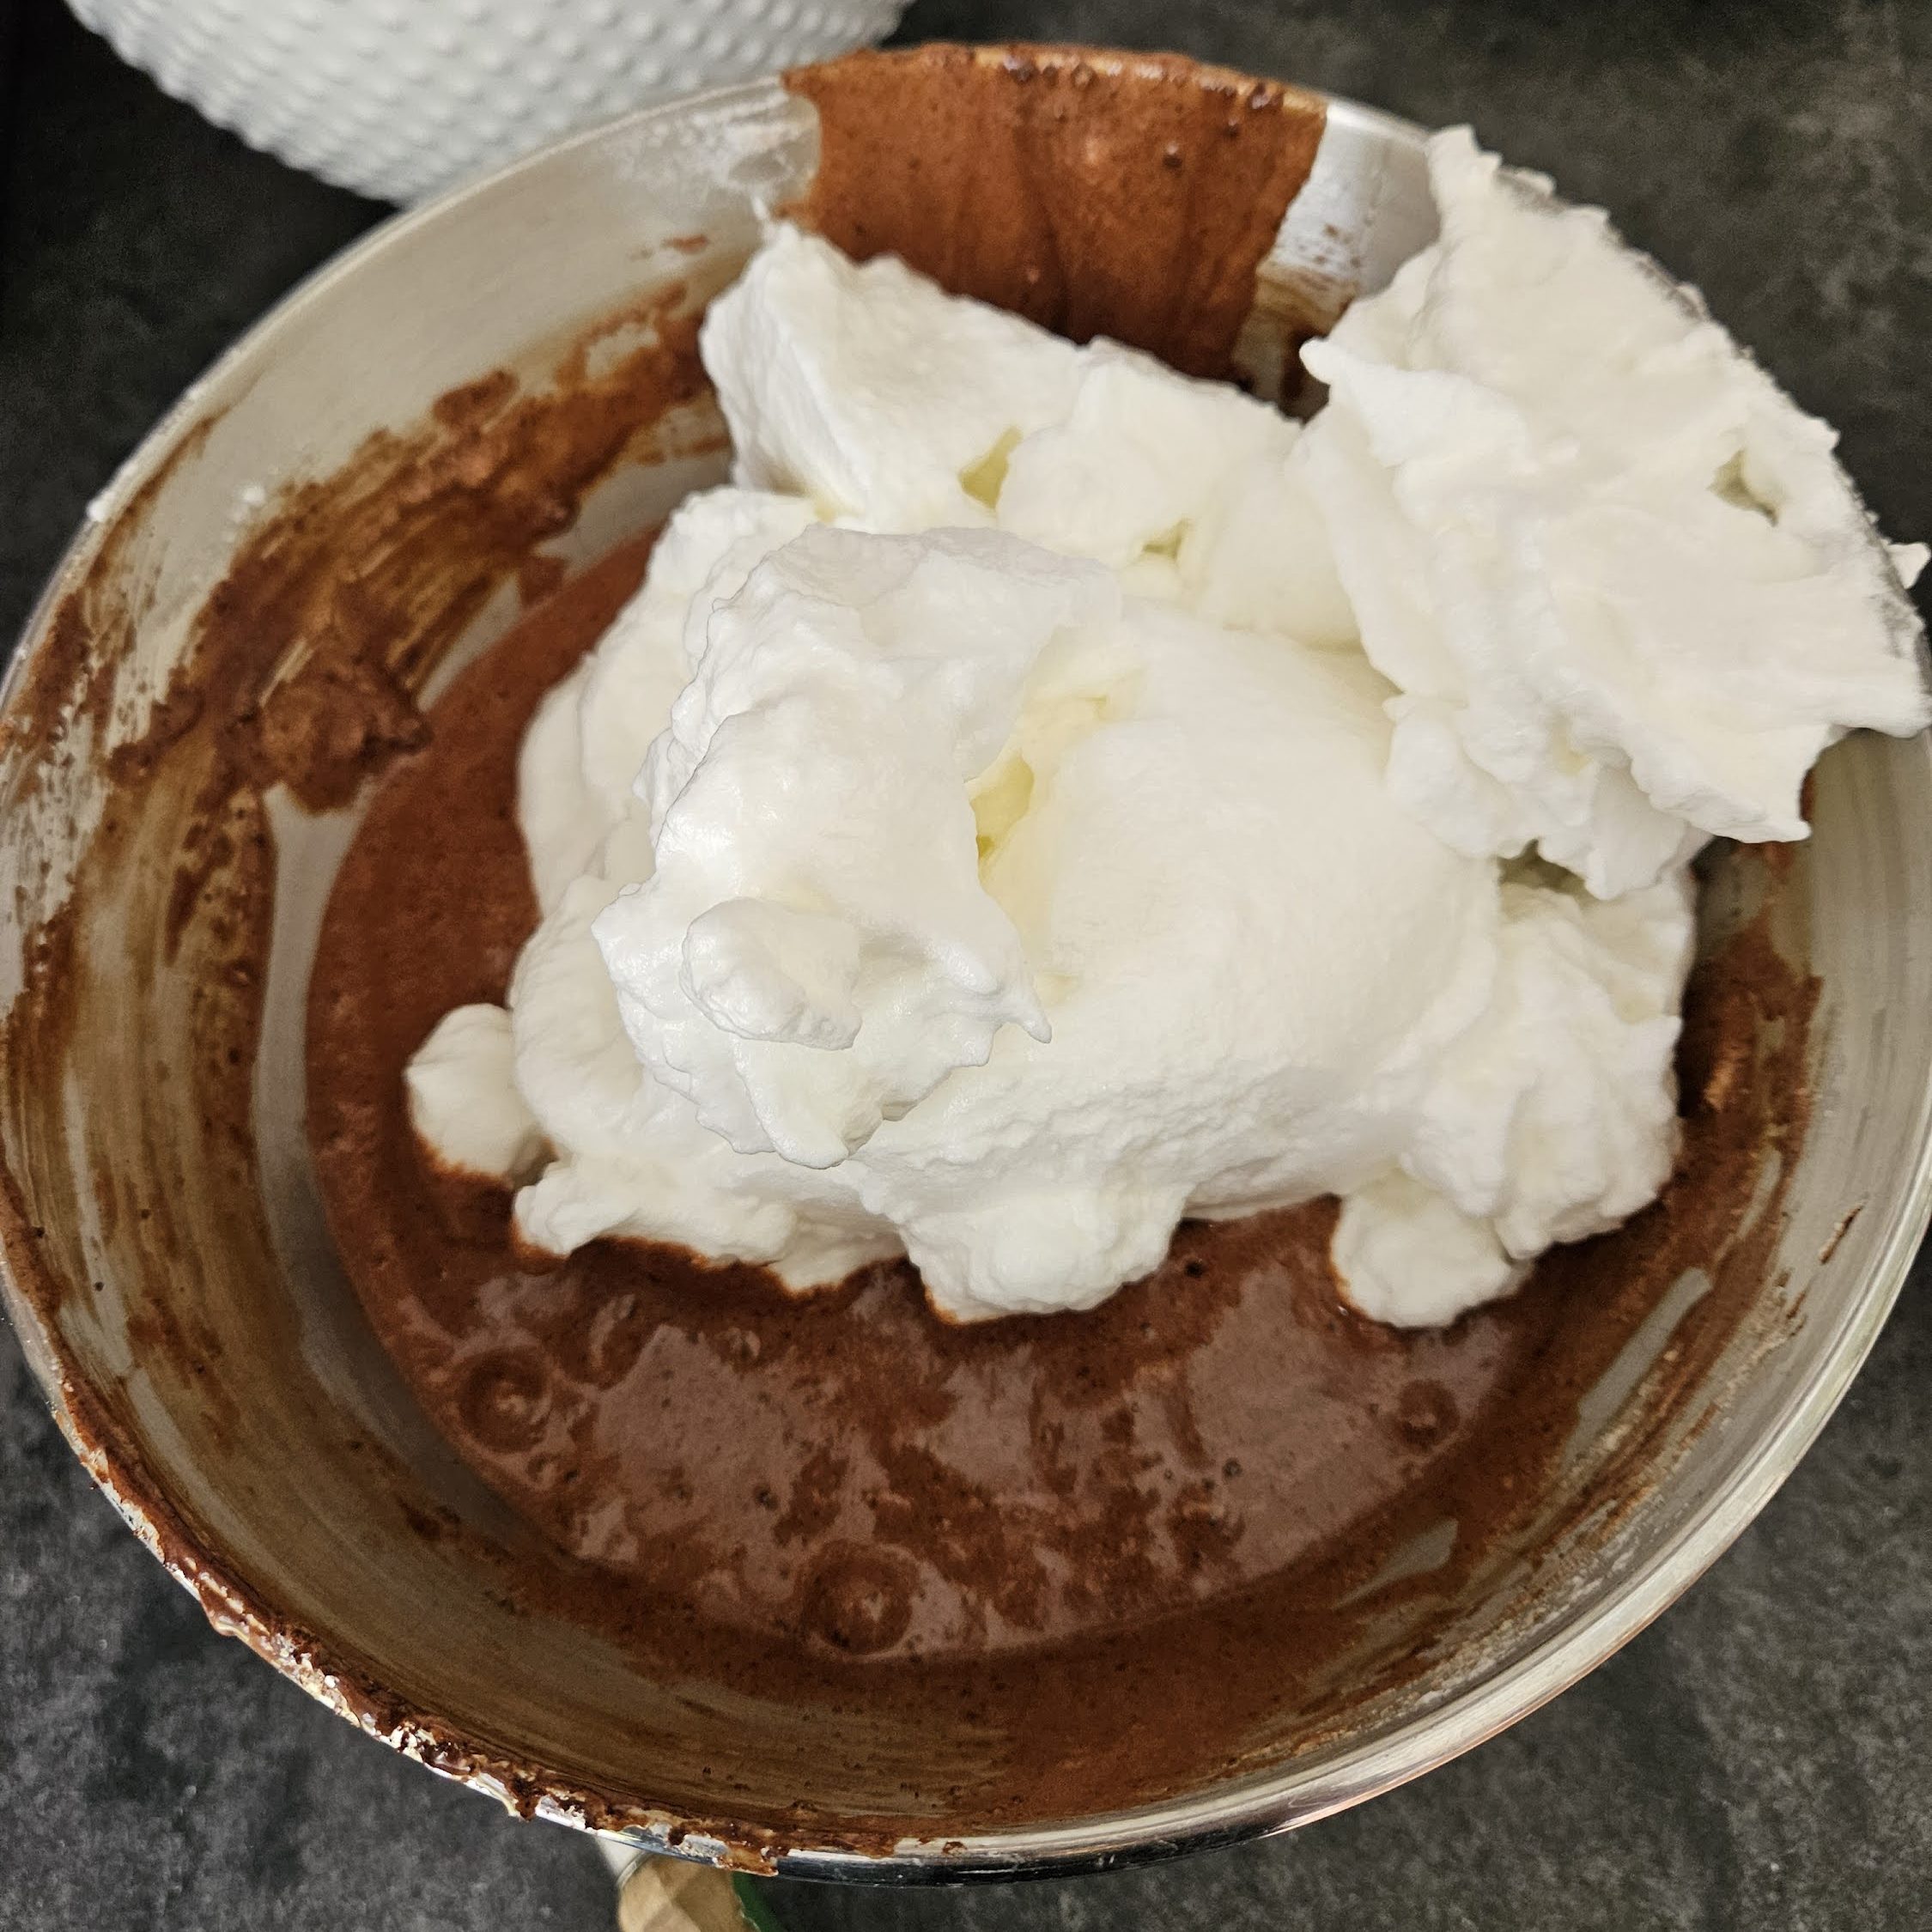

I had a little trouble when it came to folding my meringue into the rest of the batter and ended up with a few white lumps in my sponges. Because the cake is very thin and covered in chocolate, they weren’t noticeable in the finished product, but I did a little post-bake research to find out how to prevent this problem in the future.
According to the blog All Day Cake by Sophie Bamford, as soon as you add the dry ingredients to wet ingredients, the flour starts to absorb moisture, so the longer it sits, the more firm the batter becomes. I found this to be true with the cocoa powder/melted butter/water mixture, which didn’t want to integrate with the egg yolk/sugar mixture very easily. She also says the egg whites should only be beaten to soft-peak stage, as stiff peaks are harder to incorporate into the batter.
Her advice is to measure out the dry ingredients, but don’t mix them together just yet. Whisk the egg yolks and two thirds of the sugar together first, and start whipping the egg whites on medium speed, which will make a more stable meringue than beating them on high. When the meringue is 90% done, mix the cocoa powder with the other wet ingredients, then stir them into the egg yolk mixture. Finish whipping the egg whites with the remaining sugar, and then stir one third of the meringue into the chocolate mixture. Finally, fold in the remaining meringue, gently, so as not to lose much of the air trapped in the whipped egg whites.


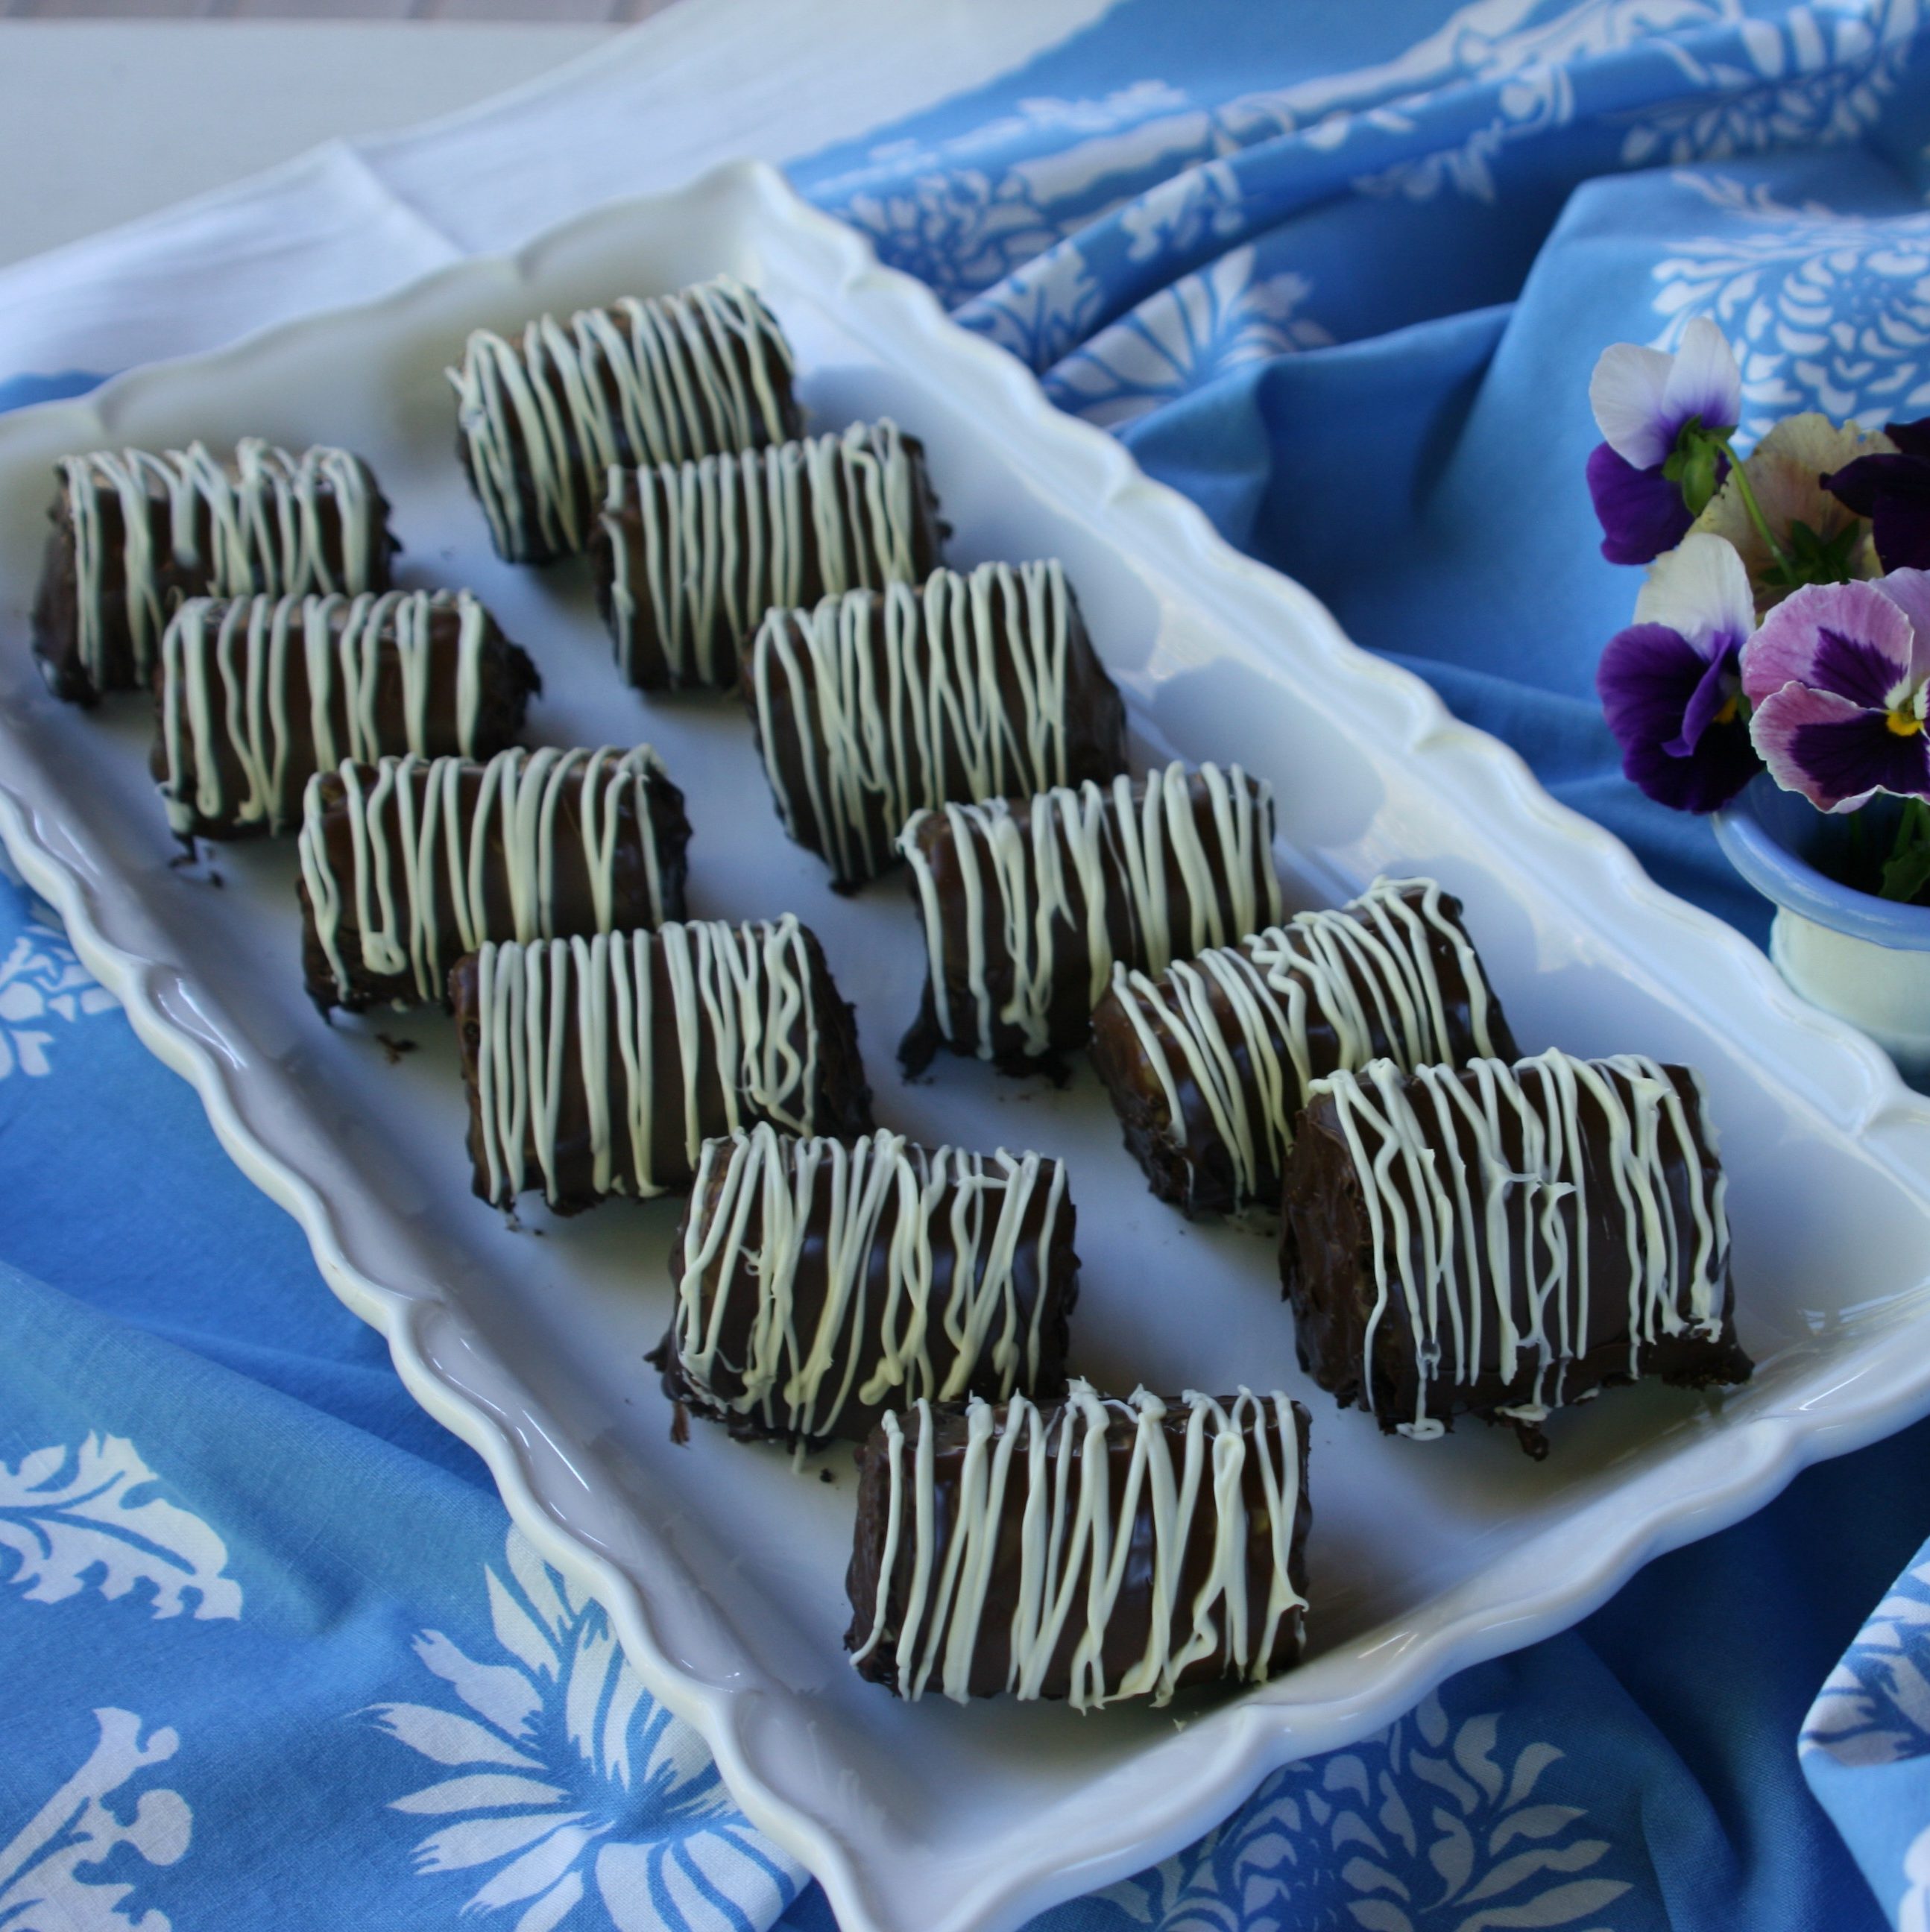
Once baked and cooled, my cakes were a bit sticky to work with, but I managed to spread the buttercream over each and roll them up from both ends, per the instructions, meeting in the middle. This created two double rolls that, when cut down the middle, made four rolls, which I then cut into thirds, ending up with 12 mini rolls. Then I poured the melted chocolate over them and drizzled them with white chocolate before leaving them to set.
If you decide to make these, I have a couple pieces of advice. The judges in the Great White Tent were adamant that the buttercream shouldn’t taste like toothpaste. Although the recipe calls for 1 teaspoon of peppermint extract, I added ½ teaspoon and it tasted minty enough for me. So be cautious and only add enough for your taste. Second, after rolling them up, I found the cakes easier to cut after chilling them in the fridge for a few minutes. The recipe says to chill the rolls after cutting them, but I found it easier to roll them up, wrap them in parchment paper and chill them for 15 minutes before cutting.
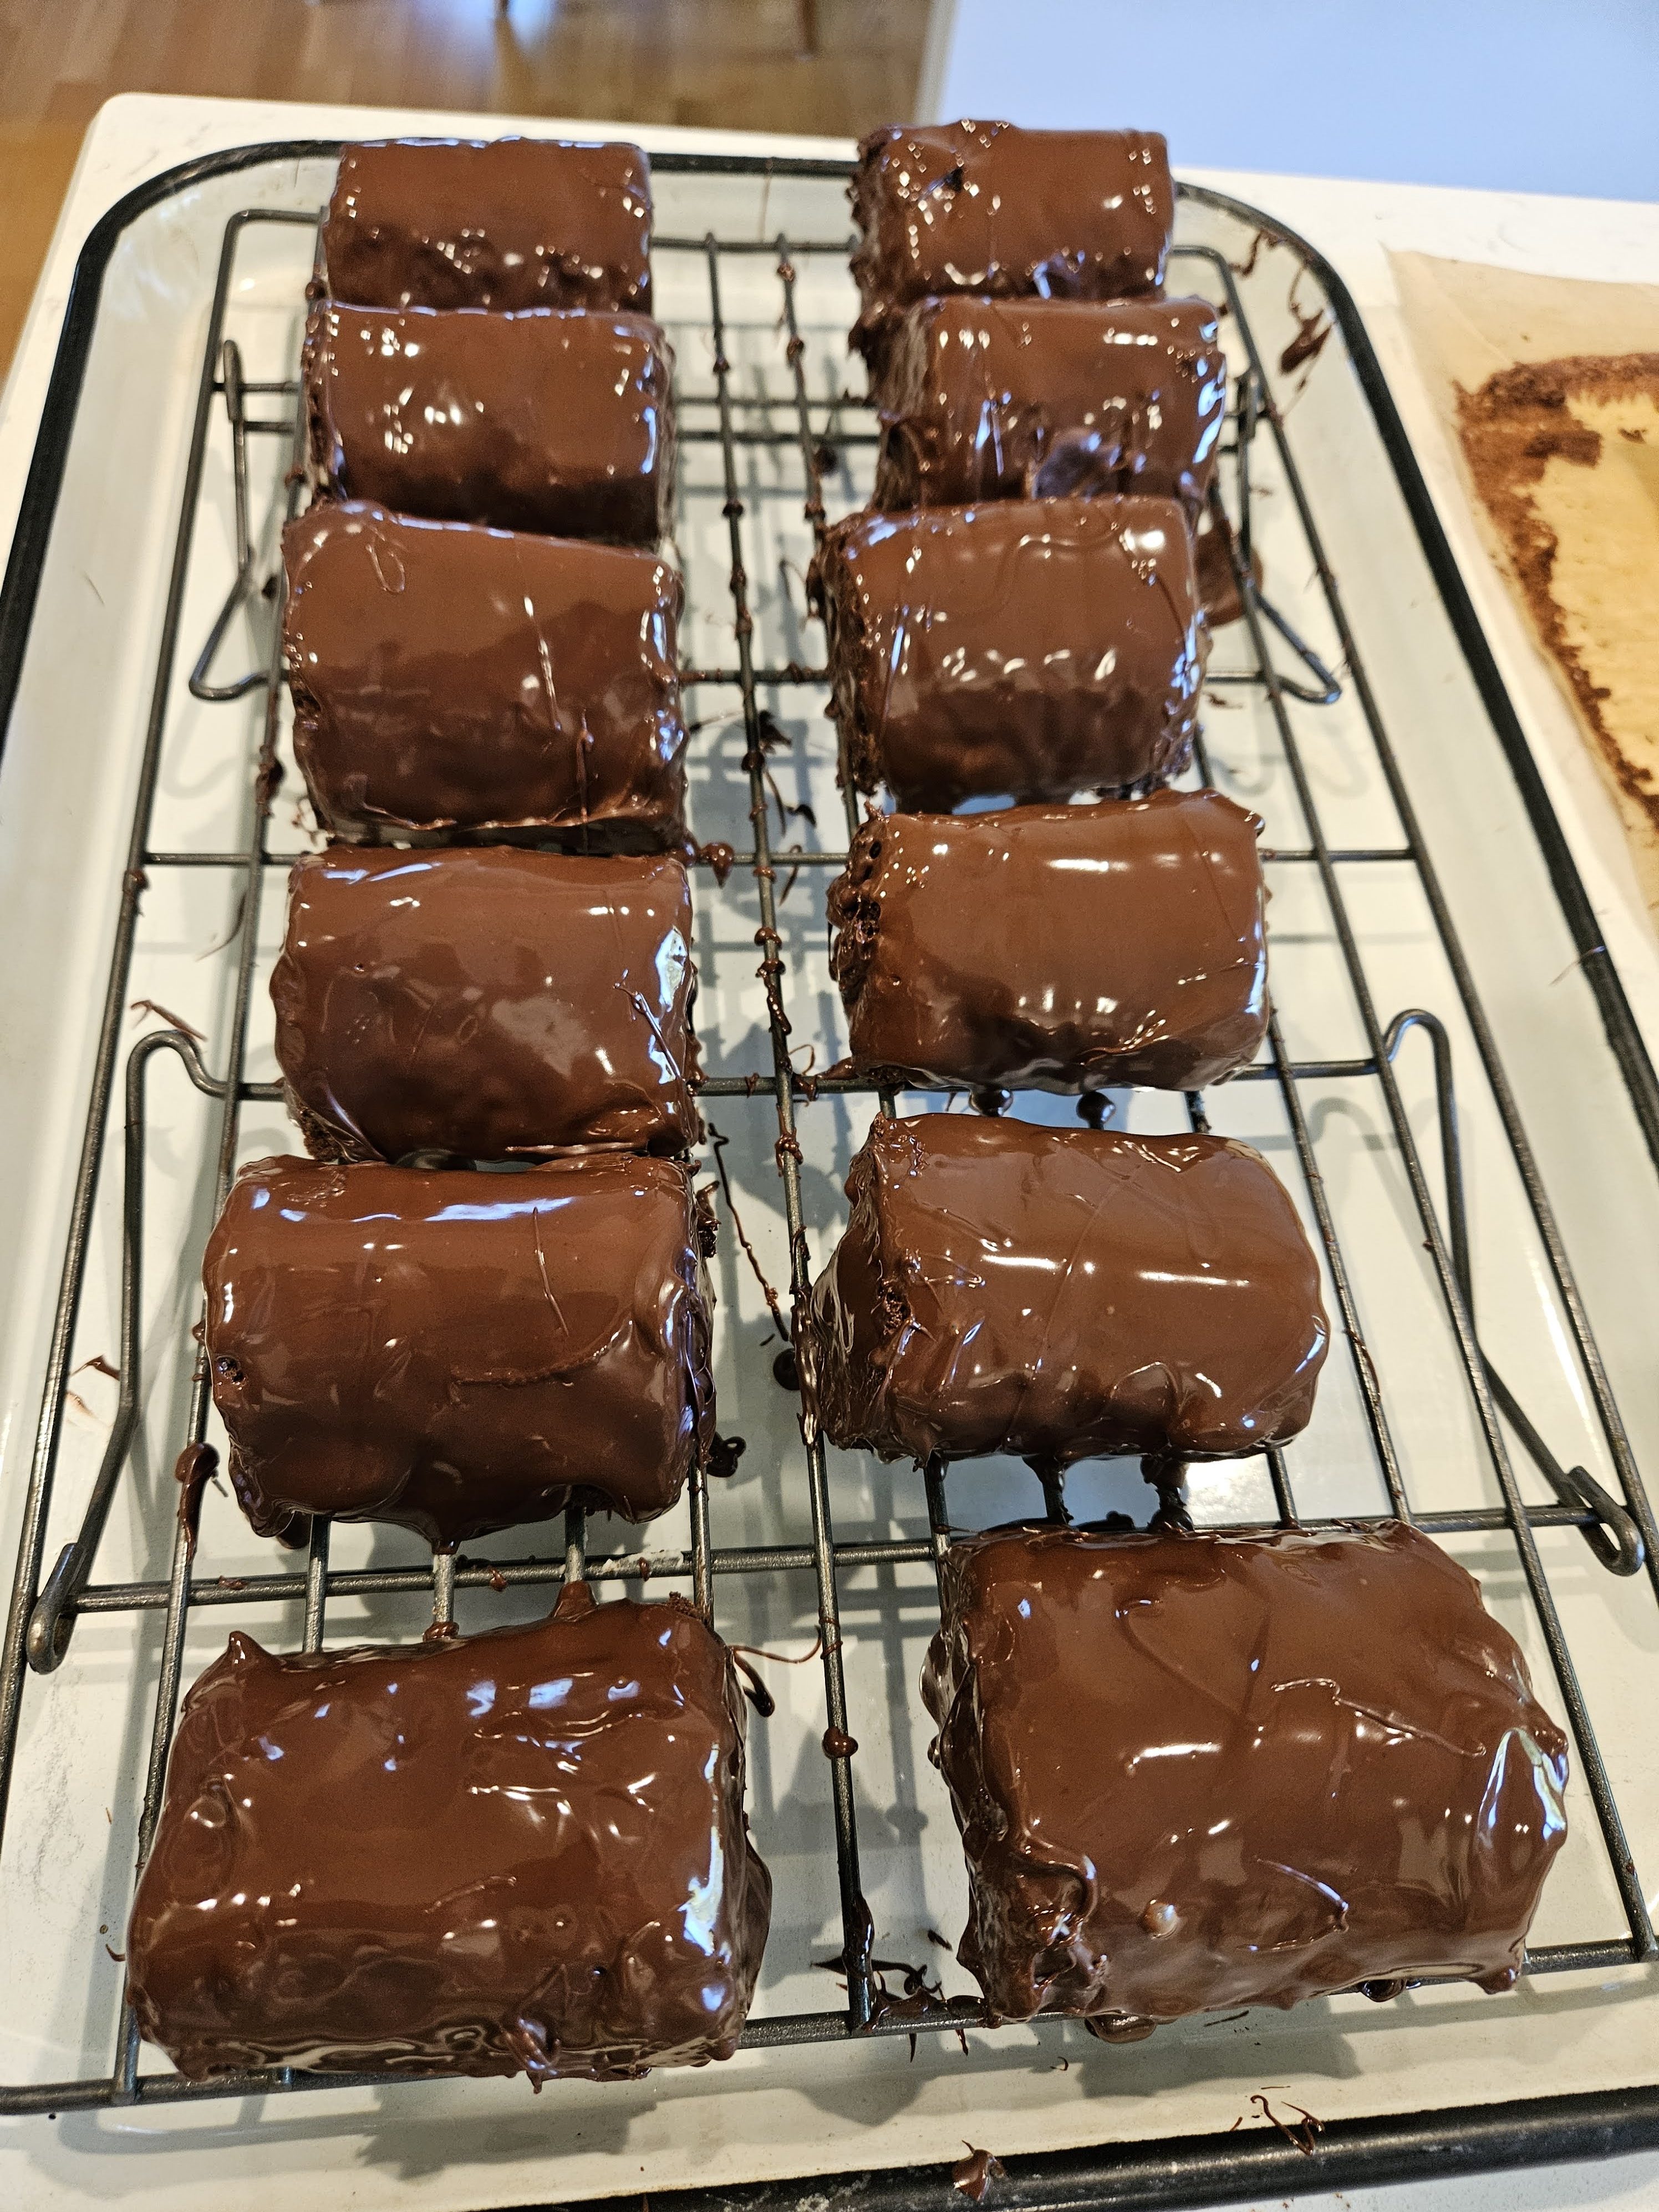
Since the judges didn’t mind if the mini rolls had “bare bottoms,” the best way to coat them in chocolate is to place them on a cooling rack over a clean baking pan or parchment paper and then pour the melted chocolate over the cakes. The pan or parchment paper will catch the chocolate drips, so you can scoop up the leftover chocolate to spread over the ends of the mini rolls and cover any gaps in the coating.

These mini rolls would make great treats for a birthday party or simply a nostalgic surprise for a gluten-free friend. They were a hit with my new neighbors, who have two small children .
You can access Prue’s original recipe here, but I have adapted it for American bakers below, along with adding my alterations.

Prue Leith’s Chocolate Mini Rolls
(Adapted for American bakers)
For the sponge:
- ¾ c. cocoa powder
- 6 large eggs, separated
- ¾ c. superfine (baker’s) sugar, divided
- 2 T. unsalted butter, melted
- 1 t. vanilla extract
- 4 T. boiling water
For the filling:
- 2/3 c. unsalted butter, softened
- 2¾ c. powdered sugar
- ½-1 t. peppermint extract (to taste)
To finish:
- 7 oz. dark chocolate (70% cocoa)
- 7 oz. milk chocolate
- 3½ oz. white chocolate
Directions
- Grease and line the bottom of two 13×9-inch baking pans with parchment paper. Lightly grease the paper, as well. Heat oven to 350°F.
- To make the sponge, first sift the cocoa powder into a small, heatproof bowl and set aside. In a separate bowl, beat the egg yolks and ½ cup of the sugar together until light, thick and fluffy.
- In the large bowl of an electric mixer fitted with the whisk attachment, begin beating the egg whites on medium speed until soft peaks begin to form.
- To the cocoa powder, add the melted butter, vanilla and boiling water. Stir together, then add chocolate mixture to the beaten egg yolks and whisk until combined.
- Continue whisking the egg whites on medium speed while gradually adding the remaining ¼ cup of sugar to the mixer bowl. Stop when sugar is dissolved and the peaks just hold their shape. Be careful not to overbeat.
- Stir one third of the meringue into the chocolate batter. Then, using a large metal spoon, fold the remaining meringue through the mixture until it is fully incorporated, being careful to keep as much air in the mixture as possible.
- Divide the batter evenly between the two prepared pans, and level the mixture with an offset spatula. Bake for 12-18 minutes, until cooked through and springy to the touch.
- Place pans on wire cooling racks and cover with a damp tea towel. Leave to cool completely.
- To make the filling, beat the butter until soft, then gradually mix in the powdered sugar. Add ½ teaspoon peppermint extract and taste. If it’s not strong enough, add a little more until it tastes minty enough without being too strong. Continue beating until buttercream is light, soft and fluffy.
- Turn the cooled cakes out onto two clean sheets of parchment paper. Peel off the paper that lined the pans. With a small knife, score a line 1½ inches from each short end. Spread the buttercream over the entire surface of both cakes.
- Starting from one short edge, roll one cake into a tight roll, stopping in the center of the cake. Repeat from the opposite edge so that both rolls meet in the middle. Wrap the two rolls tightly in the parchment paper and place in the fridge to chill for 15 minutes. Repeat with the second cake.
- Remove the cakes from the fridge and cut down the center of each, between the rolls. You’ll now have four cake rolls. Trim the ends and cut each roll into three equal sections, ending up with 12 small rolls.
- Line a baking sheet with clean parchment (or waxed) paper, and place a cooling rack on top. Transfer the rolls, seam-side down, onto the cooling rack and place them in the fridge while you melt the chocolate.
- Melt the dark and milk chocolate together in a heat-proof bowl over a pan of just-simmering water. (Be careful not to let the bottom of the bowl touch the surface of the water.)
- Pour the melted chocolate over the mini rolls, letting the excess chocolate drip onto the parchment paper. If needed, scoop up the excess chocolate and spread it over any bare patches on the mini rolls. Leave to set while you melt the white chocolate.
- Melt white chocolate in a bowl suspended over a pan of just-simmering water (or follow directions on the package to melt it in the microwave). Pour the white chocolate into a disposable piping bag (or zip-lock bag) and snip a small hole in the end (or corner). Pipe fine lines across the mini rolls, then leave to set.
- The mini rolls can be stored at room temperature for a day or two or kept in the refrigerator for about a week.
Up Next: Sandwich Biscuits
Discover more from Here's the Dish
Subscribe to get the latest posts sent to your email.
