
When I went looking for historical information about hand-raised pies, I thought I’d find stories of how these were handmade by women for their husbands’ lunches, a sturdy meal wrapped in pastry, making it portable and hearty enough to sustain a miner or dockworker until suppertime. In fact, I found very little on the history of these meat pies, except for a few paragraphs in this article on CooksInfo.com saying they were very popular in the 1800s when sprung metal pie molds became commercially available. Oh, and that they came to have a reputation for using the least choice parts of meat, or even meat that people wouldn’t touch if they knew what it was—like starlings!
I also found this article from The New York Times archives, dated Feb. 28, 1979, that describes the ubiquitous (at least back then) pies being a staple in pubs and food halls in the U.K., even being delivered to English homes directly from the butcher shop. So maybe my romanticized vision of a young wife lovingly making one of these for her hard-working husband before he left for the mines was straight out of Poldark and not quite based in reality.
But they are hearty, and sturdy, as long as you can get the pastry to cooperate. Hand-raised pies use a hot water crust pastry, which is made with boiling water and lard. Before you get too grossed out about using lard in this day and age of healthy eating and avoiding saturated fats, be aware that lard is in most refrigerated and frozen pie crusts you’ll find in the grocery store. If you’re like me and have one in your freezer right now (just for emergencies, of course!), go check the label. It’s there, trust me.
You can substitute shortening, like Crisco, for the lard, according to this article on hot water crust on Food52.com. It also explains why the fat is melted (It makes for a sturdier and crispier crust.) and why two different kinds of flour are used: bread flour (or strong flour, as it’s called in Britain) because its higher protein content allows for stronger gluten development, and all-purpose (or plain) flour to prevent it from getting too tough.
I went with Paul Hollywood’s original recipe on BBC.com, which uses a little bit of lard and a little bit of butter. The recipe comes with a helpful video on how to shape the pastry for a raised pie, and I recommend watching it, as well as the Masterclass episode where Paul shows Mary Berry how to make them (Netflix, Masterclass 1). They give a few pointers that aren’t in the recipe, like kneading the dough until smooth and letting it cool for 10 minutes before shaping.
Since most people don’t own dollies like the ones used by the contestants on The Great British Baking Show to mold their pastries, the recipe suggests using 12 ounce jam jars. I happened to have two canning jars that were just the right size, so I used those. The recipe also says to wrap the jars with plastic wrap before building the dough up around them, which makes getting the dough off the molds much easier. This was the trickiest part of the challenge for most of the GBBO bakers.
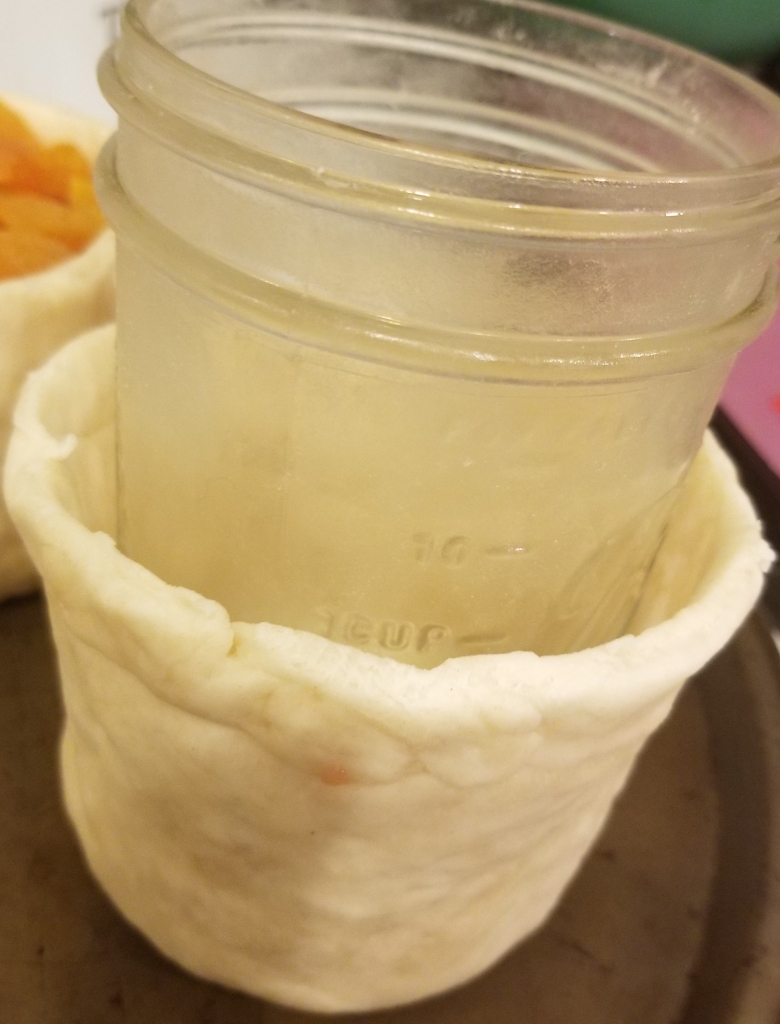
I found that working with the jars upside down was easier. Using about half the dough, I formed it into a circle, put the jar in the middle and then turned it upside down, holding the dough on top of the inverted jar to let gravity help me out. I then gradually stretched the dough down the sides of the jar, trying not to allow any holes to develop. The dough is pretty forgiving, so you can patch it up if you need to, but in my experience, it’s easier for patched dough to spring a leak.
After I formed the pastry casings, I let them chill in the fridge while I prepared the fillings. The recipe says to chill them for 20 minutes, but don’t be afraid to leave them in longer, since the dough will be stiffer and less likely to collapse when unmolding it.
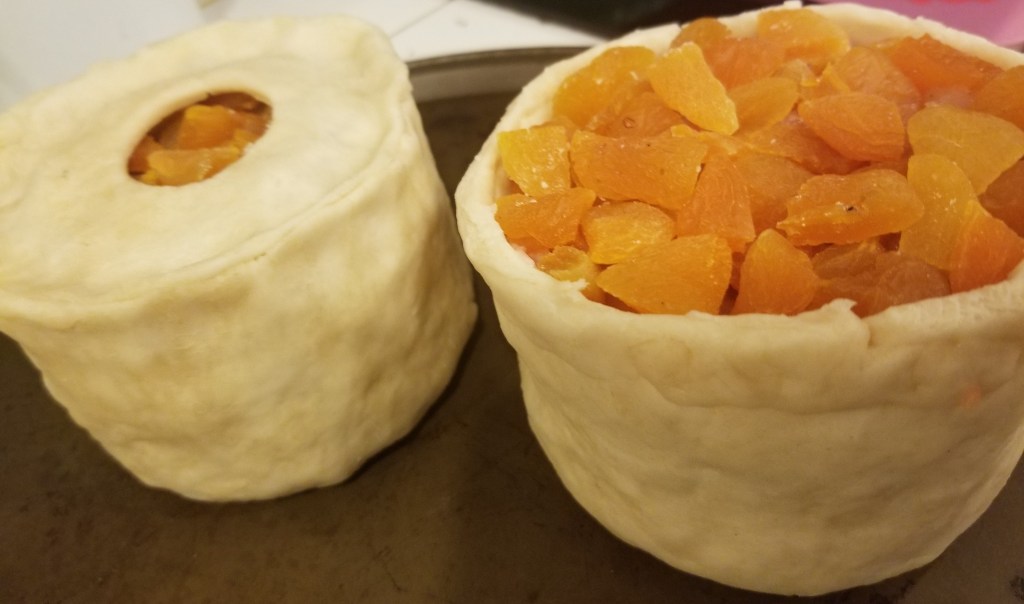
As for the fillings, this recipe uses chicken, bacon and dried apricots seasoned with fresh thyme. I did a little research on the difference between English bacon and American bacon, but when I watched the Masterclass video, the bacon looked close enough to American-style bacon that I didn’t even try to find a British equivalent. But if you’re interested in finding out the difference, here’s a good article on it.
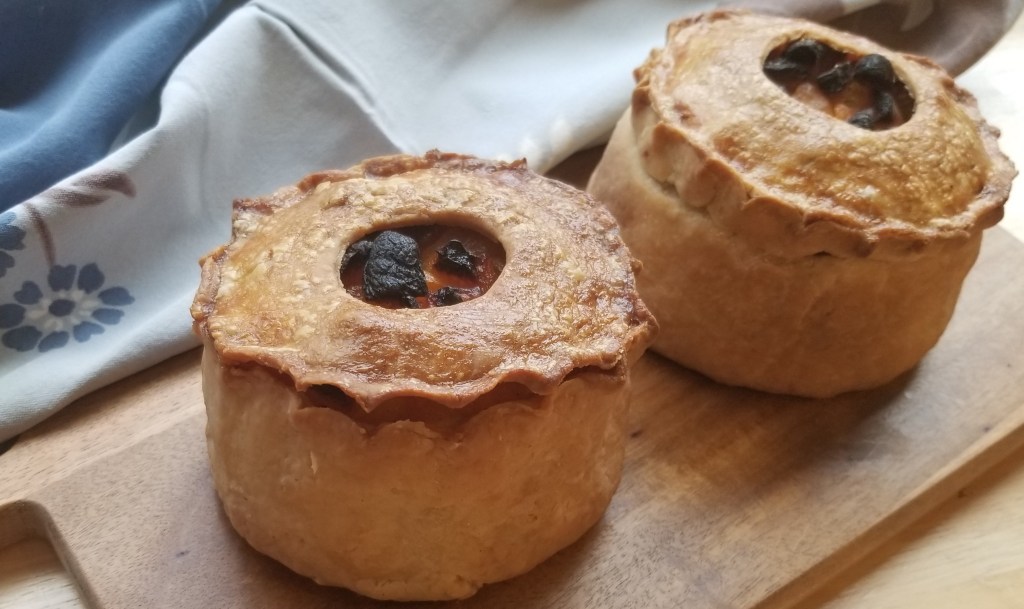
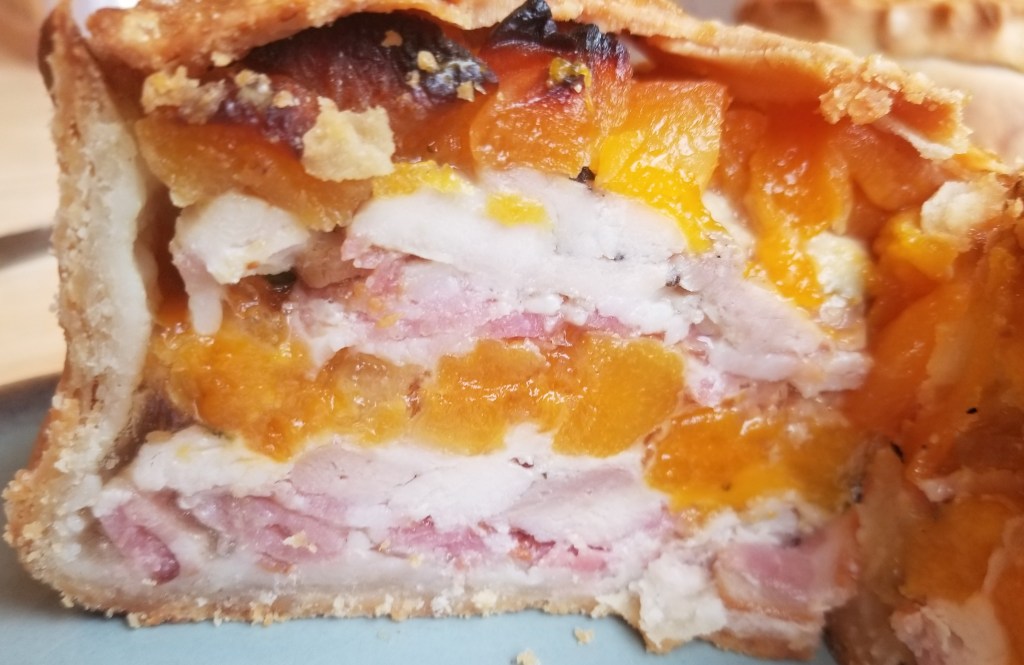
I was surprised that everything goes in raw. It’s layered—bacon, chicken, apricots, repeat—and then topped with a lid of pastry that has a hole in the center for steam to escape. The lid should fit inside the casing, not on top, and it should be well-sealed and crimped around the edges so the filling won’t leak out.
The lids are brushed with egg wash, and then the pies are baked in a hot oven (400°F) for about an hour, or until the pastry is brown and crispy all the way around. In retrospect, I could have checked the internal temperature to make sure the chicken was done, but I went with the “brown and crispy” test, and they turned out fine.
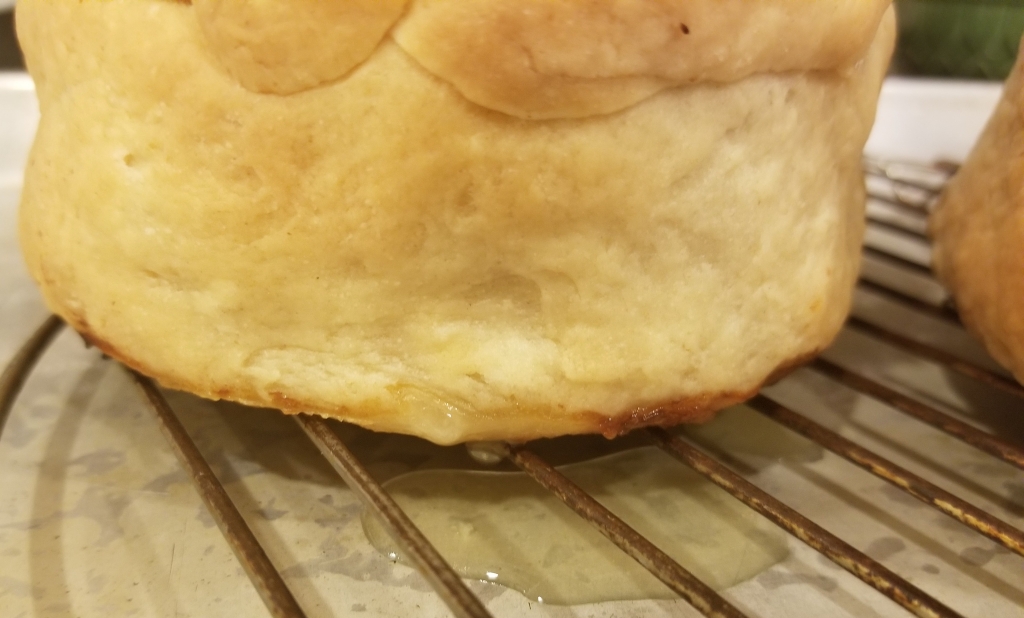
You’ll know if your pies leak by whether or not the bacon grease ends up on the outside. (Make sure you put them on a baking sheet with sides on it!) I was 50 percent successful in that one of my pies leaked and the other didn’t.
The main reason you don’t want any leakage is because, after baking, you have to pour a chicken stock/gelatin solution into the hole in the lid and leave them overnight for the gelatin to set. If the pie has a hole in the bottom, all that stock will pour out, which was another issue that many of the bakers in the Great White Tent experienced.
So of course when I poured my gelatin solution into my pies, one ended up leaking all over. Knowing there was nothing I could do about it, I left them in the microwave (for safekeeping from the dog and cat) overnight.
The hardest part about letting them set overnight was that the house smelled wonderful—the scent of bacon and chicken mingling with baking pastry—but we were unable to try it until morning. So I wasn’t surprised when my husband jumped at the chance to have meat pies for breakfast! (Apparently that’s a thing in Leicestershire on Christmas, so why not start a new tradition in Wisconsin on a normal weekday!)
We both liked the flavor of the apricots mingled with the salty bacon and savory chicken. The thyme added an overall freshness to the flavor. The pastry was crispy and not too thick. I could see the gelatin in the one that didn’t leak, but it still didn’t fill “all the nooks and crannies” like Mary wanted. Next time I might use more stock than the recipe called for.
Even though the pies weren’t that big, they were very filling. My husband and I got more than two meals out of the two pies, and truth be told, we were both a bit tired of them before they were gone. So my advice would be to make them for a family or when you have friends over.

Paul Hollywood’s Hand-Raised Pies
Adapted for American bakers
For the pastry:
- 1 2/3 c. all-purpose flour
- 5 T. bread flour
- 3½ T. butter, cut into chunks
- ½ c. boiling water
- 1 t. salt
- 2¼ oz. lard
- 1 egg, beaten (for the egg wash)
For the filling:
- 10½ oz. boneless chicken meat, cut into chunks
- 10½ oz. bacon strips
- 2 sprigs fresh thyme
- salt and pepper, to taste
- 8½ oz. dried apricots, quartered
- 2 t. unflavored gelatin
- 5 oz. cool water
- 1 chicken bouillon cube
Directions
- In a large mixing bowl, combine the flours. Rub the butter into the flour with your fingertips.
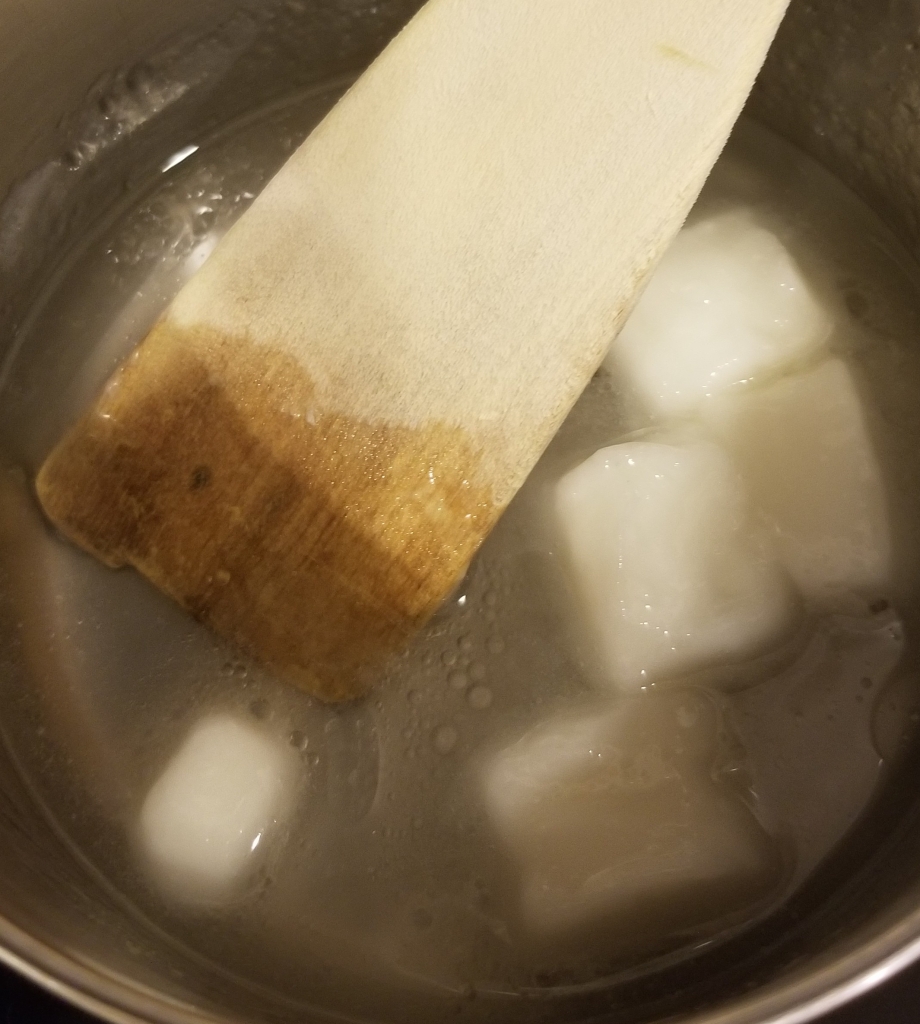
- Mix together the boiling water, 1 t. salt and lard in a small saucepan. Heat and stir until the lard melts. Pour lard and water mixture over the flour mixture, stirring with a spoon until everything comes together.
- Tip the dough onto a floured surface and bring together into a ball. Knead lightly until smooth, then set aside to cool for 10 minutes.
- Wrap a piece of plastic wrap around two clean, empty, straight-sided jars (Pint-sized, wide-mouthed canning jars work well.). Remove a quarter of the pastry and reserve for the lids of the pies. With the remaining three-quarters of the pastry, divide in two and place half on a flat surface. Flatten it into a circle about 4-5 inches in diameter. Place one jar in the center of the pastry and press down, then flip the jar upside down with the pastry on top. Sculpt the still warm pastry around the jar, bringing the pastry down the sides of the jar. Try to make sure the pastry is an even thickness all around. Make sure the bottom is not too thick and that there are no holes in the pastry. Repeat with the other half of the dough and the other jar.
- Place the pastry-wrapped jars in the refrigerator for at least 20 minutes. Divide the reserved quarter of pastry in half and roll each half into a circle the size of the pie top. Make a hole about half an inch in diameter in the center of each one and chill them in the fridge.
- While pastry is chilling, prepare the fillings. Keeping the chicken and bacon separate, season with salt, pepper and fresh thyme.
- Take the pastry cases out of the fridge. Use a knife to trim the edges of the pastry cases so they are even all around. Gently separate the plastic wrap from the jar and pull the jar out of the plastic wrap; then pull the plastic wrap out of the pastry. If that doesn’t work, carefully pour hot water into each jar to soften the pastry and release it from the mold. If it softens too much and begins to sag, you may need to chill it again for 10 minutes or so.
- Pack the fillings into each pie in layers, starting with about ¼ of the bacon, then ¼ of the chicken, then ¼ of the apricots. Repeat until the filling is all used up. (You should have two layers of each filling in each pie.
- Place a lid on each pie and crimp around the edges, sealing thoroughly. Brush lids with the beaten egg. Place pies on a baking tray and cook for 50-60 minutes, or until the pastry is brown and crisp all the way around. (To check chicken for doneness, stick an instant-read thermometer in the center of the pies. Chicken is done when it reaches 165°F.)
- While the pies are baking, sprinkle the gelatin over 5 ounces of cool water in a small saucepan and wait 5 minutes for it to soften. Stir to dissolve. Add bouillon and heat over low heat, stirring constantly until bouillon dissolves. Do not boil.
- When the pies are cooked, place them on a cooling rack to cool for 10 minutes. Carefully pour half the stock into the hole in each pie lid to fill in any spaces inside the pie with (what will be) chicken stock jelly. This must be done when the pie is hot; otherwise the jelly will just sit on the top and not soak into every nook and cranny. Leave to set overnight before serving. Pies are meant to be eaten at room temperature. Store leftovers in refrigerator.
Next week: American Pie
Discover more from Here's the Dish
Subscribe to get the latest posts sent to your email.

Your pies look beautiful!
LikeLiked by 1 person