
One cannot think well, love well, sleep well, if one has not dined well.” — Virginia Woolf
Virginia Woolf had a complicated relationship with food, as well as domestic servants, but apparently she could make a mean cottage loaf!
The cottage loaf is closely associated with English country life, although American settlers brought the idea from Europe to the New World with them. No one knows its origins, but the first mention of a cottage loaf in print appeared in the mid-19th century. Mrs. Beeton offers a picture of one in her book Mrs Beeton’s Book of Household Management, published in 1861.

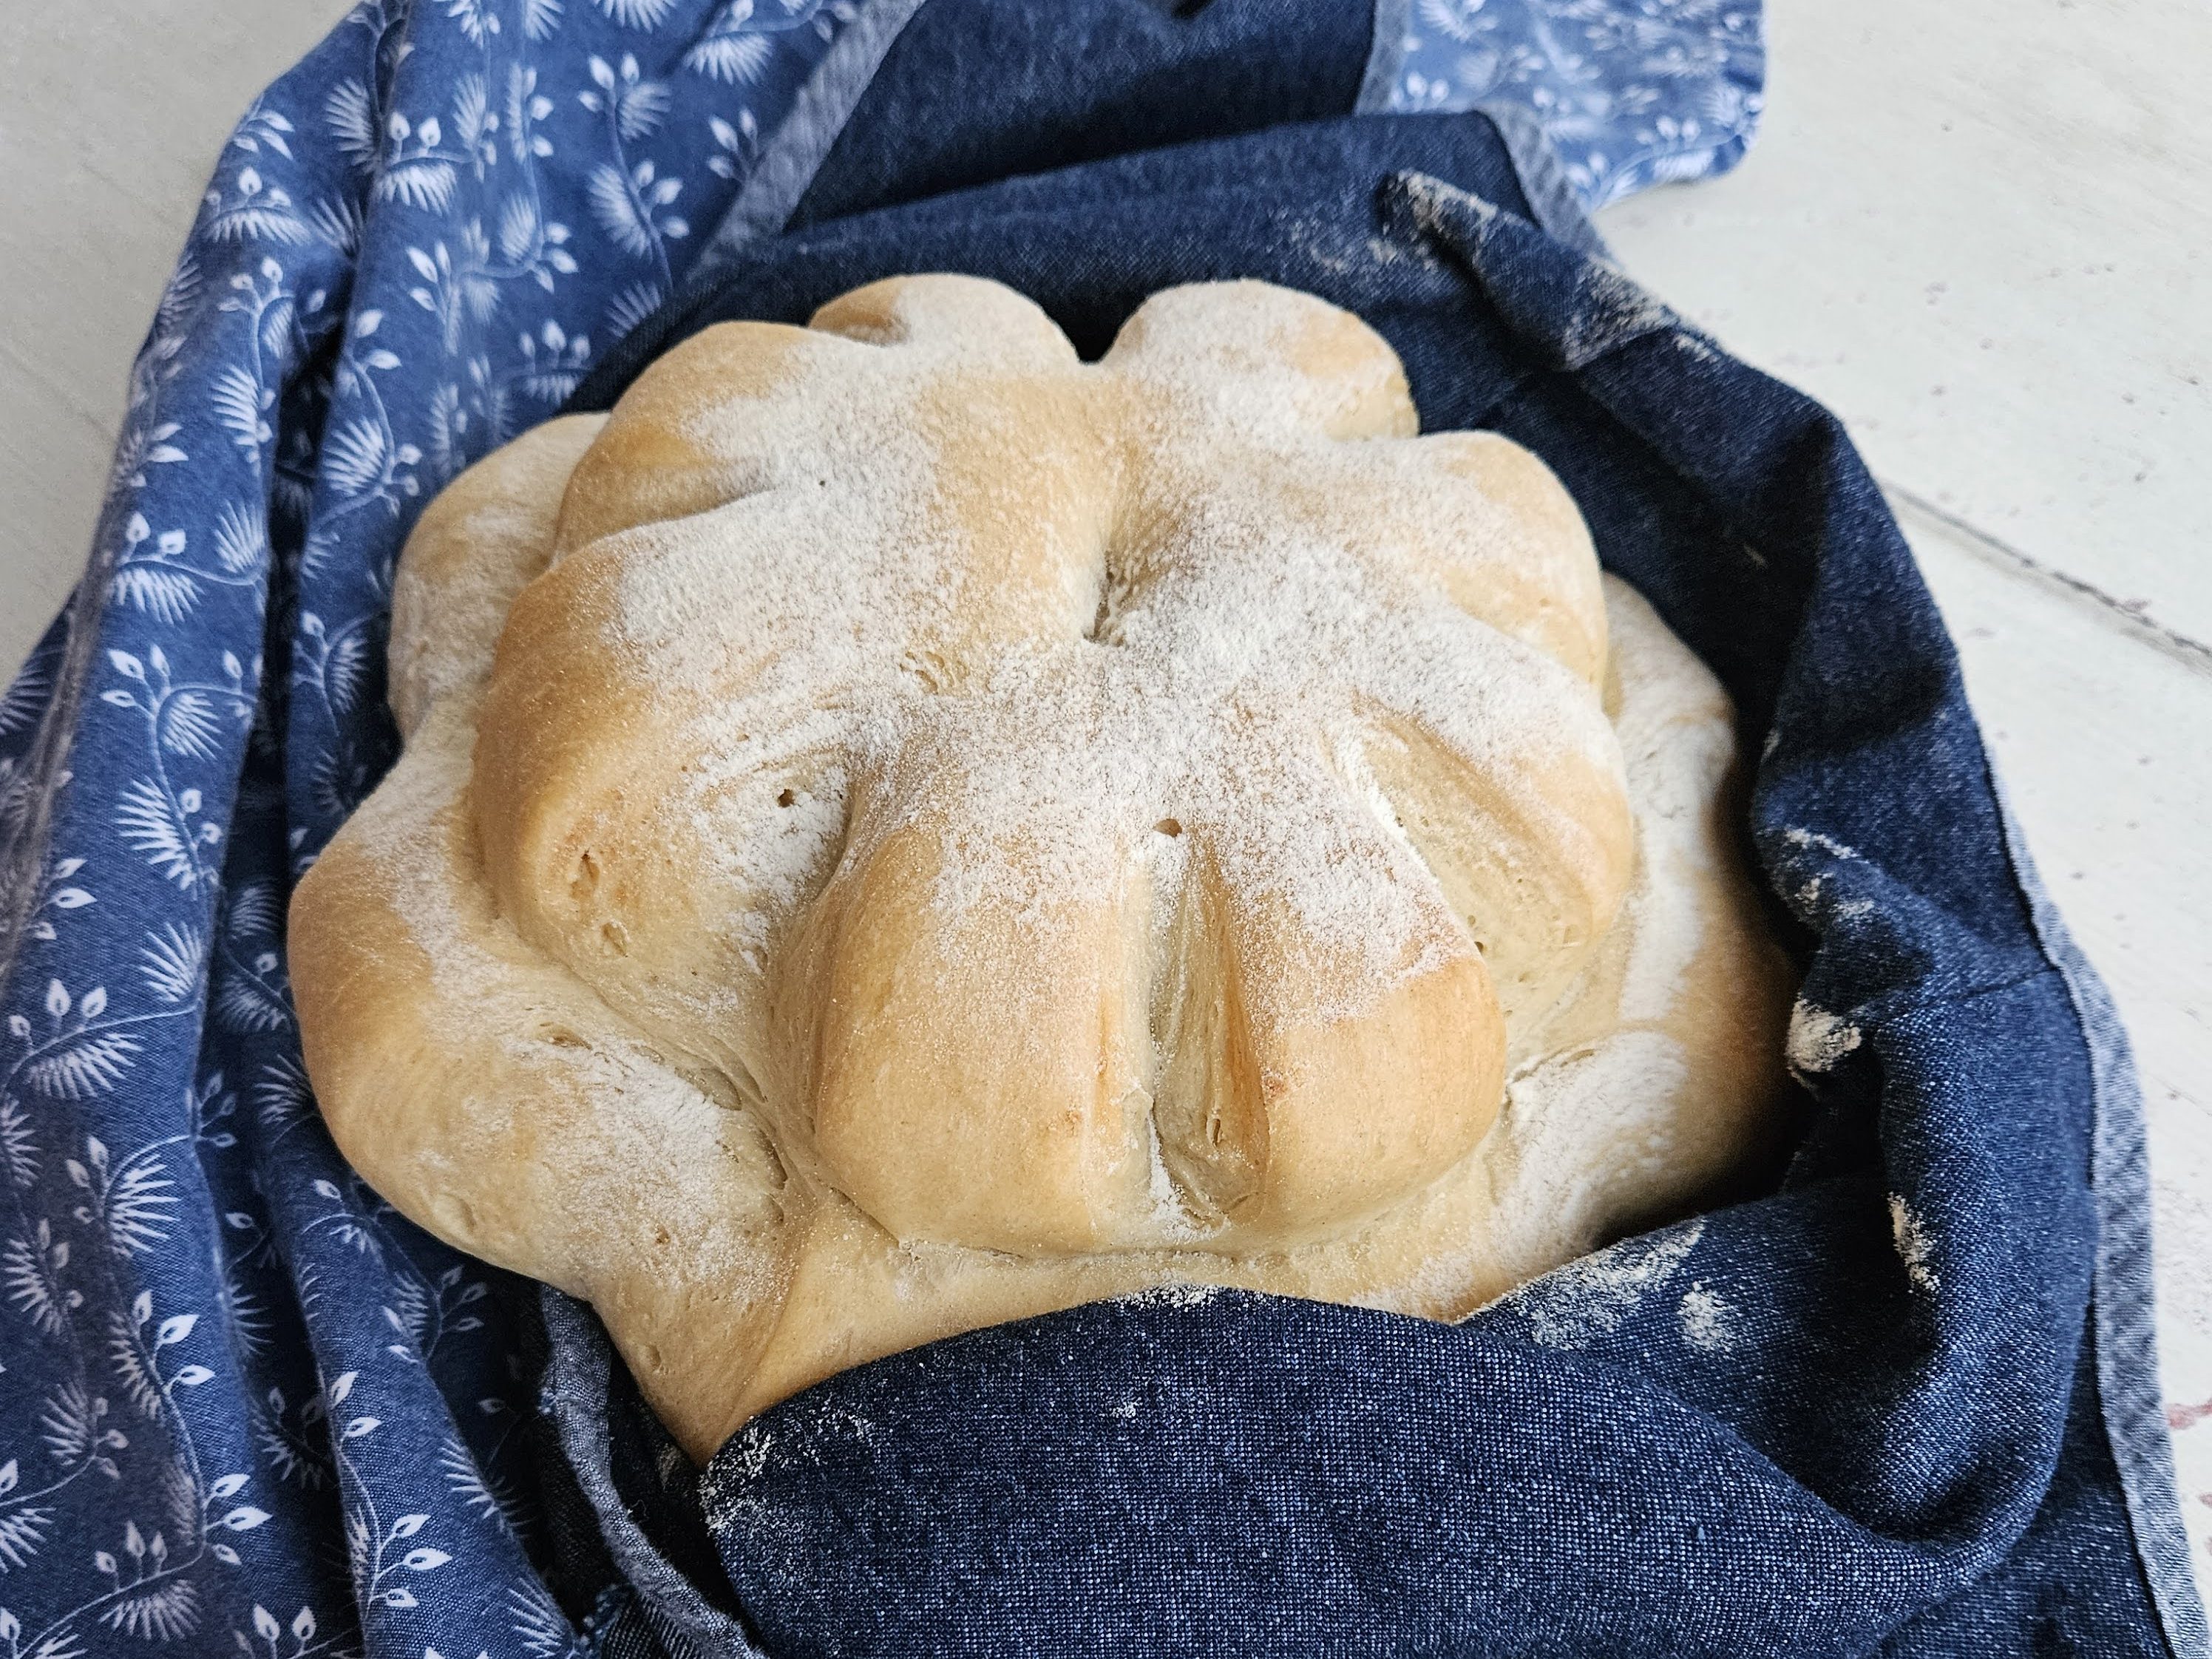
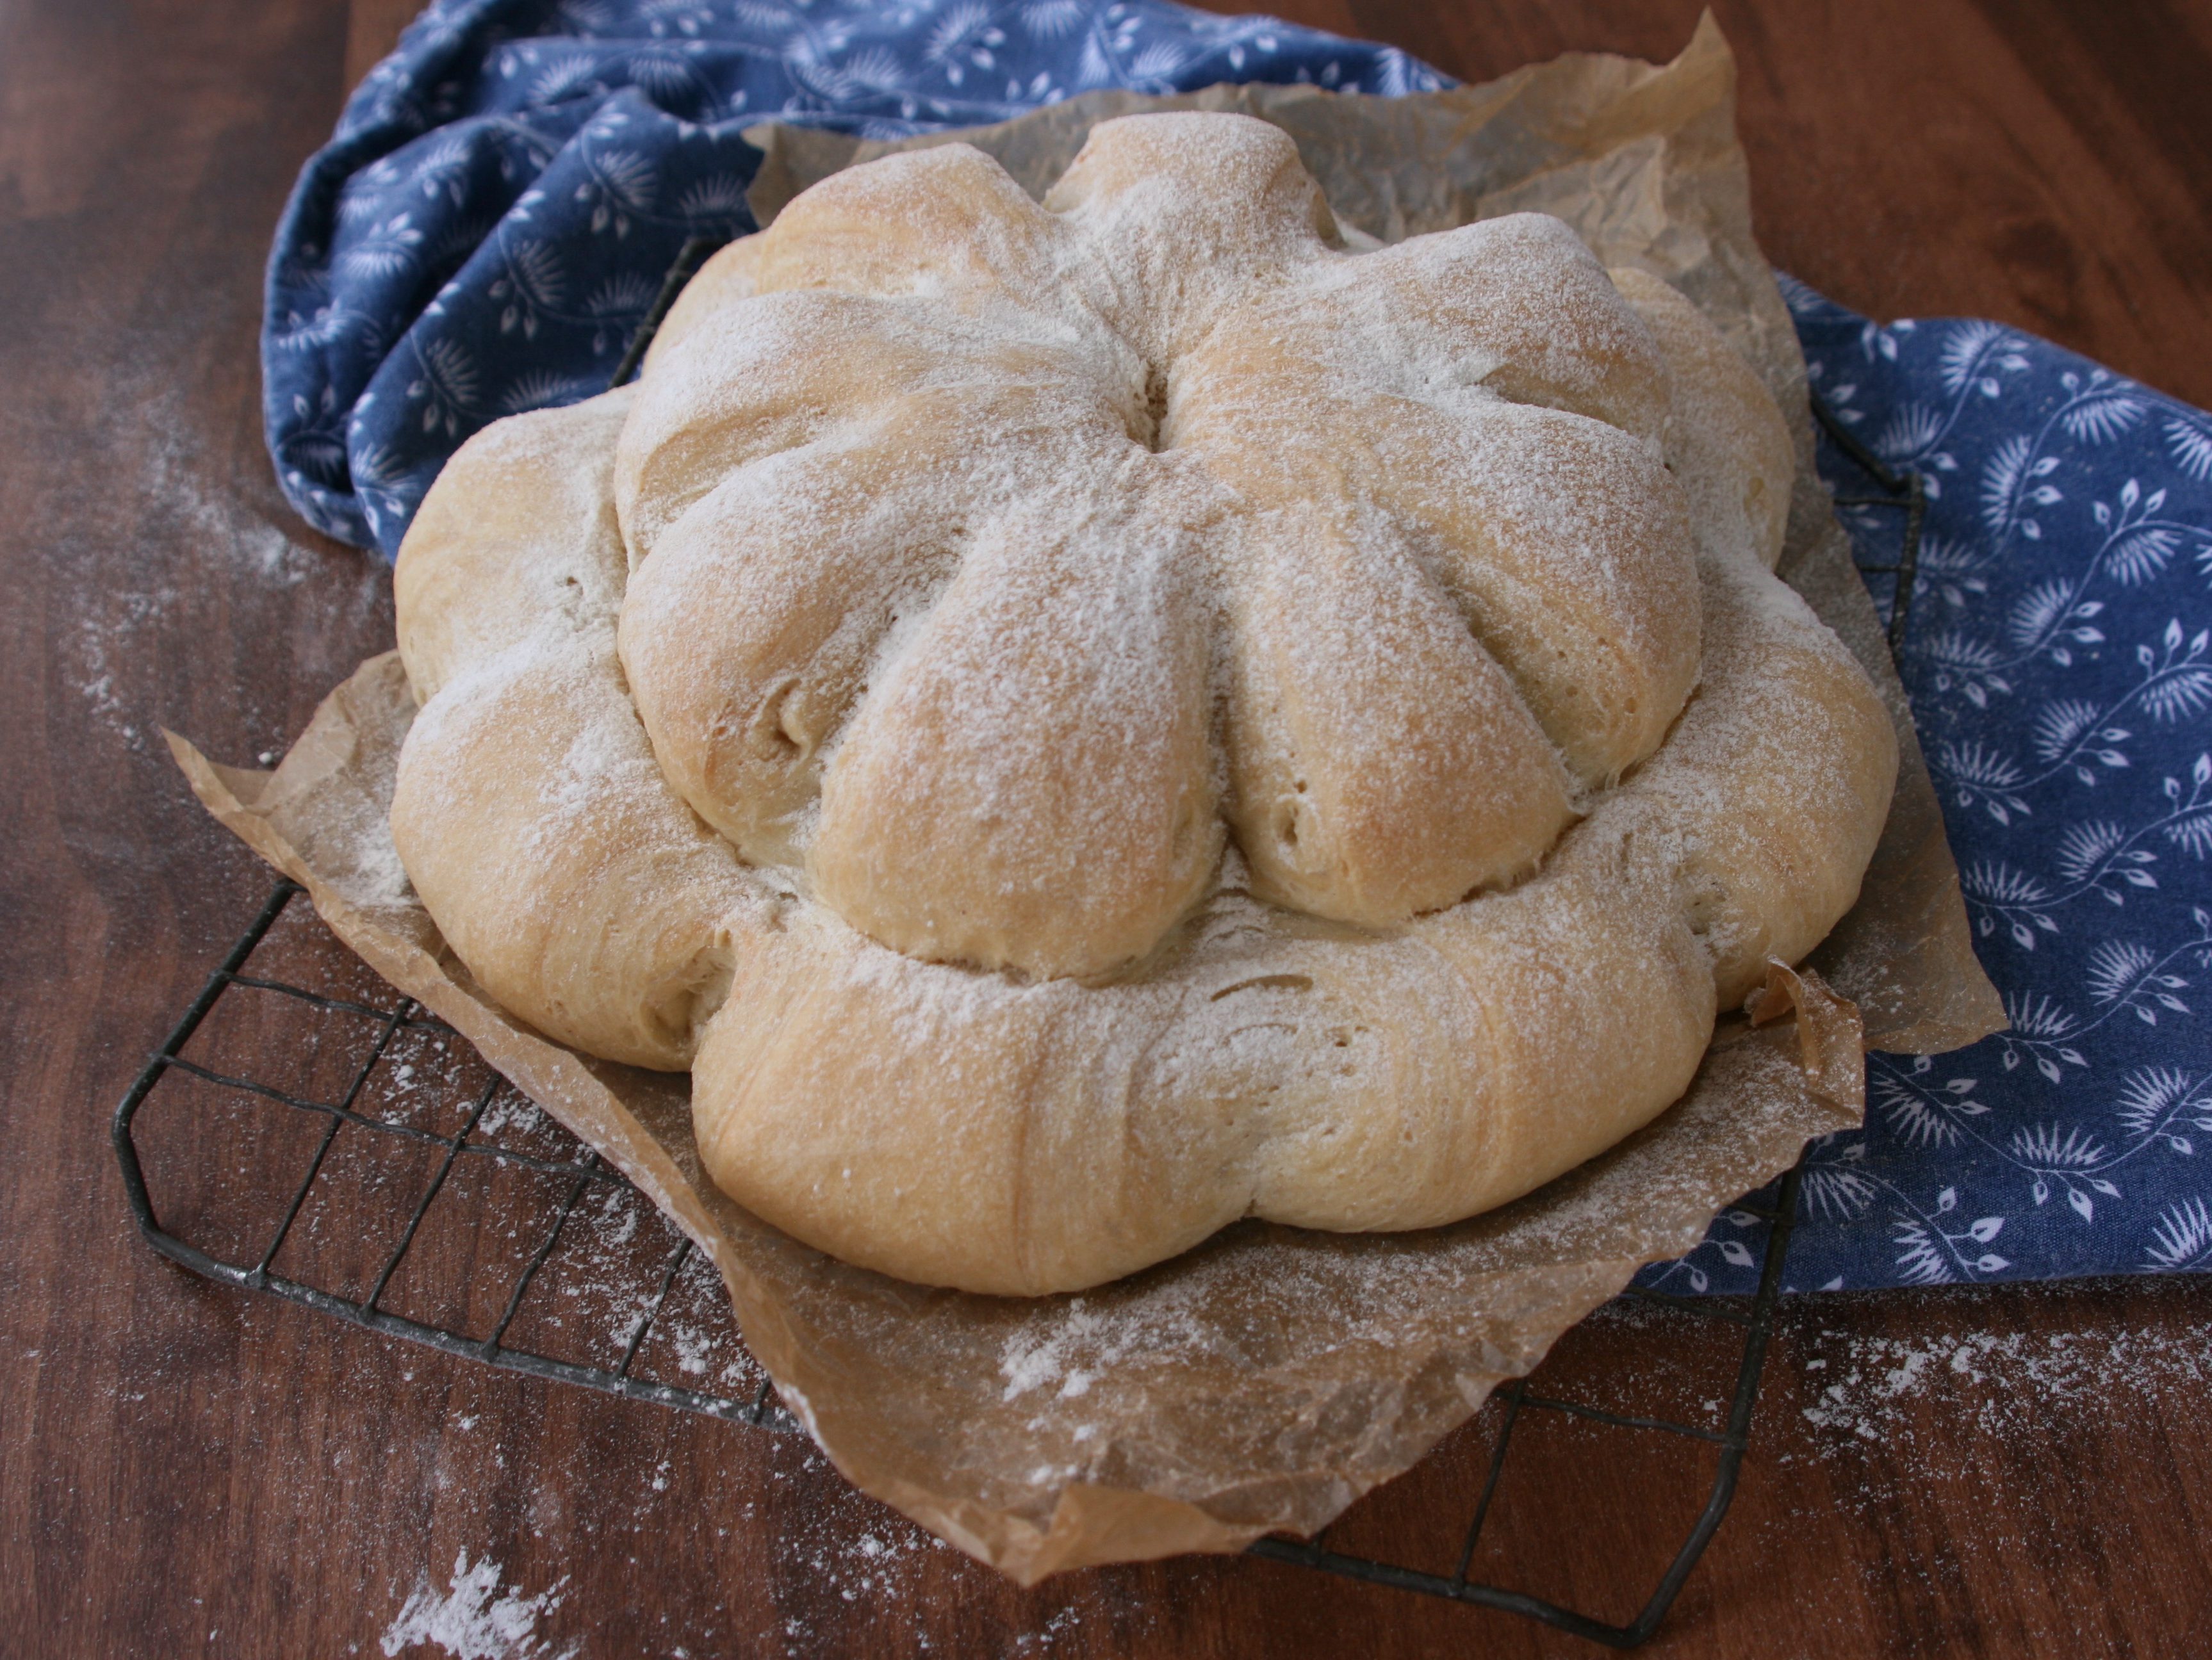
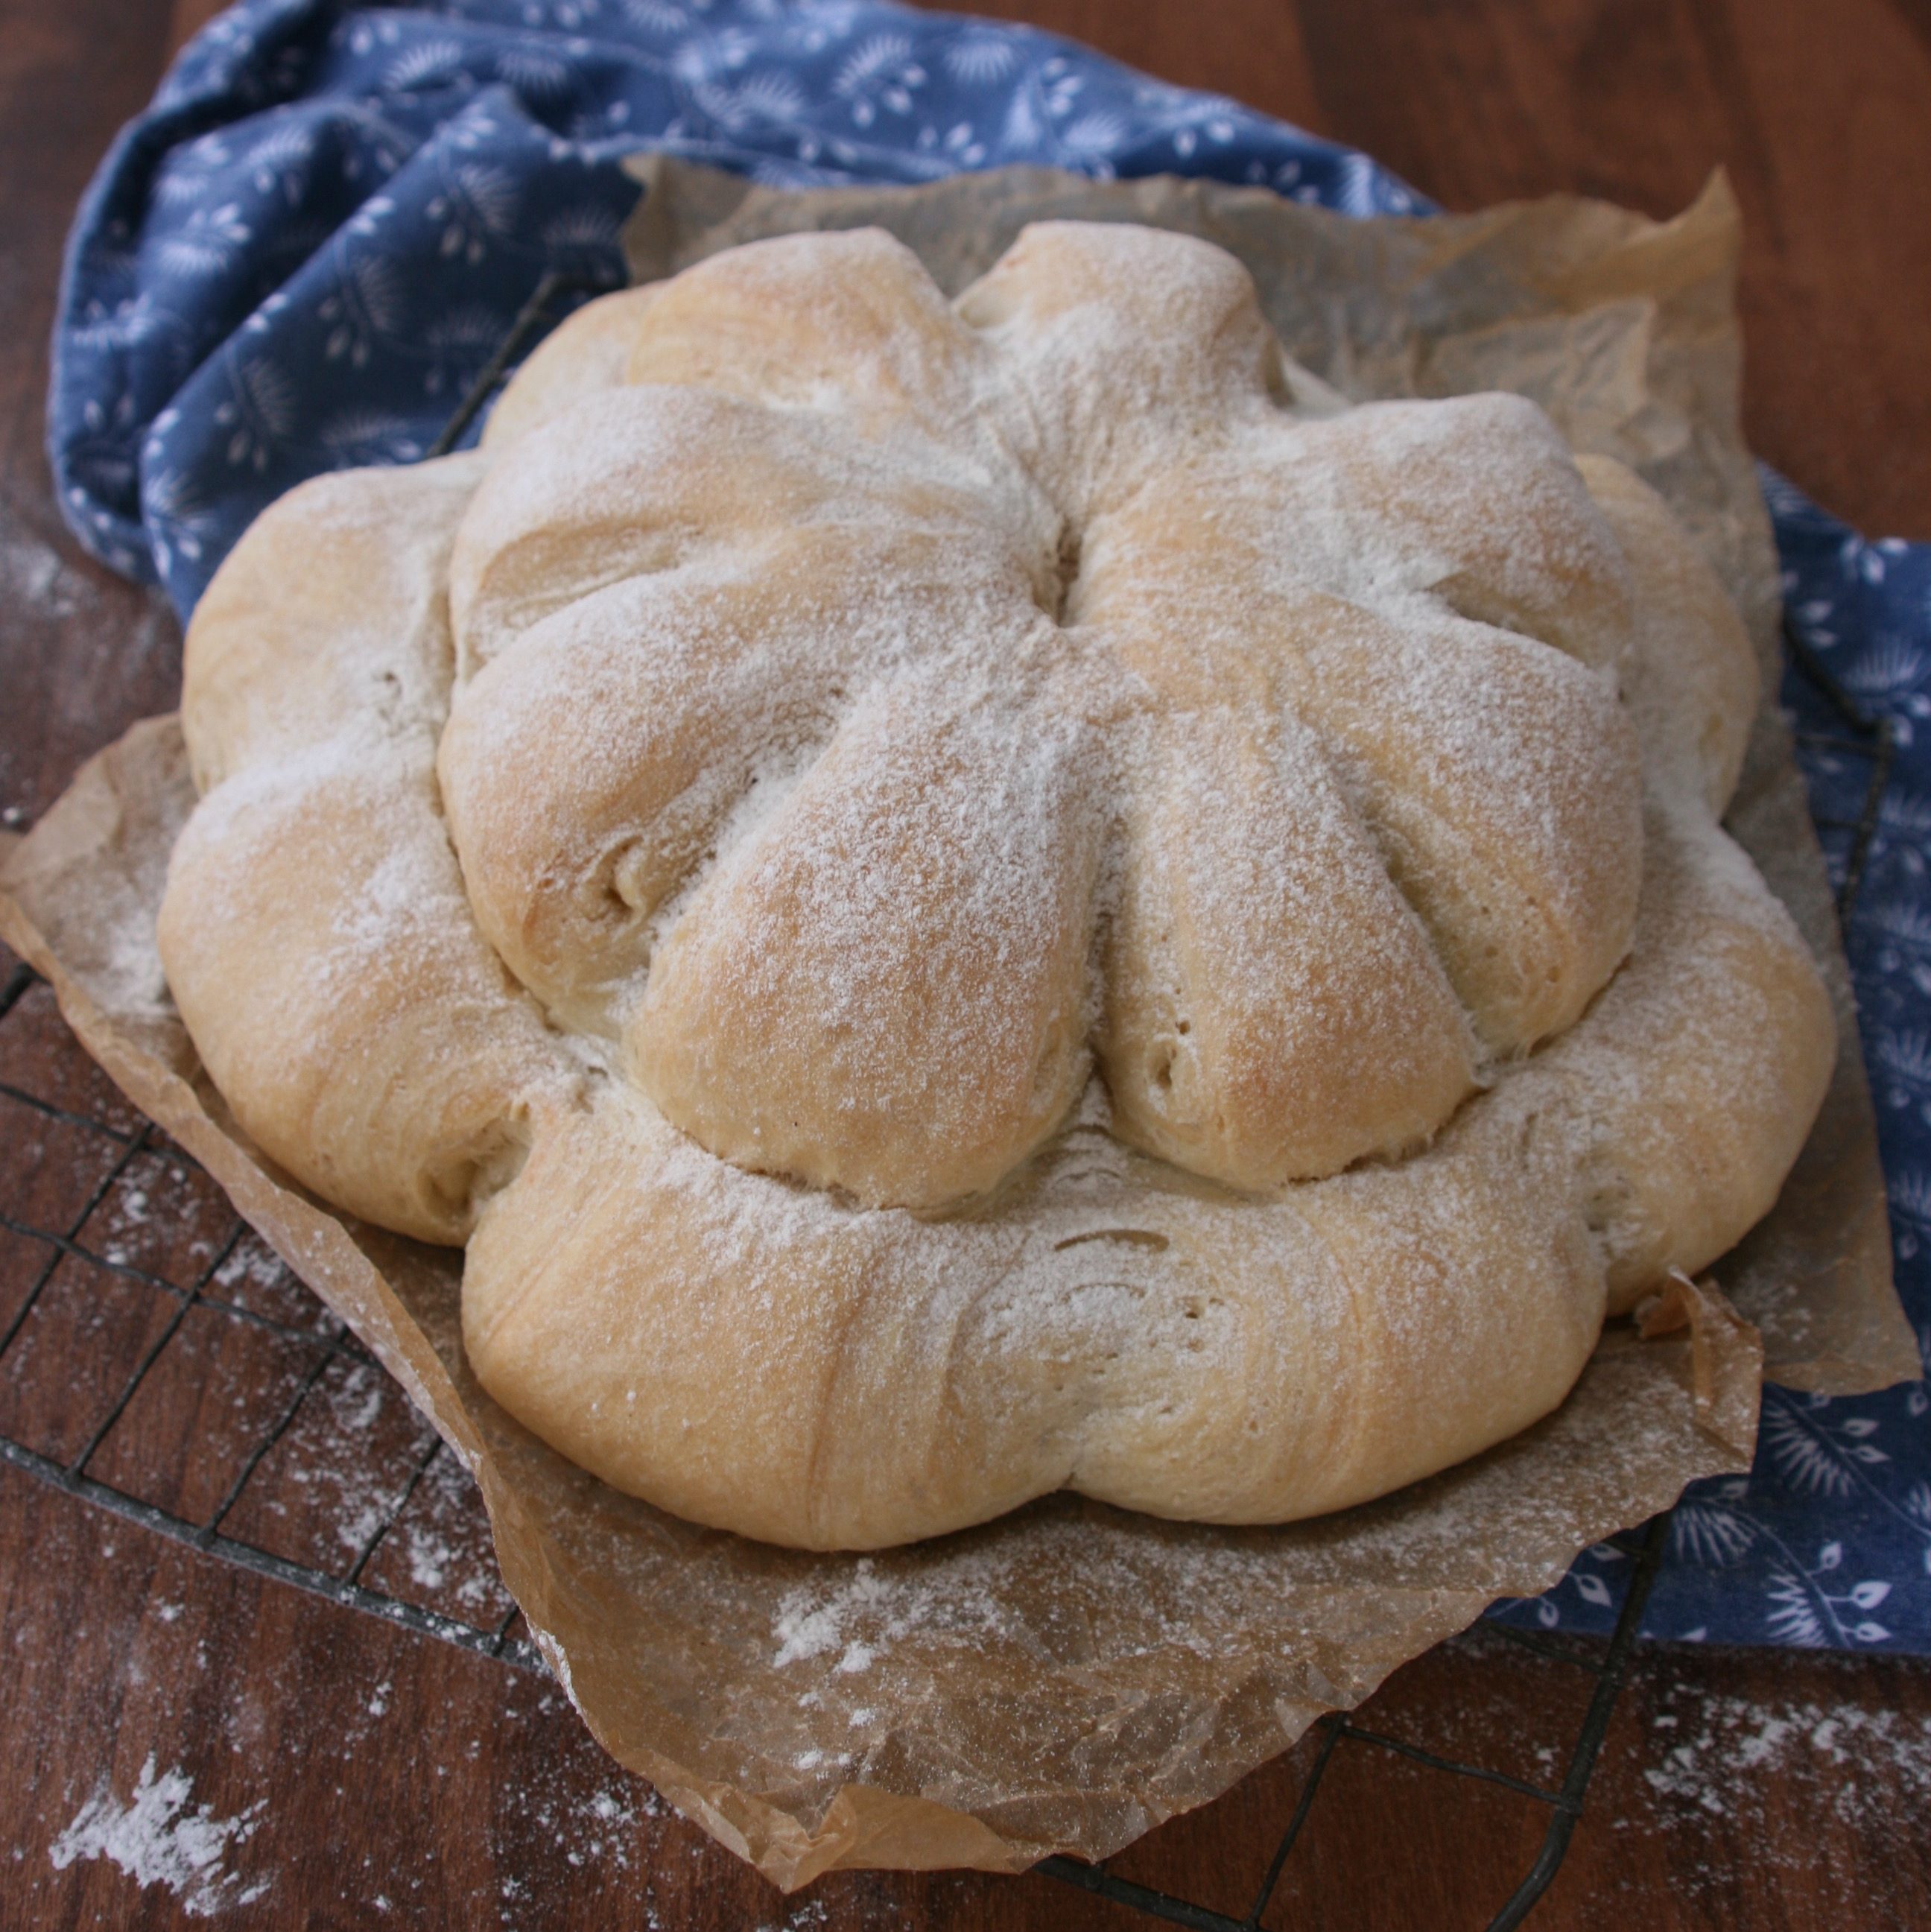
The distinguishing feature of a cottage loaf is, of course, its shape — a small round loaf on top of a larger round loaf. There are several theories as to how this shape came to be: Because early ovens had no shelves, in order to conserve space, bakers built the bread to rise up, not out. Or, bakers added a small loaf on top of a traditional loaf to avoid being accused of short-changing customers, much like a baker’s dozen of rolls is still common today. (Apparently, bakers in medieval England could be fined or flogged if they were found cheating their customers.) A third possibility is that the shape of a cottage loaf resembles the shape and roofline of an English cottage.


A round cottage (left) and a cottage loaf (right).
While they were among the most popular types of bread before World War II, cottage loaves have all but disappeared from bakery shelves since then. Even George Orwell, writing for the English Standard in 1945, bemoaned the loss of this iconic loaf: “If there is anything quite as good as the soft part of the crust from an English cottage loaf (how soon shall we be seeing cottage loaves again?) I do not know of it.”
As far as baking challenges go, this isn’t a difficult one. For the bakers in the Great White Tent, those who had the most difficulty were the ones who didn’t really know what a cottage loaf looked like or had little experience with bread. The problems they encountered ranged from adding too much liquid to the dough (James) to having the top slip off in the oven (Kate) to the loaf being underbaked (Sophie). But with the complete recipe before us and none of the time pressures that GBBO contestants face, this would be a good recipe for inexperienced bread bakers to try.
The recipe found on The Great British Bake Off’s website is very similar to Paul Hollywood’s recipe in his cookbook How to Bake except that it uses lard instead of butter. It’s all done by hand (literally!) — no mixer required — and not very time consuming, except for the time needed for proving and baking. And only five ingredients. My favorite kind of bake!

The Method
After combining the flour, yeast and salt, add the fat (Make sure it’s room temperature so it mixes in well.) and about three-fourths of the water, and mix with one hand. With the other hand, pour in a little more water at a time until the mixture forms a rough dough. You may not need to add all the water the recipe calls for, or you might need a little more. The dough should be soft, not soggy.
Once all the flour is incorporated, tip the dough onto a lightly floured surface and knead until the rough dough becomes smooth (5-10 minutes). Transfer the dough to a lightly oiled bowl and leave to rise until doubled, which could take one to three hours. When it’s doubled in size, tip it onto a lightly floured work surface again and fold it over onto itself repeatedly until all the air is knocked out.
To shape the loaf, cut off about one third of the dough and set it aside. Form the larger piece into a ball by first, flattening it into a rectangle; second, rolling it into a fat sausage shape; third, bring the two ends toward the middle; fourth, turn it over so the seams are on the bottom. Form this into a round dome. Placing the edge of your hands, palm up, on either side of the dome, move your hands around the dough, rotating the dome and tucking the dough underneath itself, forcing the sides of the dome down and under until you have a smooth, taut ball. Set that aside and repeat the process with the smaller piece.
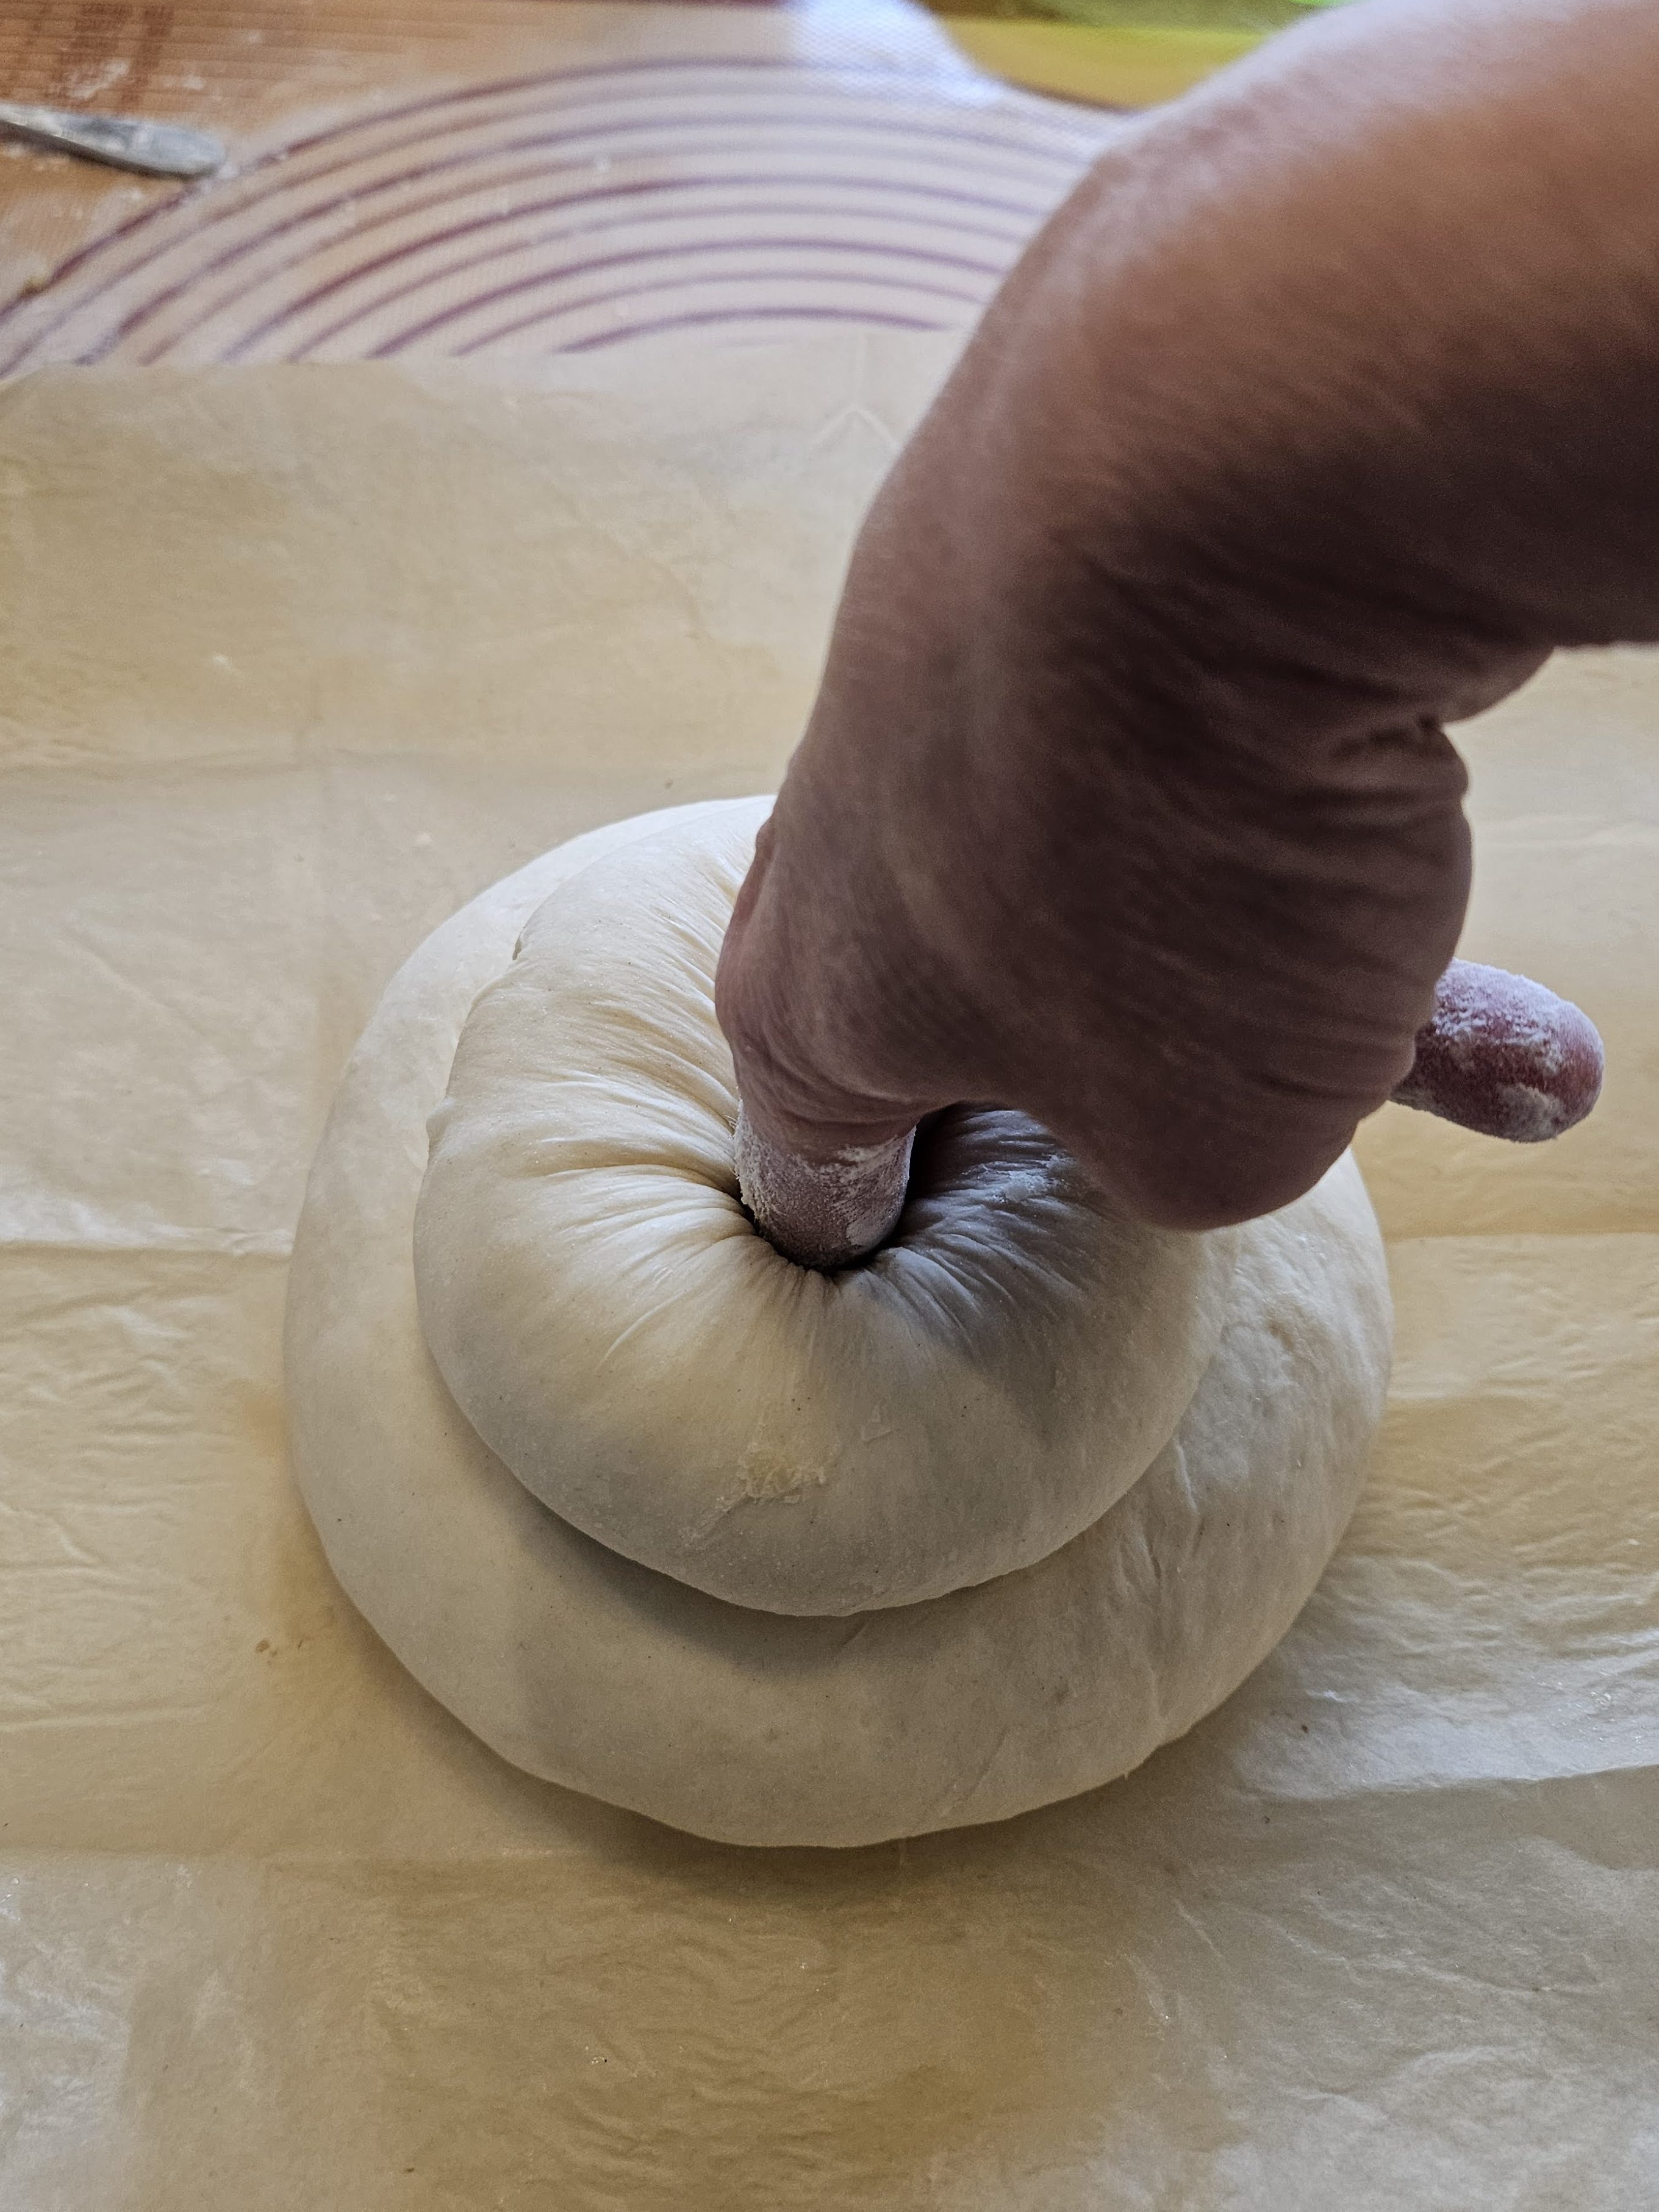
Place the smaller ball on top of the larger one and, after dipping your index and middle fingers in flour, poke them down through both balls of dough all the way to the work surface to create a dent in the top of the loaf and to adhere the two pieces together. You might want to poke it twice. Then carefully lift the loaf in one hand and, using a very sharp knife, make eight vertical slashes through both sections of dough all the way around the loaf.


Place it on a parchment-covered baking sheet and put the whole thing inside a large plastic bag. Let it prove for about an hour. (It should double in size again and should spring back when poked lightly with your finger.) Meanwhile, place a roasting pan in the bottom of the oven and heat the oven to 450°F. When the dough has risen, remove it from the plastic bag, dust the loaf with flour and fill the roasting pan with water to create steam. (Be careful not to burn yourself!) Place the bread in the oven, bake for 15 minutes, then lower the oven temperature to 375°F and bake for another 20-25 minutes, until the loaf is crusty and golden brown.
The steam helps the bread to expand and creates a thin, crisp crust. This simple recipe makes a light, chewy loaf that is great for sopping up gravy or dipping in olive oil. I served it to my family with a hearty soup on a snowy February day. There’s nothing like comfort food to warm the heart and fill the belly!
You’ll find Paul Hollywood’s original recipe here. I’ve adapted it for American bakers below.

Paul Hollywood’s Classic Cottage Loaf
Ingredients
- 3¾ c. bread flour, plus extra for dusting
- 2¼ t. fast-action yeast
- 1 t. salt
- 4 T. lard, room temperature and cut into small chunks
- 1¼-1½ c. water (more or less), plus more for the oven
- Vegetable oil, for coating the bowl
Directions
- Tip flour into a large bowl and add yeast to one side and salt to the other. Add the lard and pour about 1 cup of the water over the flour. Using one hand, mix with open fingers (like a claw), then gradually add more water, a little at a time while mixing, until the flour is all incorporated and the dough is soft but not soggy.
- Tip the dough onto a lightly floured work surface, setting the bowl aside for now, and knead for 5-10 minutes until it’s smooth and silky. Pour a little vegetable oil into the bowl and rub it around. Place the dough back in the bowl and turn it over once or twice so it’s coated with oil. Cover the bowl with a clean dish towel and leave the dough to rise until doubled in size, usually about an hour, although it could take 2-3 hours, depending on the ambient temperature.
- Once the dough is risen, tip it back onto the lightly floured surface and fold it inwards repeatedly to knock the air out. This ensures that the dough will rise upward, not outward.
- Use a bench scraper or large knife to cut off one third of the dough and set it aside. Flatten the larger piece of dough into a rectangle, then roll it up like a jelly roll into an oblong shape. Fold the two ends into the center and press down slightly so you have a chunky square shape. Turn it over so the seams are on the bottom.
- With palms turned upward, place your hands on each side and slightly under the dough. Use your hands to rotate the loaf, tucking the dough under itself slightly as it turns. You are gently forcing the sides of the dough down and underneath to create a smooth, taut ball. (Avoid using too much flour during the shaping.)
- Set that piece aside and repeat the rolling and shaping with the smaller piece of dough. Place the smaller ball on top of the larger ball. Coat your index finger and middle finger with flour and push them down through the center of the loaf all the way to the bottom. Lift the loaf in one hand and, using a sharp knife, make eight vertical slashes in both pieces all the way around. Then place the loaf on a parchment-lined baking sheet, put the whole thing in a large plastic bag, and leave it to rise for an hour or until it is well-risen and springs back quickly when prodded with a finger.
- Meanwhile, place a roasting pan in the bottom of the oven and heat the oven to 450°F. When the dough has risen, remove it from the bag and dust the loaf with flour. Fill the roasting pan with water to create steam, and place the bread on the baking sheet in the oven. Bake for 15 minutes, then lower the temperature to 375°F and bake for 20-25 minutes more, until the bread is crusty and golden brown and the bottom sounds hollow when tapped. (Internal temperature should be about 190°F.) Transfer to wire rack to cool.
Discover more from Here's the Dish
Subscribe to get the latest posts sent to your email.
