
One of my favorite flavor combinations is chocolate and orange. This may stem from a love for Orange Milano cookies from Pepperidge Farm, which my sister, being a full 18 months older than me and a sophisticated world traveler while I was still in college, introduced to me. A more recent—to me anyway—indulgence in this furtive tryst of flavors is the chocolate orange, preferably of the dark chocolate variety. So when the Great British Baking Show tasked its contestants with baking a torte cake with multiple layers of filling, it was more than intuition that prompted me to choose these two flavors.
Besides featuring complementary flavors, tortes are made of sponge layers that don’t use normal wheat flour, Paul Hollywood explained, so I found a recipe for a flourless chocolate almond cake from OnceUponAChef.com. Wanting to infuse my orange filling with the essence of fresh oranges, I chose a recipe for orange curd from The New York Times. My complementary filling would be a simple chocolate mousse, and I planned to enrobe the entire torte in a chocolate ganache. To top it all off, and add even more intense orange flavor, I decided to make candied orange zest to use as a garnish.
With so many elements, I needed a plan of action. Working in order of what keeps the longest, I tackled them in the following order:
- Candied orange zest (can be made up to a month ahead of time—longer if kept in the freezer)
- Orange curd (can me made up to three days ahead—or frozen for up to three months)
- Flourless chocolate cake (can be made a few days ahead of time and kept in freezer)
- Chocolate mousse (can be made up to a day before assembling the cake)
- Chocolate ganache (can be made up to a week in advance).
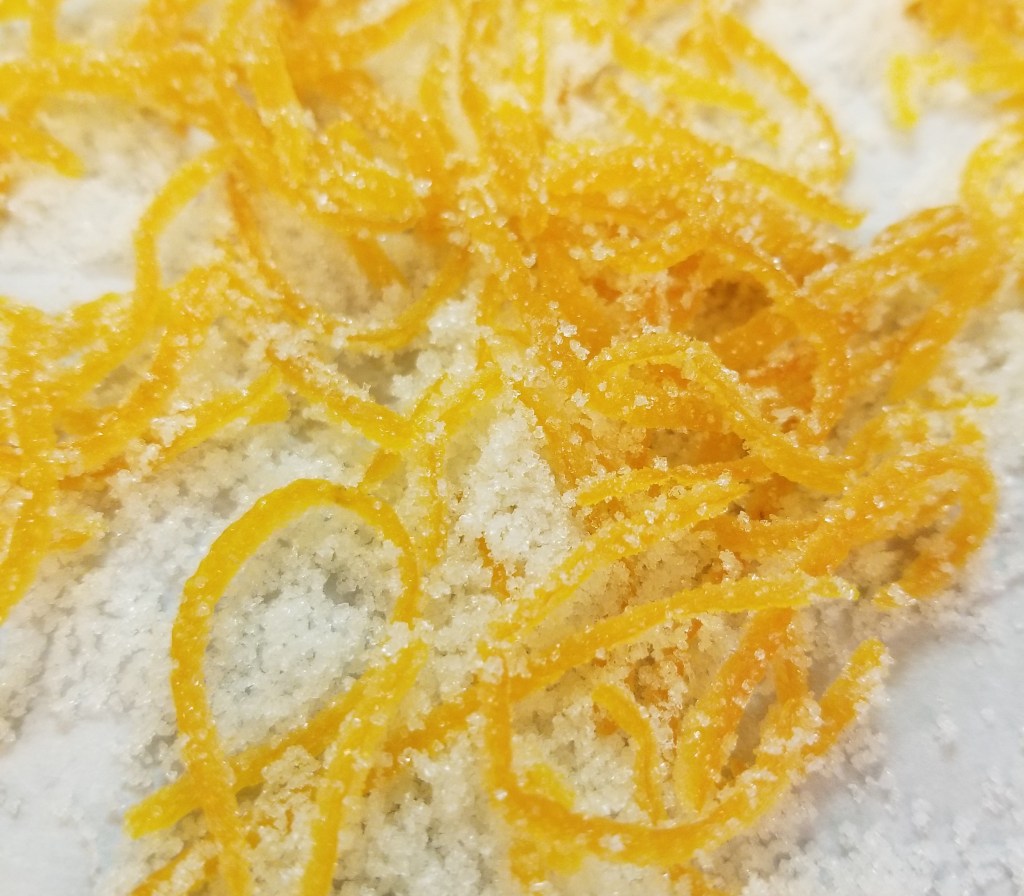
I’ve made candied orange peel before. It’s really quite simple: Boil the peels in a sugar syrup and then dredge them in more sugar, producing beautiful jewel-like pieces of orange peel that taste like gumdrops … only better! This time, I used long thin pieces of orange zest, rather than the wider peel I’ve used in the past, and was quite happy with the result. I do admit to snitching a few, but only for quality control purposes!
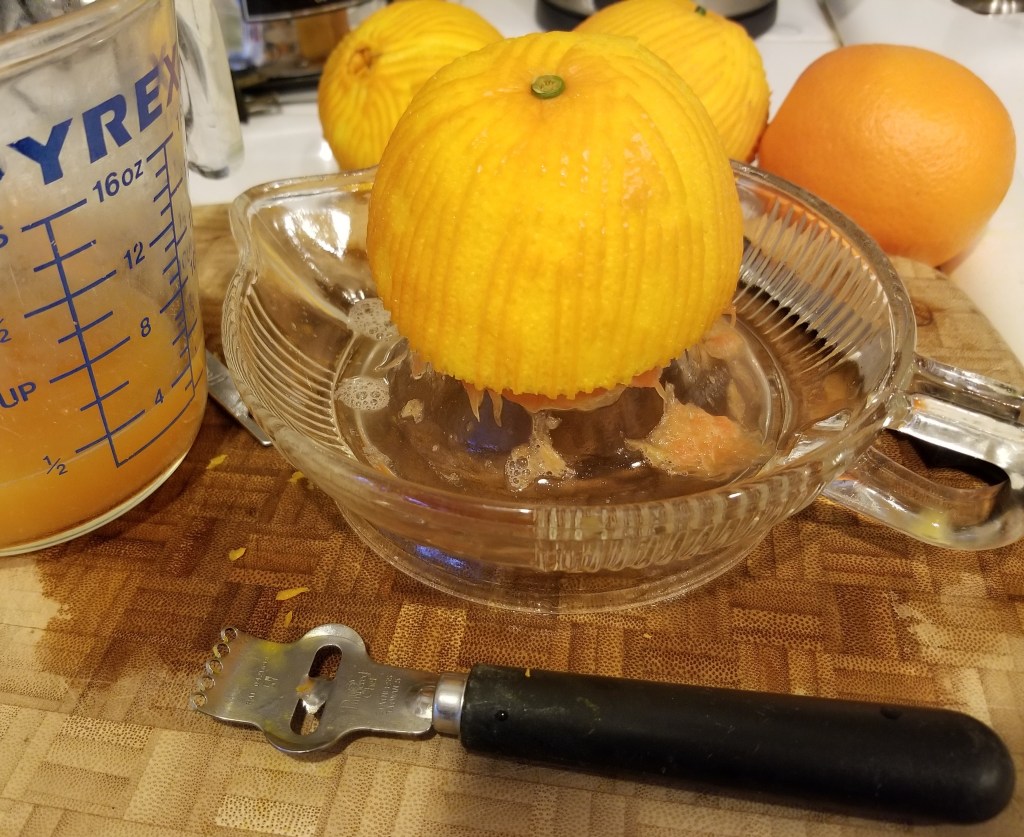
The orange curd is also simple to make, an unas-suming combina- tion of eggs and egg yolks, sugar and orange juice, with a bit of zest and lemon juice thrown in for tartness. It’s all whisked together in a double boiler until it thickens, like mayonnaise, and then butter is stirred in until melted. Finally, the whole thing is strained through a sieve and refrigerated until set. This particular recipe calls for blood oranges, which are sweet red-fleshed oranges, but when I asked at Whole Foods, they said blood oranges aren’t in season right now, so I chose Cara Cara oranges, which have pinkish-colored flesh and are also quite sweet.
Next came the cake. It’s not a difficult recipe, but I’ll warn you, it does require a lot of bowls. When I’m not baking for this Challenge, I tend to throw everything into one mixing bowl and hope for the best, but this cake recipe uses one bowl to melt the chocolate in the microwave; another to beat the butter, sugar and egg yolks together in before adding the chocolate and ground almonds; and still another to beat the egg whites in. Once everything is incorporated together, the mixture goes into the prepared pans to bake.
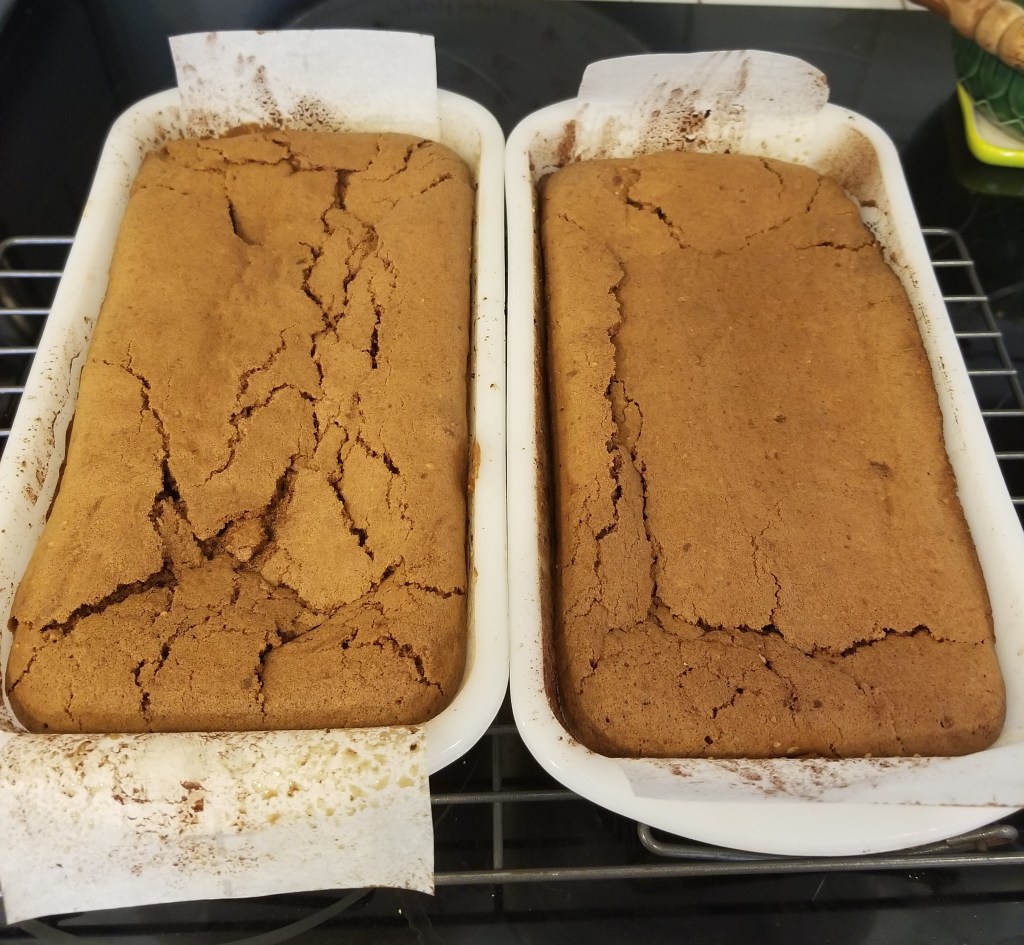
Rather than bake it in a round springform pan as the recipe calls for, I chose to divide the batter between two loaf pans, since I wanted to create a rectangular torte with multiple layers of cake and fillings. Since I wouldn’t have the detachable sides that a springform pan has, I lined my loaf pans with strips of parchment paper that hung over the ends so I could use them to lift the cake out of the pan when it was done. I also dusted the pans with cocoa powder to maintain the dark chocolate color on the outside as well as make the cake easier to turn out. The recipe actually calls for dusting the pans with matzo meal (for Passover) or fine breadcrumbs, but I think flour would work just as well.
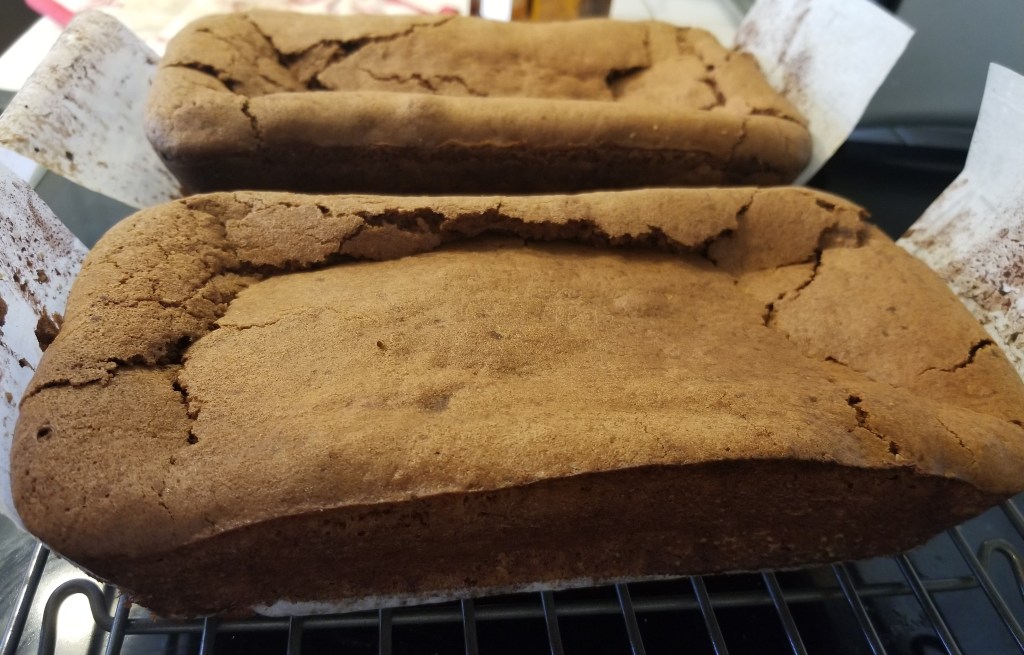
Once the cakes are out of the pan and completely cooled, they have to be trimmed because they sink in the center as they cool. Using a long serrated knife, I trimmed off the top edges to make the top of each cake as flat as possible. I then wrapped them in plastic wrap and popped them in the freezer before attempting to slice each one in half horizontally to form my layers.
While my cakes were freezing, I made the mousse filling, using the mousse recipe from the Triple Chocolate Mousse Cake recipe found here. Similar to ganache, this mousse is made by pouring hot cream over chocolate to melt it, only the cream has a little softened gelatin added to it to make it sturdier. More cream is then whipped and gently folded into the cooled chocolate to make a light, chocolatey cloud. I refrigerated it until set while I prepared my cake layers.
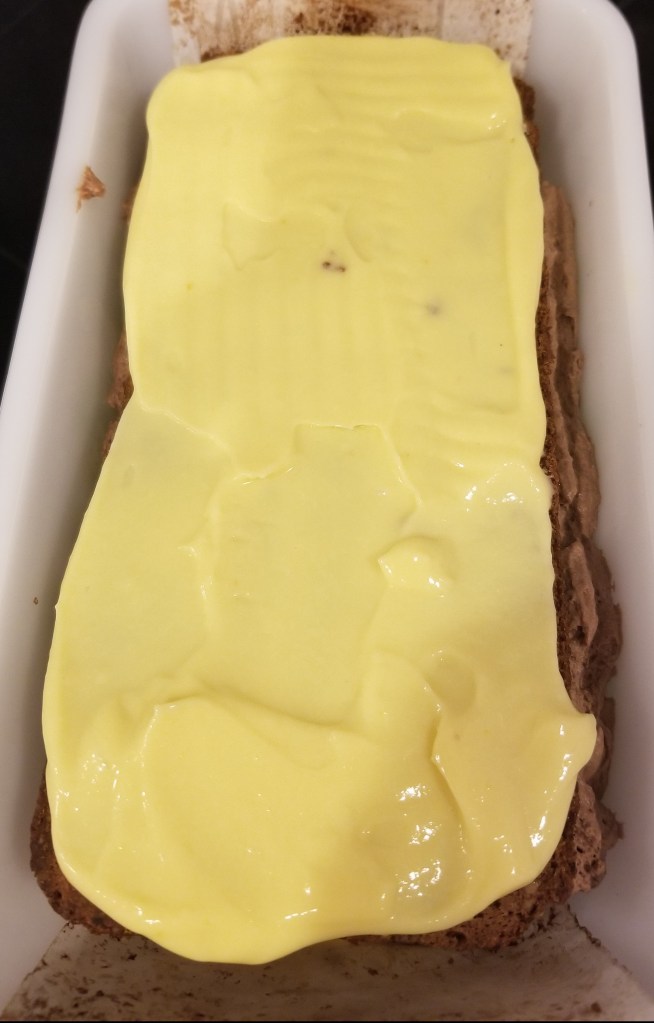
The cakes cut much easier after being in the freezer for about an hour. I sliced the two cakes in half to form four layers about ¾-inch thick. Freezing it worked so well that I decided to assemble my tort in the loaf pan and freeze it overnight to let the layers set. I put the parchment paper strips back in one of the loaf pans, laid one cake layer in the bottom, spread it with orange curd and piped chocolate mousse over that. I repeated those layers and then topped the whole thing with a third layer of cake. I ended up having an extra cake layer left over, which I stuck in the freezer to use later (or simply to snack on!).
The next day I made my ganache using the same recipe I had used for my Hidden Design Cake. It’s a pretty standard recipe calling for a 1:1 ratio of chocolate to cream (by weight). The chocolate I used this time, though a premium brand, was in chip form, and I found the ganache was still quite runny even after cooling for half an hour, so after a bit of frantic internet research, I put the bowl of ganache over a pan of simmering hot water and slowly stirred in a tablespoon more of grated chocolate. It took quite a bit of constant stirring over low heat before the additional chocolate melted, but it turned out to be the perfect consistency. Lesson learned: If using chocolate chips for ganache, use a little bit more than the recipe calls for.

As the ganache cooled, I pulled the assembled torte, still in the loaf pan, out of the freezer and turned it out onto a serving platter. As I suspected they would be, the sides were uneven, with now-frozen mousse and orange curd oozing out. Working quickly while it was still frozen (like the contestants working in the tent on a hot day of filming GBBS), I trimmed the edges till I had nice straight sides to cover with ganache. I stuck strips of parchment paper underneath the edges on all four sides of the torte and then poured the luscious, velvety liquid chocolate over the frozen layers till the top and sides were completely covered, smoothing the entire surface with an offset spatula.
Although the ganache set quickly when poured over the frozen torte, I didn’t want to chance the whole thing melting on me, so I stuck it in the fridge while I prepared one last element to put the finishing touch on my creation. Transferring the ganache I had left over into my mixer bowl, I whipped it up until it was of piping consistency. I filled my piping bag fitted with a star tip and piped around the bottom edge of the torte and then added two rows of stars on top, leaving room in the center of the top surface for the candied orange peel.

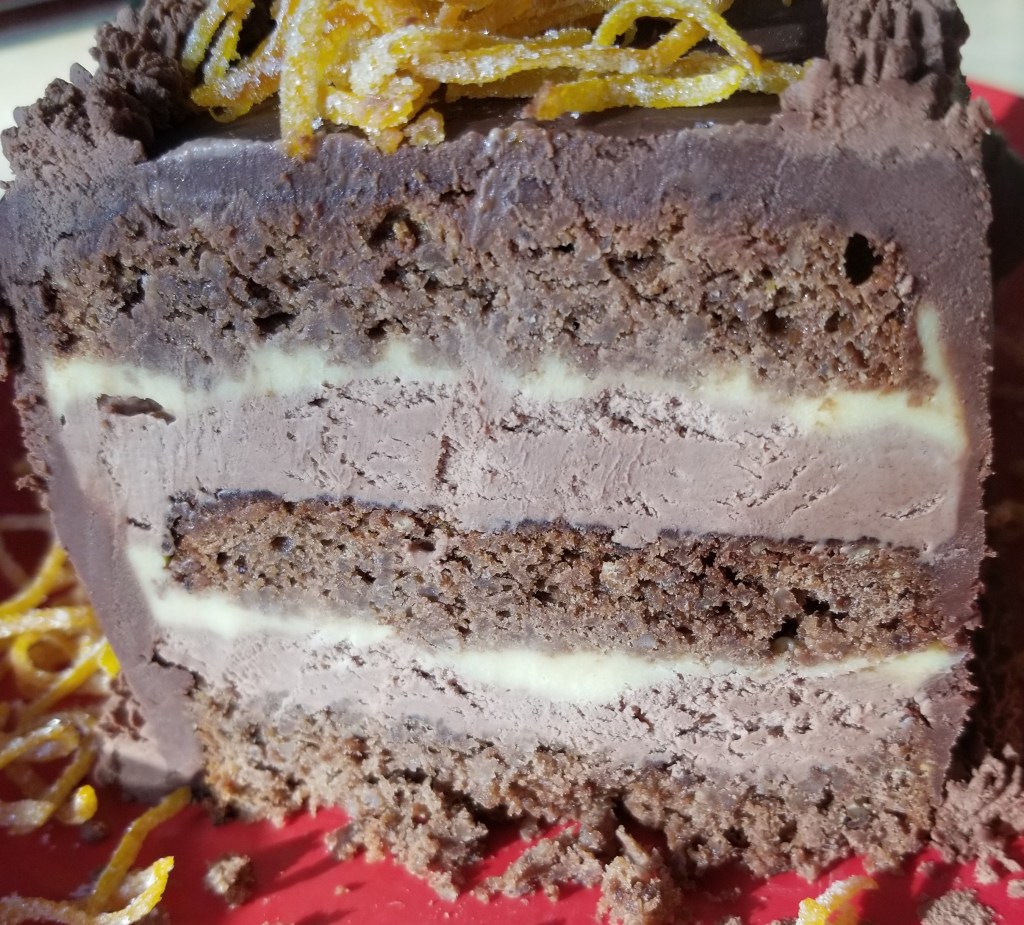
I was pretty happy with the way my torte looked, and all that’s left was for it to be sliced and eaten. Fortunately, we had willing friends to share it with. The layers looked pretty even, although I discovered quite quickly that the warmer it got, the harder the torte was to slice without it collapsing in on itself, so I kept it refrigerated and later wrapped the leftovers in plastic wrap and put them in the freezer. The only criticism I gave myself was that the orange flavor wasn’t intense enough. Even though I added a couple tablespoons of Cointreau to the orange curd as well as to the ganache, the chocolate definitely overpowered the orange. Next time, I might try a different orange curd recipe—such as this one, which suggests boiling down the orange juice to create a more intense flavor—or possibly make the ganache with less cream so I could add more orange liqueur.

Chocolate-Orange Torte
Credit for orange curd: Adapted from Cooking.NYTimes.com
Credit for mousse: BakedByAnIntrovert.com
Credit for ganache: PrettySimpleSweet.com
Credit for candied orange peel: FoodNetwork.com
For the cake:
- 6 oz. semisweet chocolate, finely chopped (or use chips)
- ¾ c. sugar, divided
- ¾ c. (1½ sticks) unsalted butter, at room temperature
- 6 large eggs, separated
- 1/8 t. salt
- 1 t. lemon juice
- cocoa powder (for dusting the pan)
Directions
- Preheat oven to 350°F. Line a baking sheet with parchment paper. Spread the almonds in a single layer on the parchment paper and bake for 5-7 minutes until the almonds are lightly browned and fragrant. Set aside to cool.
- Prepare two identical loaf pans (approximately 4½”x8½”) by spraying the bottom and sides with vegetable oil spray and laying in the bottom of each pan a strip of parchment paper the same width as the pan but twice as long. Let the ends of the paper hang over the ends of the pans. Spray the paper with vegetable oil spray and dust generously with cocoa powder. Over a sink, rotate the pans on their sides several times to spread the powder evenly.
- Place the chocolate in a microwave-safe bowl and microwave for 20 seconds at a time, stirring in between, until the chocolate is about 75% melted. Stir until fully melted and completely smooth. Set aside to cool slightly.
- In a food processor with metal chopping blade, combine almonds and ¼ cup of the sugar. Process until the nuts are finely ground, stopping the machine occasionally to scrape down the sides, about 1 minute total. Do not overprocess or you’ll end up with almond butter!
- In the large bowl of an electric mixer, beat the butter until soft; add ¼ cup of sugar and beat to mix. Add egg yolks one at a time, beating and scraping the sides of the bowl as necessary, until the mixture is smooth. On low speed, add the chocolate and beat until mixed. Then add the ground almonds and beat until incorporated, scraping the bowl as necessary.
- In a clean, large mixer bowl (If you don’t have two bowls, you’ll have to transfer the chocolate mixture to another bowl and wash the bowl and beaters.), beat the egg whites with the salt and lemon juice, starting on low and increasing speed gradually. When the whites just barely hold a soft shape, gradually add the remaining ¼ cup of sugar. Continue to beat until the whites hold stiff peaks when the beaters are raised. Do not overbeat.
- Stir a large spoonful of the egg whites into the chocolate mixture. Then, in three additions, fold in the remaining whites. Do not fold thoroughly until the last addition, and do not mix more than necessary.
- Divide the mixture evenly into the two prepared loaf pans. Level the batter with a spatula. Bake for 20 minutes at 350°F, then reduce the temperature to 325°F and continue to bake for an additional 50 minutes. Don’t worry if the top looks dry and cracked. Remove the cakes from the oven and place on a rack to cool. Let stand until tepid, 50-60 minutes.
- Lift the cakes out of the pans by pulling on the ends of the parchment paper. (Do not loosen with a knife if you can help it—it will make the edges of the cake messy.) Reserve one piece of the parchment paper to use when assembling the torte. Let the cakes cool completely.
- The cakes will sink a little in the middle as they cool. Use a long, sharp serrated knife to level the tops. The finished cakes should each be about 1½ inches high. Wrap the trimmed cakes in plastic wrap and pop in the freezer while you prepare the toppings.
For the orange curd:
Directions
- On the stove, bring a pot of water to a simmer. In a large, heat-proof bowl, whisk together eggs, yolks and sugar. Whisk in orange and lemon juice and orange zest. Place bowl over pot of simmering water and cook, stirring constantly, until curd reaches the consistency of homemade mayonnaise (a little thinner than store-bought mayonnaise). Remove from heat, and whisk in butter. Strain curd through a fine sieve to remove zest, then stir in Cointreau if desired. Chill at least 2 hours before using. Curd can be made up to 3 days in advance or frozen for up to 3 months.
For the mousse:
Directions
- In a small bowl, sprinkle gelatin over water and let stand for 5 minutes. Place chocolate and sugar in a medium heat-proof bowl. In a small saucepan over medium-high heat, bring ½ cup of the cream to a simmer. Remove from heat, add the softened gelatin to the hot cream, and stir until fully dissolved. Pour the cream over the chocolate; whisk until chocolate is melted and the mixture is smooth. Cool to room temperature, stirring occasionally; the mixture will thicken slightly.
- In the bowl of a stand mixer fitted with the whisk attachment, whip the remaining 1 cup cream at medium speed until it begins to thicken (about 30 seconds). Increase the speed to high, and whip until soft peaks form (about 30 to 60 seconds). Use a whisk to mix 1/3 of the whipped cream into the chocolate mixture. Using a rubber spatula, fold the remaining whipped cream into the chocolate mixture until no streaks appear. Cover bowl and refrigerate until ready to assemble torte.
For the ganache:
Directions
- Place chocolate in a medium heat-proof bowl. Set aside while heating the cream in a small saucepan over medium heat. Bring cream just to a boil. Immediately pour cream over chocolate and let sit without stirring for 1-2 minutes, then whisk gently until chocolate is completely melted and mixture is smooth. Add Cointreau if desired and whisk to combine. Cool for 15 minutes to half an hour until thickened but still pourable. If made ahead, ganache can be kept in the fridge, covered, for up to a week and then reheated gently (to avoid burning) in the microwave or in a double boiler.
For the candied orange zest:
Directions
- Remove zest from oranges in long, thin strips, avoiding the white pith. In a small saucepan, bring zest and 1 cup cold water to a boil. Boil uncovered for 7 minutes. Remove from heat and pour through a sieve to drain, discarding water. Set zest aside. Add 1 cup sugar and another 1 cup water to the pan. Heat while stirring, until the sugar is dissolved and the syrup is boiling. Add the zest to the pan and reduce heat to a simmer; cook for 20 minutes, swirling the pan from time to time. Use a fork or small strainer to remove zest from pan, placing on rack to cool for 10 minutes. Put the remaining ½ cup sugar in a shallow dish. Add the zest and toss in the sugar to coat. Spread on a baking sheet lined with parchment paper to set, about 30 minutes.
NOTE: You can reserve the orange-infused sugar syrup for sweetening tea or coffee, or even drizzle it on pancakes.
To assemble the torte:
- Remove the two cakes from the freezer. Using a long serrated knife, slice each lengthwise into two layers. Place the reserved strip of parchment paper in the bottom of one of the loaf pans used for baking the cakes, then place one cake layer on top of the paper in the pan. Spread with enough orange curd to make a layer about ¼-inch thick. Fill a pastry bag, fitted with a large round tip, with chocolate mousse. Pipe a layer of mousse on top of the curd, then gently top that with another layer of cake. Repeat the filling layers, topping with a third cake layer. Cover with plastic wrap and pop in the freezer for at least an hour or overnight.
- After removing the torte from the freezer, use a knife to loosen the sides from the pan and then lift it out with the parchment paper. Place it on a platter and trim with a sharp knife until you have nice straight sides and ends. (Reserve cut pieces for snacking!) Cut strips of parchment paper the same length of each of the sides of the torte, and slide them halfway under the torte to keep the platter clean. Pour the cooled ganache over the torte so that it drips down the sides, spreading and smoothing it with an offset spatula as it drips. Continue until the entire torte is covered. Chill in refrigerator until ganache is set.
- Transfer remaining ganache to a mixer bowl and whip until it reaches spreading consistency. Fill a piping bag, fitted with a star attachment, with whipped ganache. Remove torte from refrigerator and carefully remove parchment strips from platter. Remove any excess ganache from base of torte. Pipe whipped ganache around bottom edge of the torte, and then pipe two rows of stars on top, leaving room in center for candied orange zest. Garnish with a row of zest in the center of the top surface, and sprinkle extra zest on the platter around the torte. Keep refrigerated until ready to serve.
NOTE: I found it was easier to slice the torte when it was frozen, so I wrapped it in plastic wrap and put it in the freezer. I then sliced the leftover torte and wrapped each piece in plastic wrap and stored them in the freezer.
*Before making the orange curd, zest the oranges first, setting aside 1 T. zest for the curd, and use the rest for the candied orange zest. Then juice the oranges for the curd.
Next week: Crème Caramel
Discover more from Here's the Dish
Subscribe to get the latest posts sent to your email.

Wow, it looks yum. I too looooove chocolate-orange combo. I even made the cookies which you can find on my blog.
http://www.smithasbakelove.com
LikeLiked by 1 person
Thanks! Your cookies look yummy, too. Especially with ginger added!
LikeLike
This looks delicious! I love the homemade candied orange peel.
LikeLiked by 1 person