
Mary Berry and Paul Hollywood made it clear in this episode that an ice cream roll is not the same as a Swiss roll filled with ice cream, though the two desserts share the same elements. As Mel Giedroyc explained in the voiceover: “Mary and Paul are expecting a perfect round of ice cream contained and sealed by the sponge.” And when Mat spread ice cream onto his sponge cake and rolled it up Swiss-roll style, Paul commented, “Did you mean to do a Swiss roll? … The idea was to roll it once to keep the ice cream in.” The brief for this showstopper challenge also included a layer of jam, which Sue Perkins said “binds the sponge to the ice cream.”

While I had never heard of an ice cream roll quite like the ones the Bake Off judges envisioned, after some research I concluded that their concept of an ice cream roll comes from a popular dessert sold in British grocery stores in the mid- to late 20th century, known as the Arctic Roll.
This frozen dessert featured a core of vanilla ice cream wrapped in a layer of sponge cake with a thin ripple of raspberry sauce in between. Invented in the 1950s by a lawyer named Ernest Velden, who emigrated from Czechoslovakia in 1939 and settled in the U.K., the Arctic Roll became so popular that it was licensed to Birds Eye, which began mass producing it in 1970. It had its heyday through the ‘70s and ‘80s, but sales began dropping off and Birds Eye stopped production of the frozen treat in 1997. In 2008, another brand, Lyons Maid, resurrected the Arctic Roll under the more generic name Ice Cream Roll, which may have prompted Birds Eye to bring back the original that same year. It has since been enjoying a nostalgic comeback.
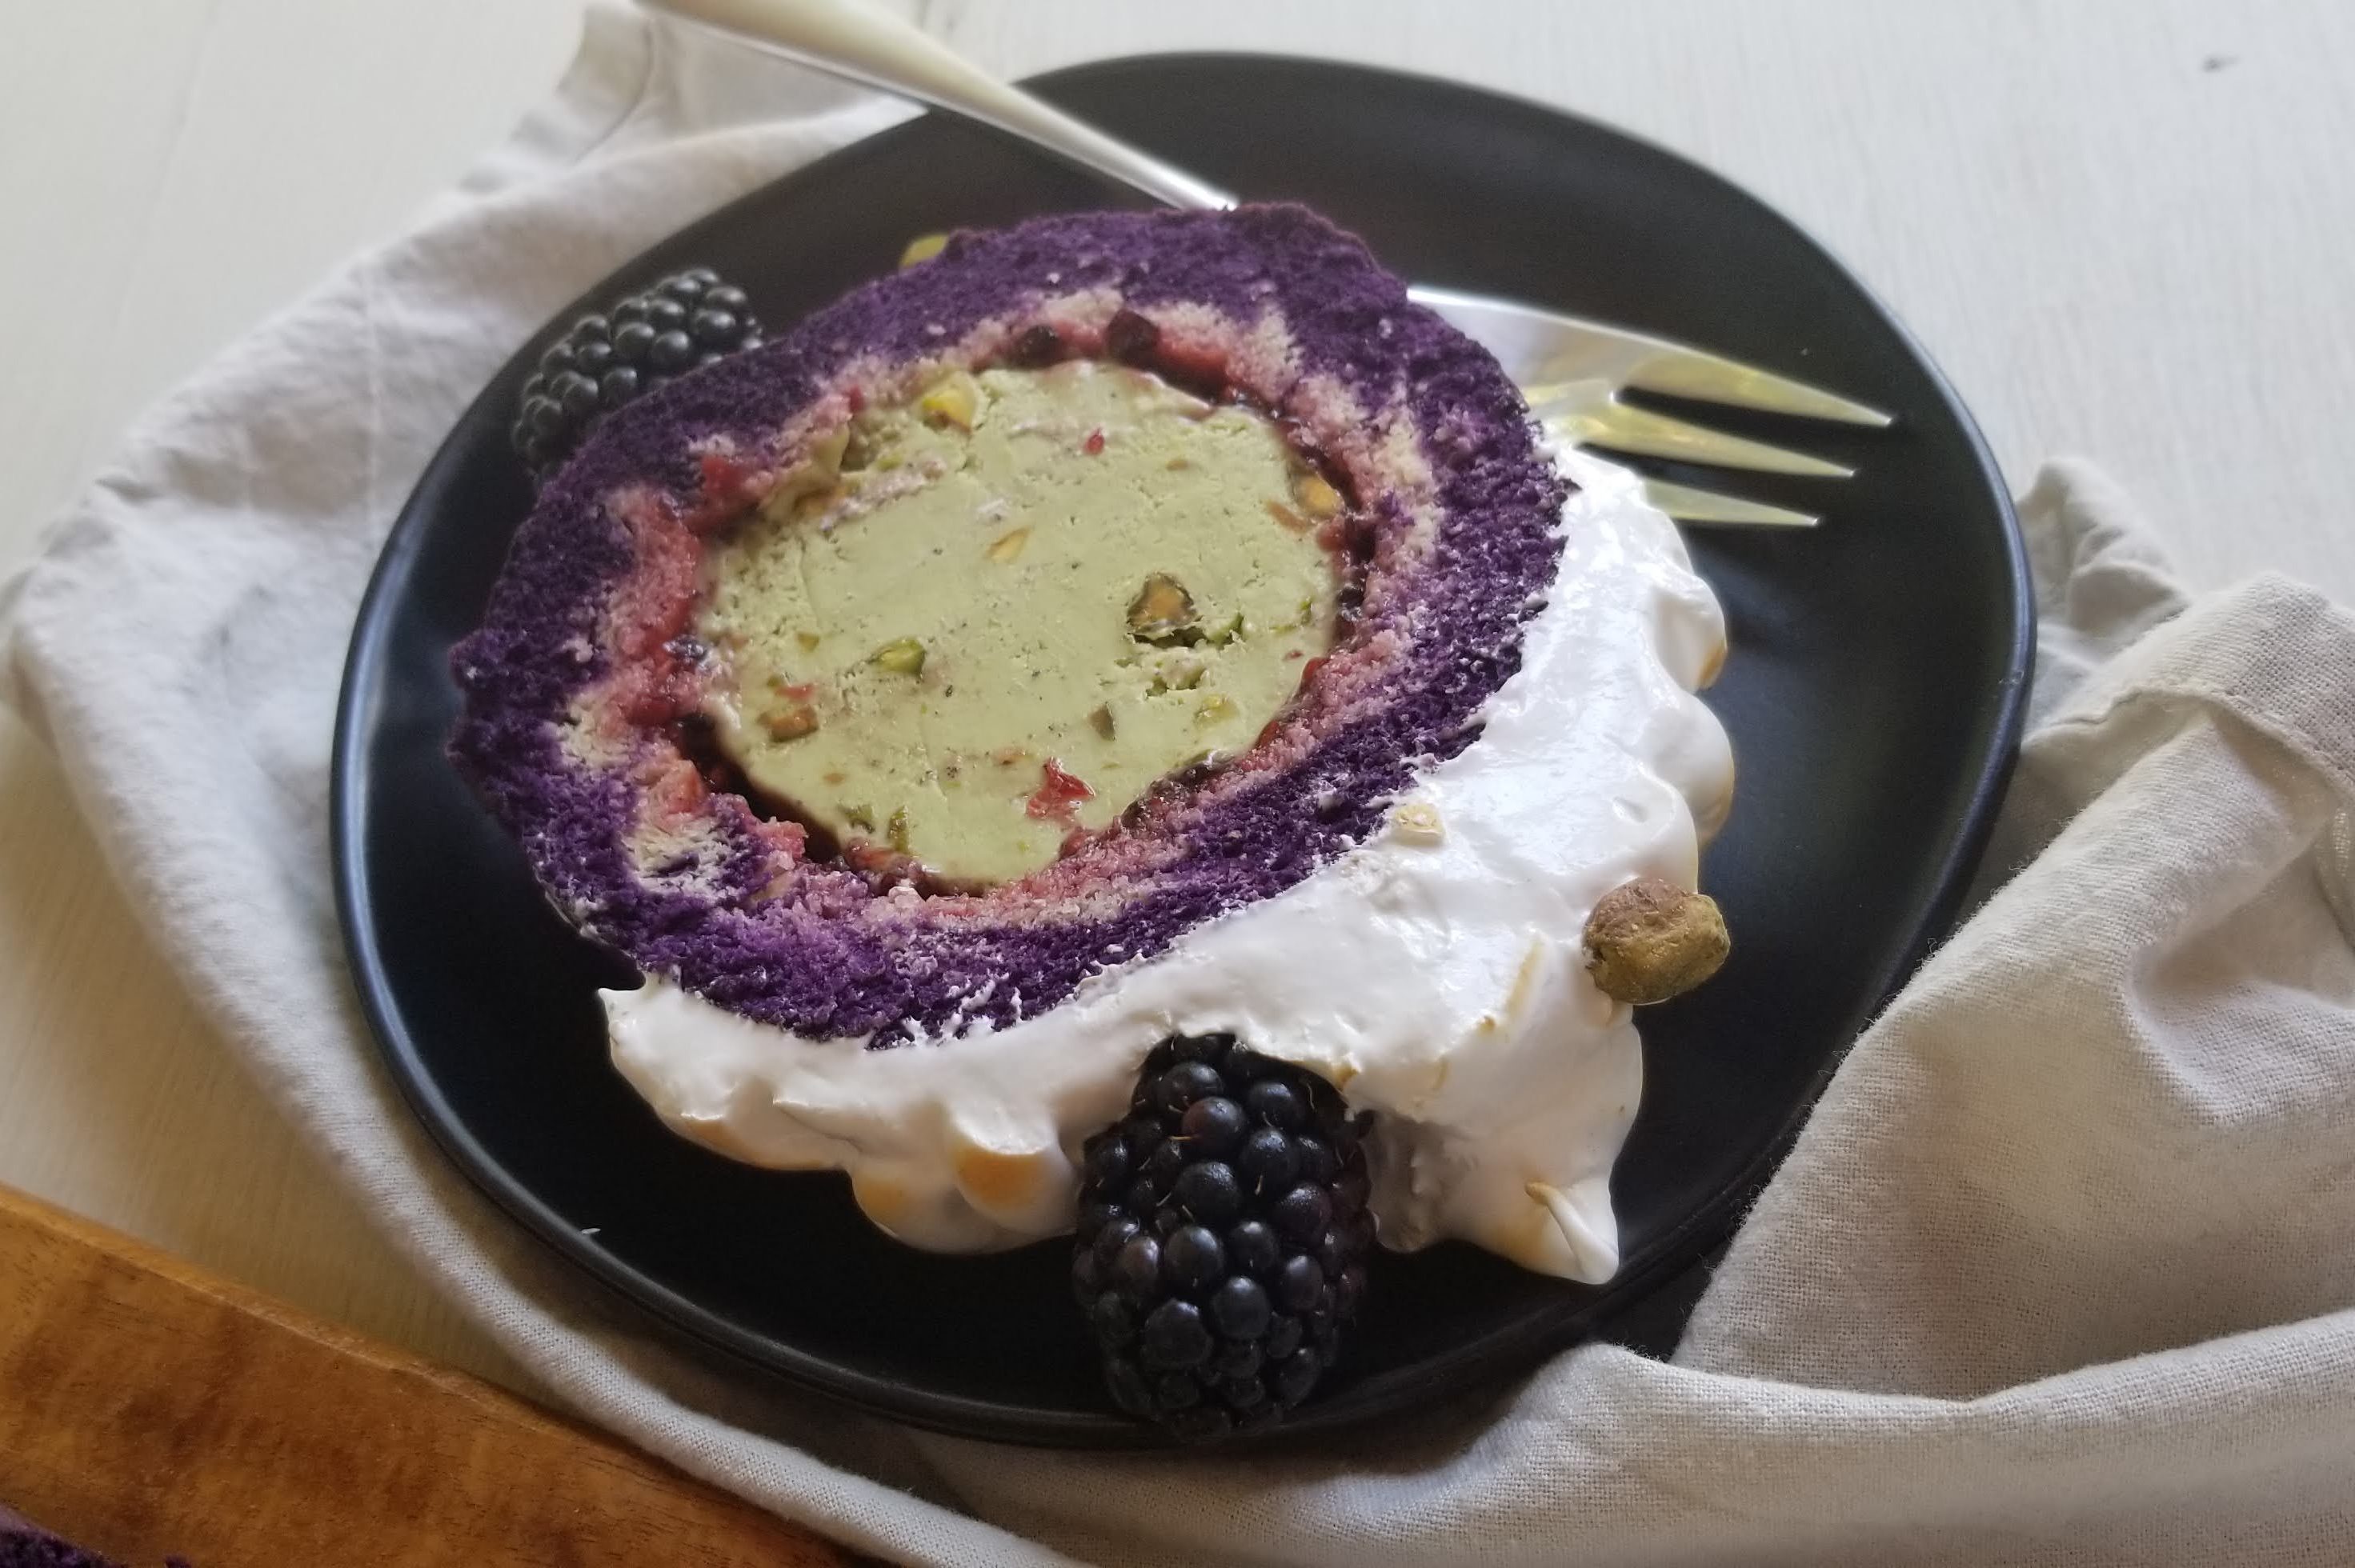
Because this was Alternative Ingredients Week (a.k.a. Free-From Week), the ice cream (and, ostensibly, the cake and jam as well) needed to be dairy-free. So I started off with a pistachio ice cream made with coconut milk and coconut cream instead of real cream. The coconut flavor, though mild, complements and enhances the pistachio.
In my search for new and different flavor combinations, I’ve been wanting to try ube, a purple yam popular in the Philippines for both its bright hue and its mild, sweet flavor that’s been compared to both vanilla and pistachio. It’s commonly used in breads and desserts, but has been sweeping social media in everything from ice cream to lattes. Having never tried it before, I thought I’d start small by adding ube extract (available on Amazon) to the cake part of my ice cream roll.

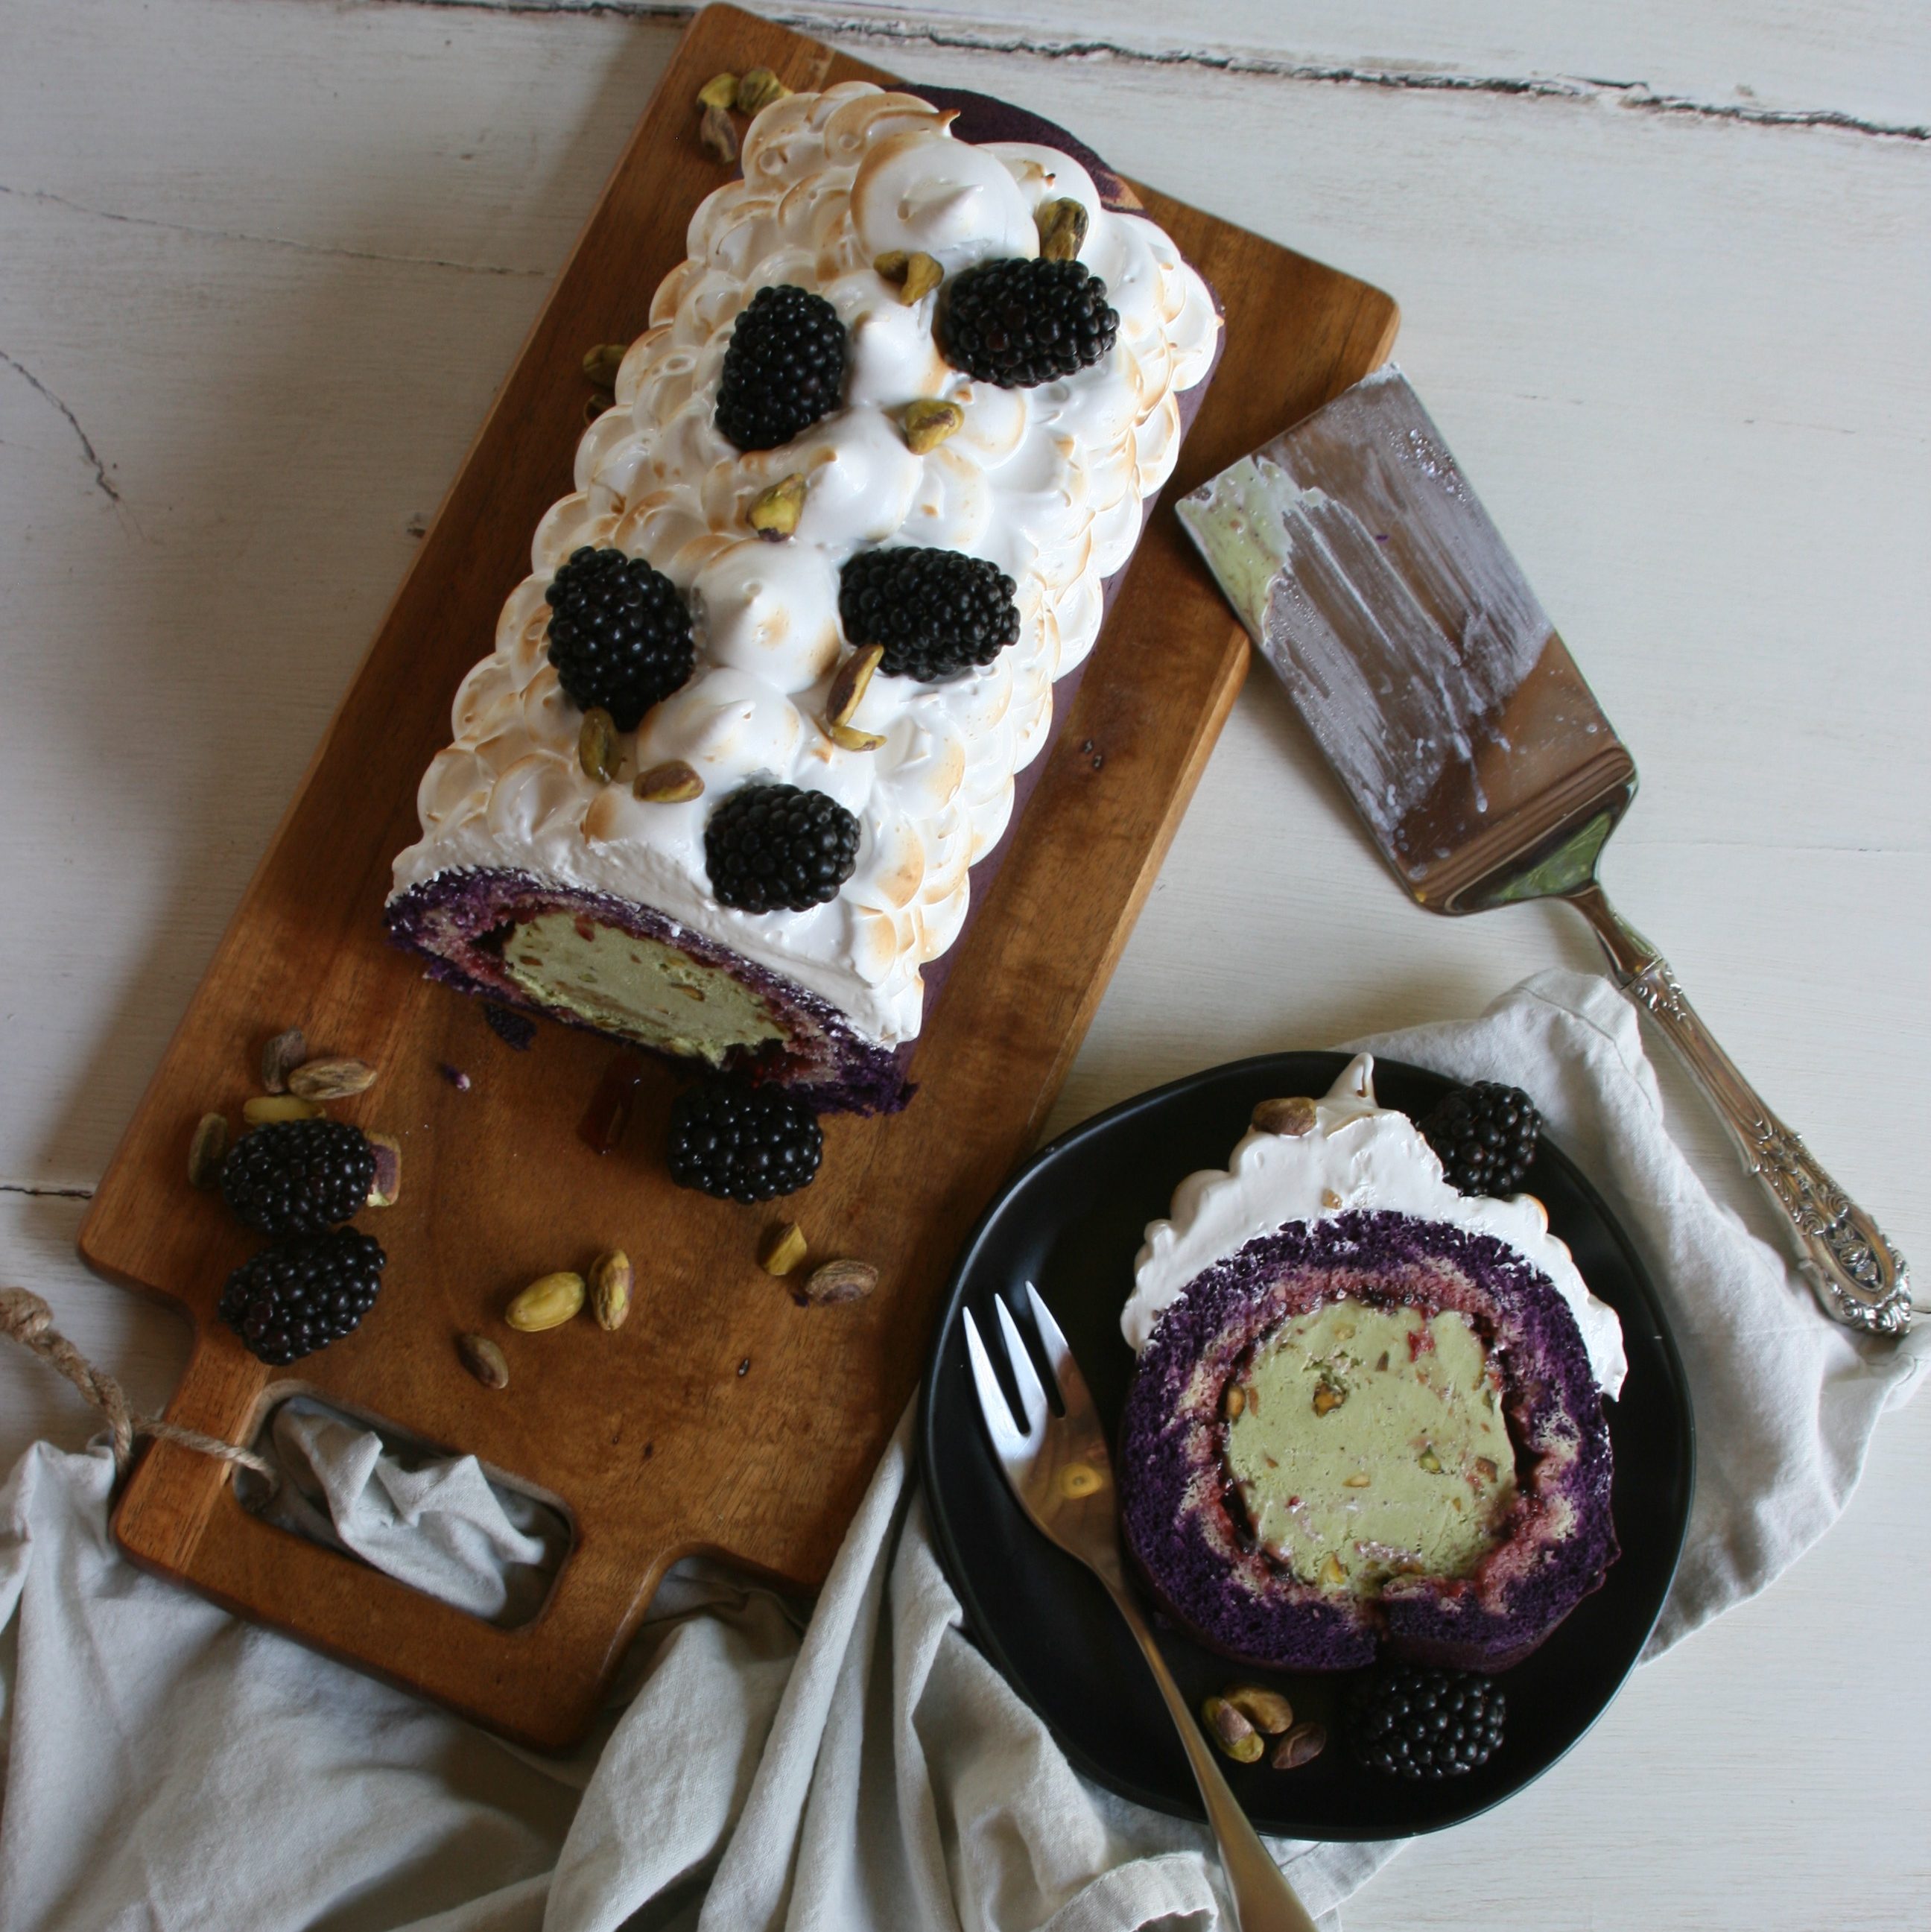
Another thing I’ve been wanting to try is making a hurricane Swiss roll, which involves a technique of marbling two (or more) colors of cake batter together so that, after it’s baked, rolled up and sliced, it makes a pattern that looks like a swirling hurricane on a radar screen. An Instagrammer I follow, @seeyenbakes, makes some really fantastic ones, which I hope you can see here and here. So I decided to try a purple and white hurricane sponge for my cake layer. (For a demonstration of this technique, check out this video. Skip to about 3:30 just to see the marbling technique.)
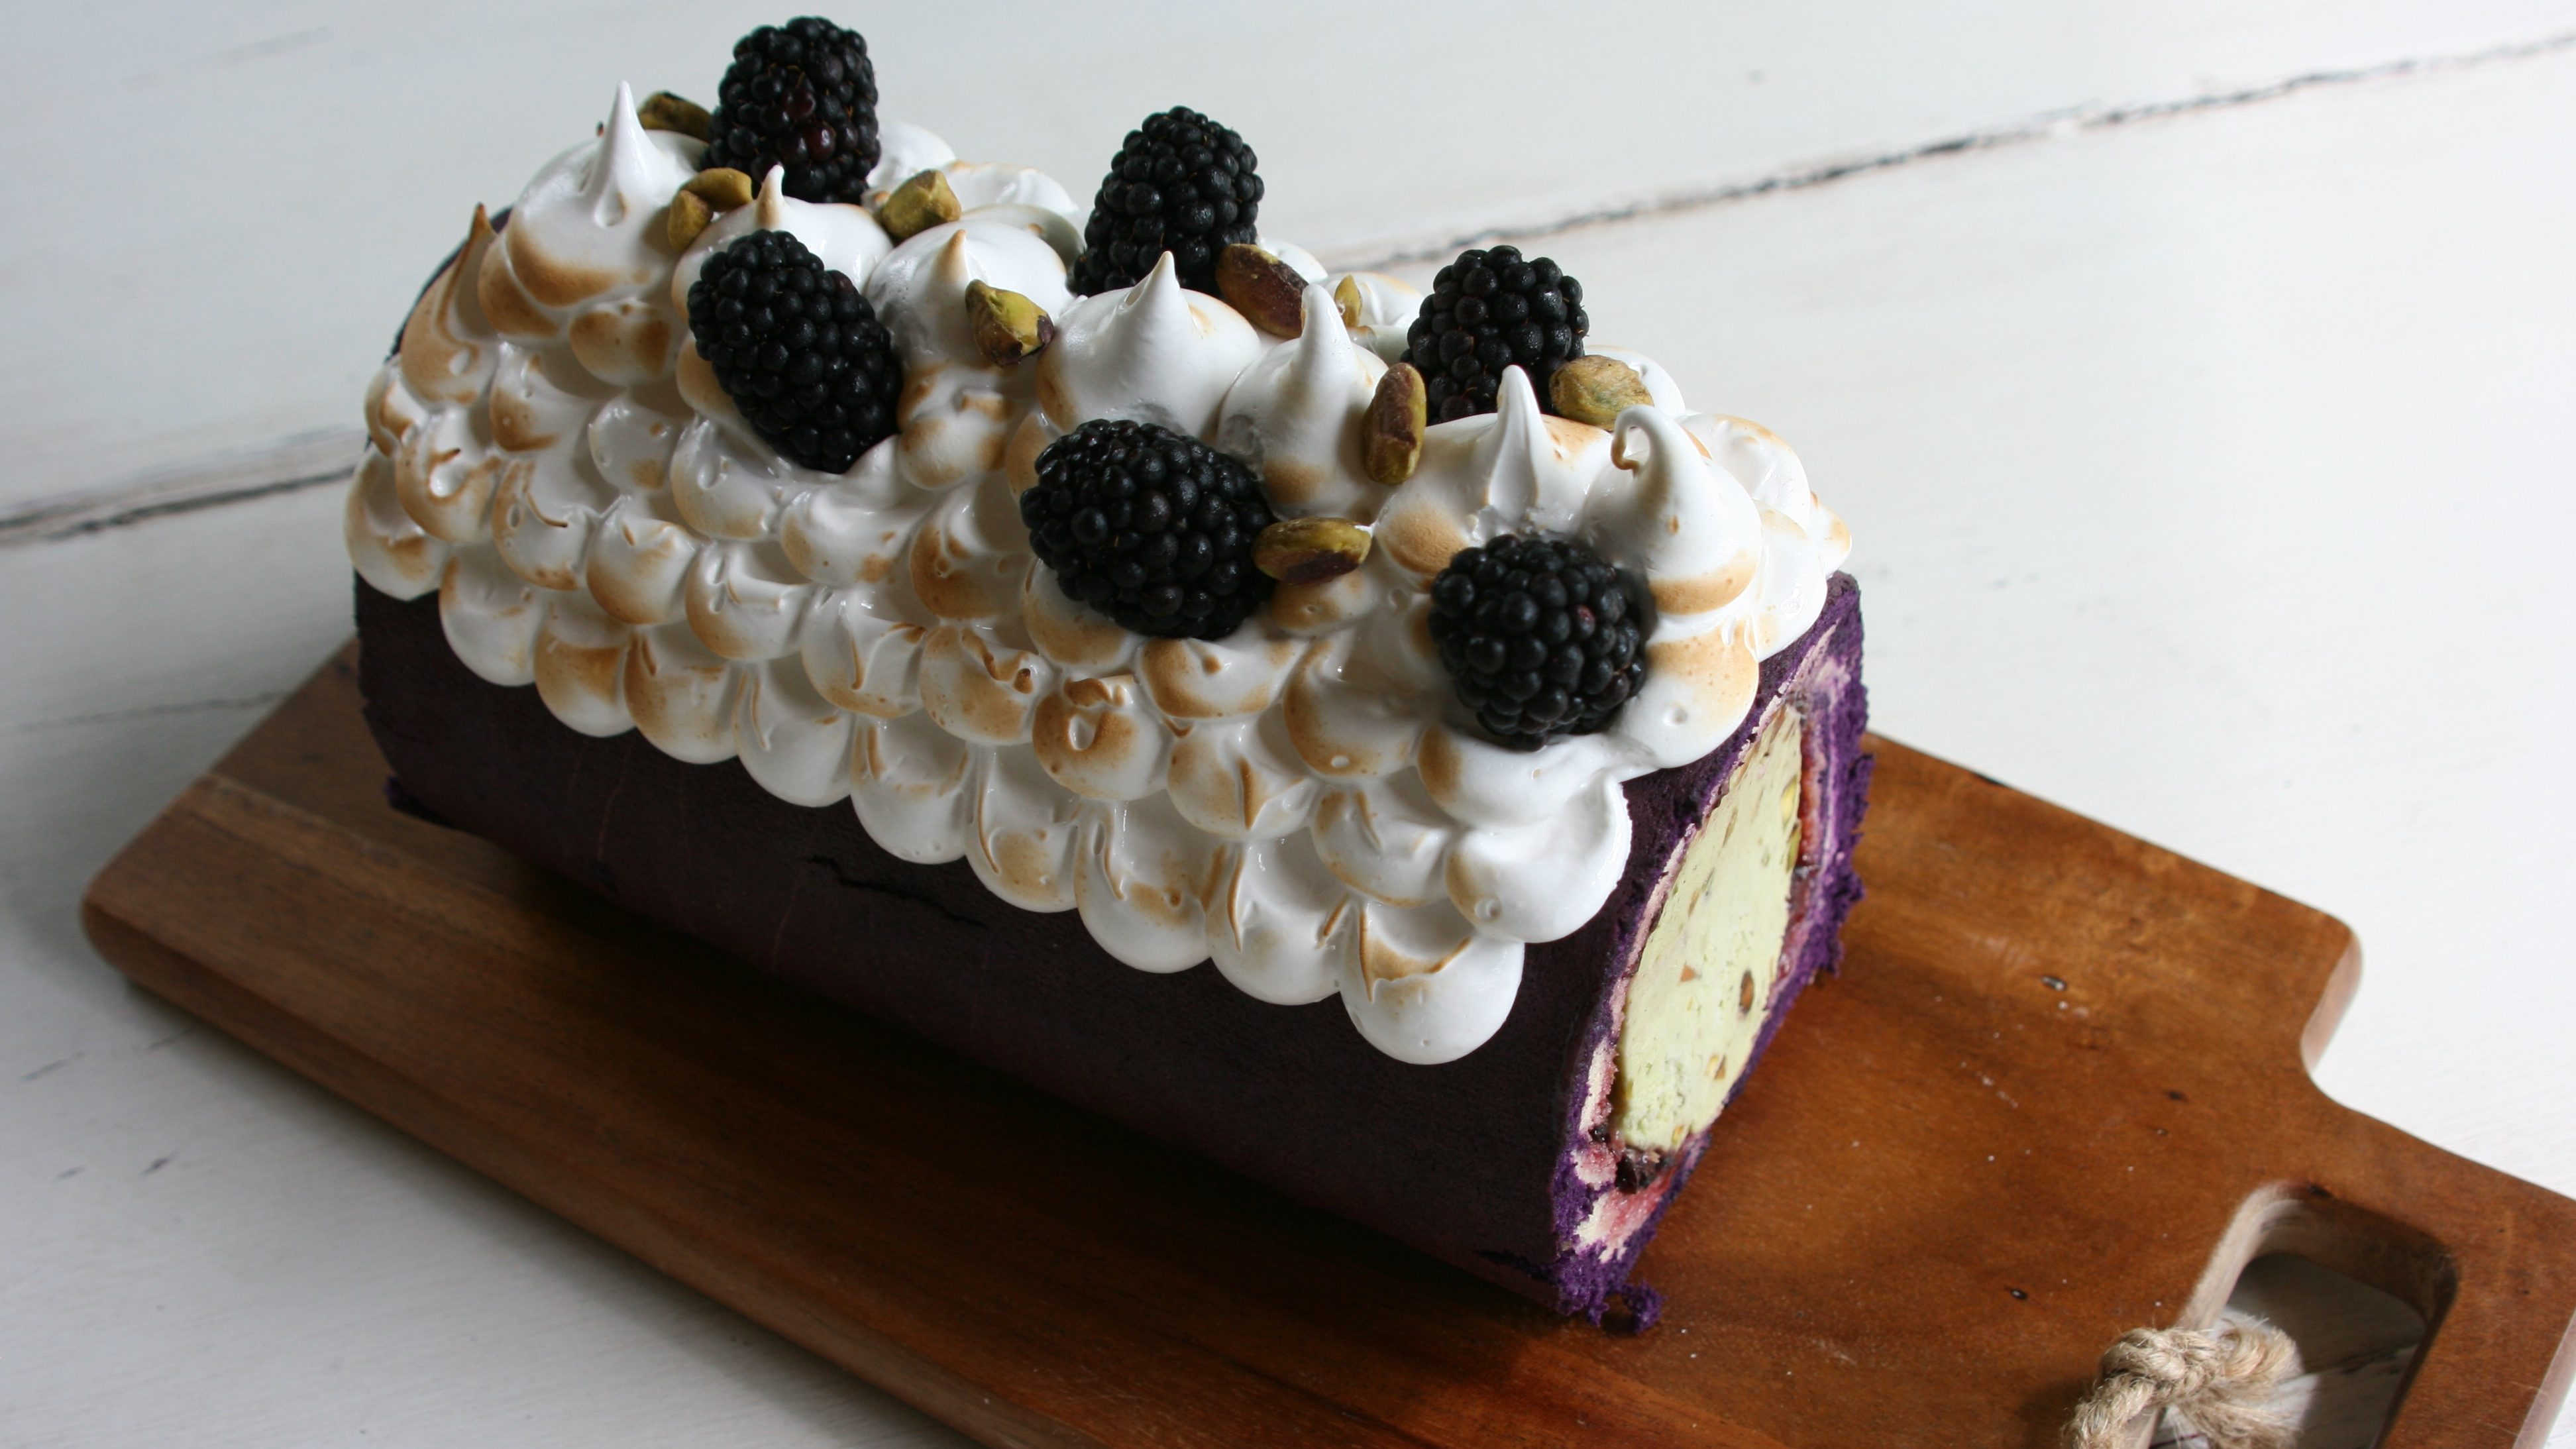
To continue the purple theme, I sandwiched between the cake and ice cream a layer of blackberry jam. And to top it all off, I piped on a creamy Swiss meringue and then toasted it with my kitchen torch to give the whole thing an elegant, Baked Alaska vibe. All in all, it makes a colorful dessert fit for a kids’ party or any fun occasion.
Frozen desserts are perfect for making ahead. So like many of my bakes, I spread this one out over several days to make it easier. Here’s my schedule:
- Day 1: Make jam and churn the ice cream. Let ice cream harden in the freezer for an hour or so before molding it into a cylinder and placing it back in the freezer overnight.
- Day 2: Make cake and let it cool, then spread with jam and wrap it around the ice cream. Leave in freezer overnight.
- Day 3: Make meringue, decorate, and serve.
My ice cream roll was a great hit. It’s very colorful, and all the flavors go well together. The hurricane design, for my first attempt, came out well. I was excited to share this with my oldest daughter, who loves ice cream and is something of an aficionado, having worked in multiple ice cream shops. I wouldn’t be seeing her for a few days, so I popped the leftovers in the freezer, and when I got it out the day she arrived, I was pleased to see that the meringue had held its shape and was still soft and marshmallowy. So you could easily make this dessert, meringue and all, a day or two before you plan to serve it to your guests.

Ube Hurricane and Coconut-Pistachio Ice Cream Roll
Ice cream recipe adapted from ASpicyPerspective.com
Cake recipe adapted from TheUnlikelyBaker.com
Credit for meringue: SimplyRecipes.com
For the blackberry jam*:
For the ice cream:
- 1½ c. full-fat coconut milk
- ½ c. coconut cream
- 1/3 c. sugar
- 1/8 t. salt
- ½ c. pistachio paste
- 1½ t. almond extract (or to taste)
- ½ c. pistachios, chopped and toasted (reserve a few whole nuts for garnish)
For the hurricane roll:
- 1 c. cake flour
- ½ t. baking powder
- ¼ t. salt
- 6 egg yolks (room temp.)
- 2 t. maple syrup
- 2 t. ube extract
- 2 T. water (room temp.)
- ½ c. sugar
- 1/3 c. canola oil
- 6 egg whites (room temp.)
- 1/3 c. sugar
- ½ t. cream of tartar
For the Swiss meringue and decoration:
- 4 large egg whites
- Pinch of kosher salt
- 1 c. superfine (baker’s) sugar
- 2 t. vanilla extract (opt.)
- 6 whole blackberries
- A few pistachios
Directions
- To make the jam, place berries in a large stainless or enamel saucepan. Bring to a full boil over high heat, mashing berries with a potato masher as they cook. Add lemon juice and boil hard for 1 minute, stirring and mashing constantly.
- Add sugar and return to a boil. Cook, stirring constantly, until mixture begins to look syrupy and thickens slightly, about 5 minutes. Remove from heat and test for doneness: An instant-read or candy thermometer should register 220°F, and the mixture should coat the back of a spoon. If you run a finger through the jam on the back of the spoon and the jam doesn’t run and fill in the gap, it’s done. Otherwise, return to the heat for another 1-2 minutes and test again. Don’t worry if it’s not thick enough; it will thicken as it cools. Transfer to a heatproof jar and cool to room temperature, about 2 hours. Cover with a tight-fitting lid and refrigerate.
- To make the ice cream, place coconut milk, coconut cream, sugar and salt in a blender and puree until smooth. (If the mixture is very smooth without any lumps, it’s okay to churn without heating. If there are ANY chunks of coconut cream, you’ll need to warm the mixture over medium heat until smooth, stirring constantly.) Stir in pistachio paste and almond extract and chill the mixture for about an hour before churning.
- Once the mixture is cold, place the frozen bowl of the ice cream maker into the machine and turn on. (Check instruction manual of ice cream maker for proper method.) Pour the smooth, cold ice cream mixture into the machine. Churn for 20-25 minutes, adding nuts near the end, according to the machine’s instructions.
- When ice cream is about soft-serve consistency, scoop into a separate container and transfer to freezer to harden for at least an hour. When it’s firm enough to hold its shape, but still moldable, scoop it out onto a piece of plastic wrap or parchment paper and mold into a cylinder, about 8-10 inches long. Roll it up in the parchment or plastic wrap and freeze overnight.
- To make the cake, preheat oven to 350°F. Grease the bottom of a 10×15-inch jelly roll pan, then line it with parchment paper. Sift together flour, baking powder and salt into a medium bowl and set aside.
- In the large bowl of an electric mixer, whisk together egg yolks, maple syrup, water and sugar on high speed until thick and well-incorporated (about 8-10 minutes).
- In another mixer bowl, using a clean whisk, beat egg whites with cream of tartar on low-medium speed until foamy. Gradually add the sugar, a tablespoon at a time, until it reaches stiff peaks. Add half the meringue mixture into the egg yolk mixture and gently fold until well blended. The batter should be light and airy.
- Add flour mixture to batter in three equal parts, gently folding after each addition, until well combined.
- In a small microwave-safe bowl or measuring cup, microwave the oil in 10-second increments until the oil is warm, but not hot, to the touch. Add about ¼ cup of batter to the oil and mix until well-blended; then add the oil mixture into the rest of the batter and fold until fully incorporated. Add the rest of the meringue to the cake batter and fold in gently.
- Divide batter between two bowls and gently fold ube extract into half the batter. Pour the white batter into the prepared pan, spreading it to the edges, keeping the thickness as even as possible. Transfer the purple batter to a piping bag fitted with a 1/2-inch plain tip, and pipe the purple batter over the entire surface of the white batter. Smooth it with an offset spatula or dough scraper to make it as even as possible.
- Use the handle of a spatula or spoon to draw vertical lines from one end of the pan to the other, touching the bottom of the pan the whole time and not lifting the spatula, but turning it around when you get to the edge of the pan and going back, like swimming laps in a pool, about half an inch apart, until you get to the other end. When you reach the other end of the pan, make horizontal lines going across the width of the pan.
- Gently tap cake pan on the counter a few times to release air bubbles. Bake for 20-30 minutes or until cake springs back when pressed gently and toothpick comes out clean.
- While cake is still warm, run a small, sharp knife around the edges of the pan; then place a clean, damp tea towel over the cake and a cooling rack on top, and carefully invert the cake onto the tea towel. Lift the pan off of the cake and peel off the parchment. Trim the edges. Roll the cake up inside the tea towel and place it on the counter, seam-side down. Allow the cake to cool completely before unrolling and filling it.
- When cake is completely cooled, unroll it gently and spread a thin layer of jam over the inside. (This should be the white part of the cake. The purple should be on the outside.) Remove ice cream cylinder from freezer and place it at one end of the cake. Roll the cake around the ice cream, trimming the end off so that it just fits around the ice cream. If the ice cream hangs out the ends, trim it to fit, as well.
- To make the meringue, fill a saucepan with 1-2 inches of water. Bring it to a simmer over medium heat. In the heatproof bowl of an electric mixer, combine the egg whites, sugar and salt.
- Place the mixing bowl over the pot of simmering water, making sure the water doesn’t touch the bottom of the bowl. Continuously but gently stir the egg whites over the heat, until the mixture reaches 160°F.
- Transfer bowl back to the mixer fitted it with a clean whisk attachment. Beat the egg whites on medium-low speed until foamy, about 2 minutes. Gradually increase the speed and beat until meringue reaches stiff peaks that droop only slightly when you lift the whisk out of the bowl, and the bottom and sides of the bowl no longer feel warm to the touch, about 4 minutes. Add vanilla extract and beat a few seconds more to mix it in.
- Remove cake-and-ice-cream roll from freezer and place on a serving platter. Transfer meringue to a piping bag and use it to decorate the ice cream roll. If desired, use a kitchen torch to toast the meringue to a light brown. Top with blackberries and pistachios.
*Makes 1 pint of jam. You will have quite a bit left over. It will keep in the fridge for a couple weeks or in the freezer for several months.
Up next: Frangipane Tart
Discover more from Here's the Dish
Subscribe to get the latest posts sent to your email.
