
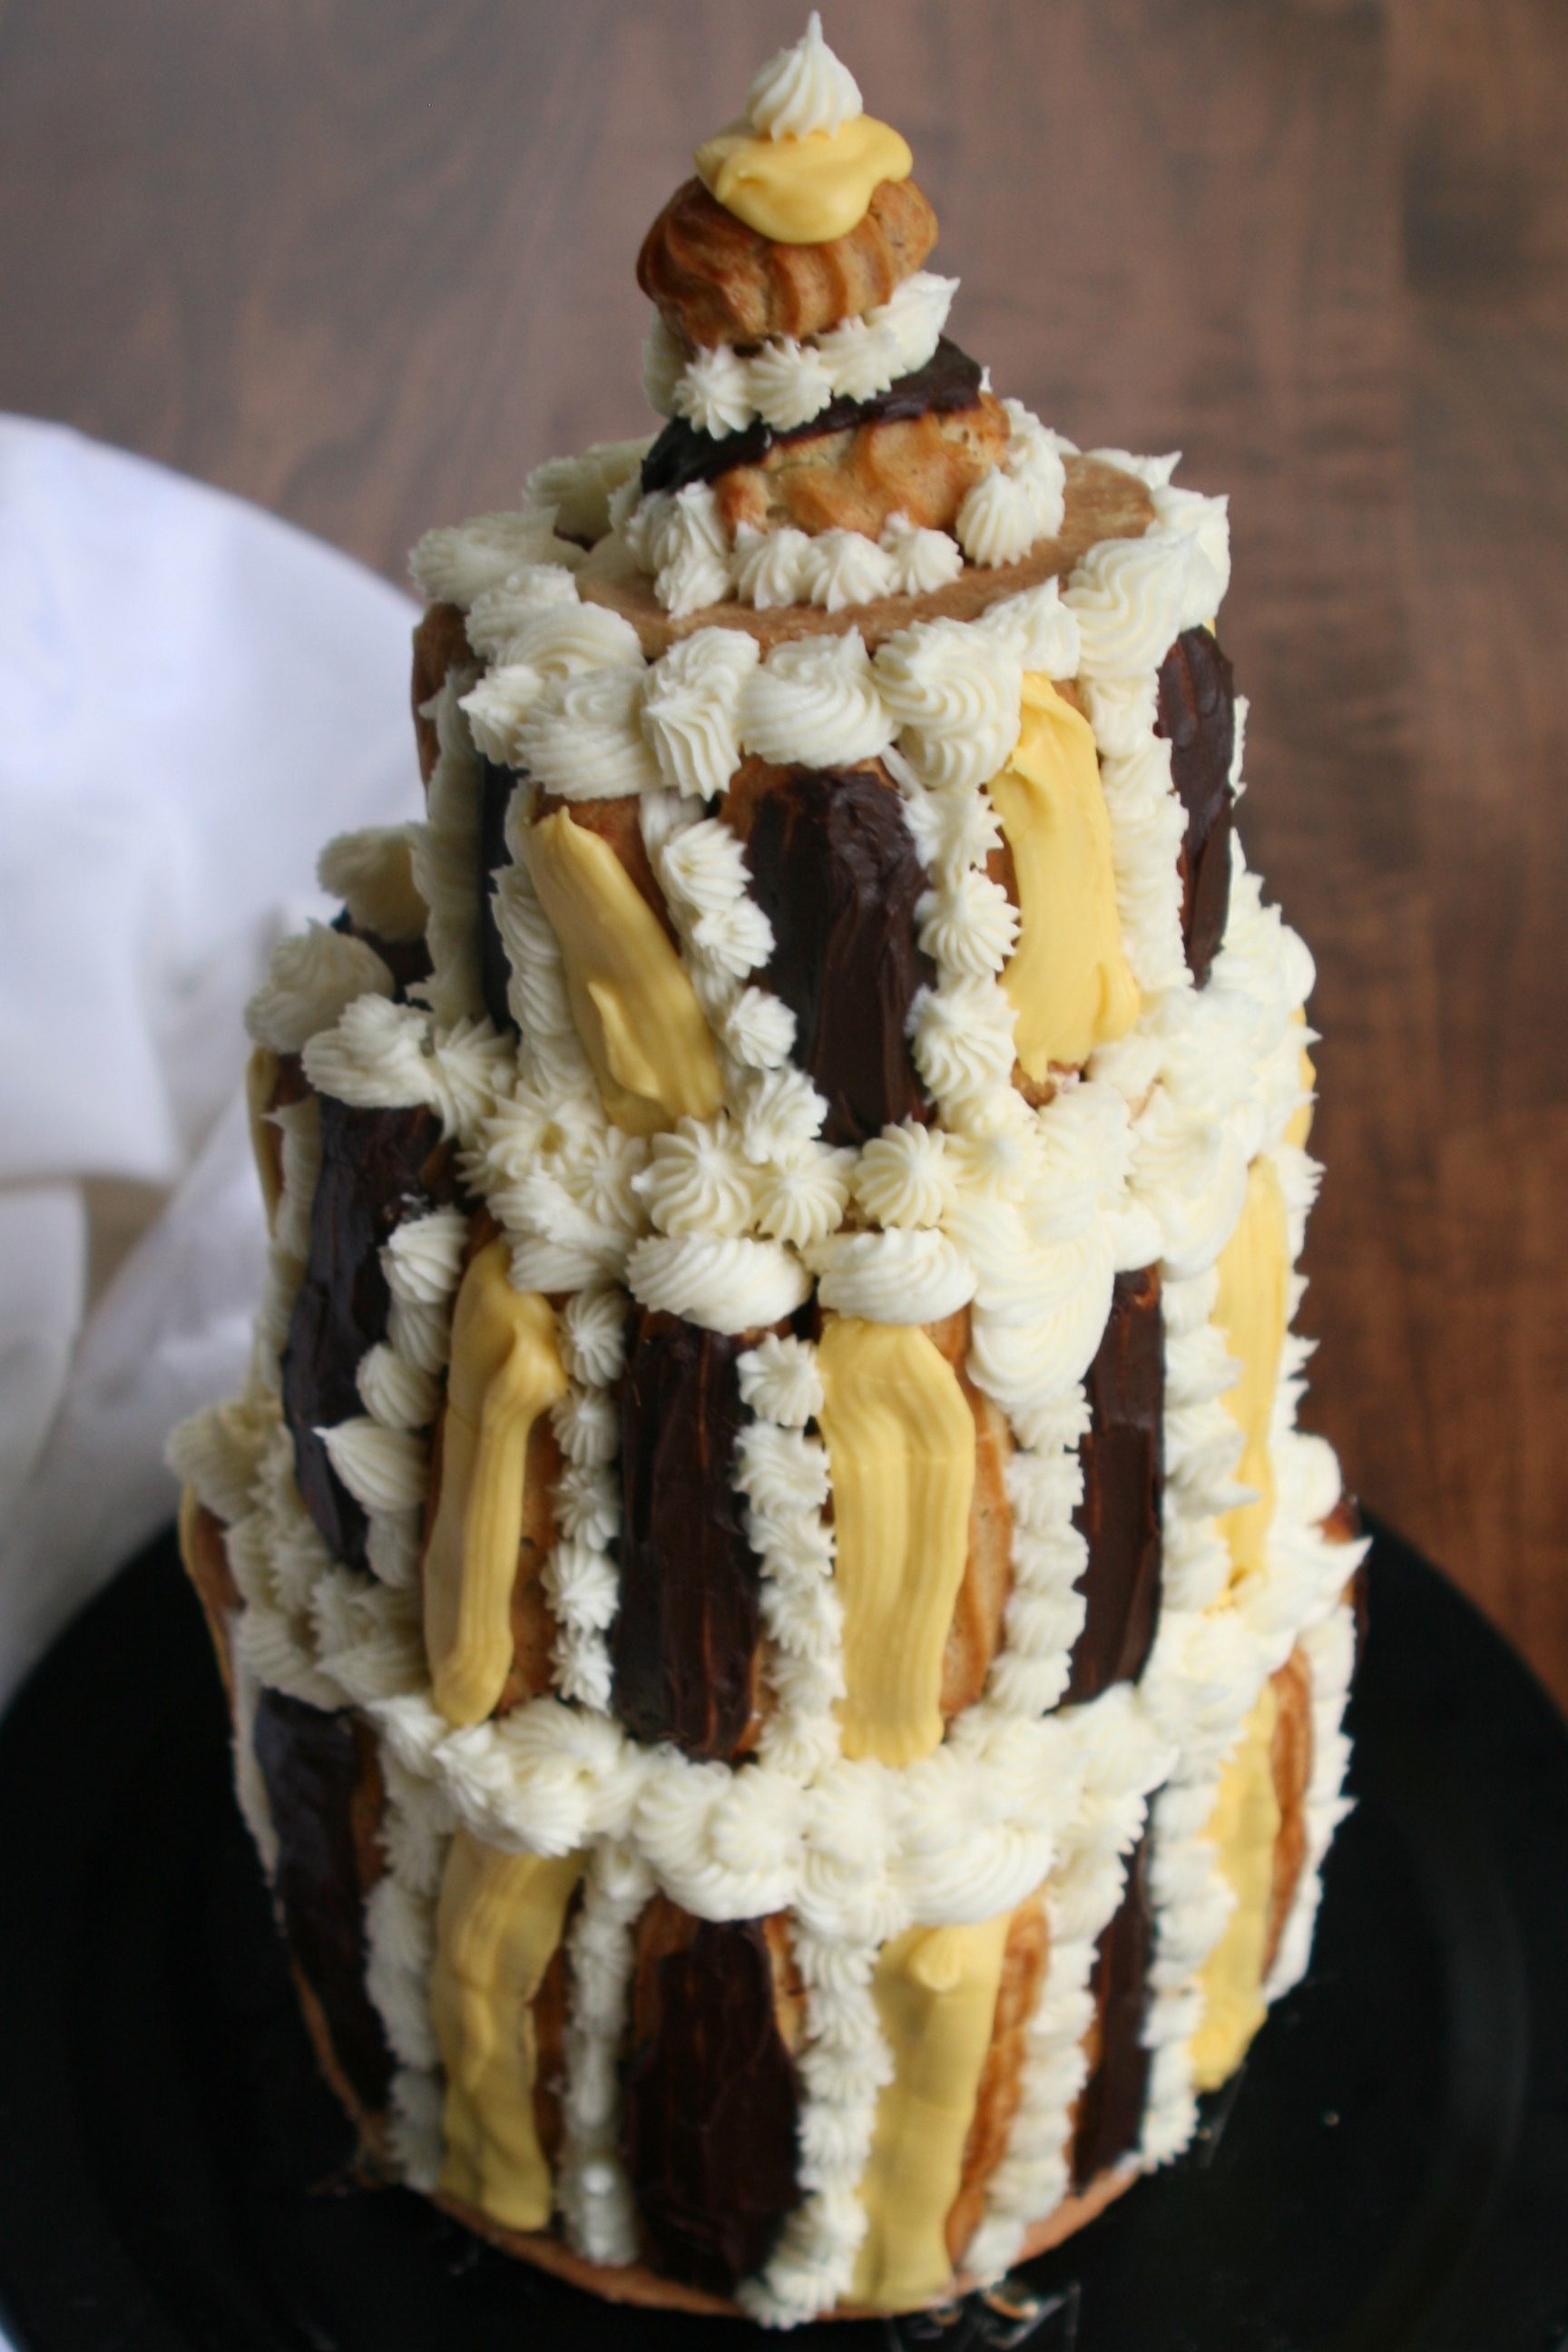
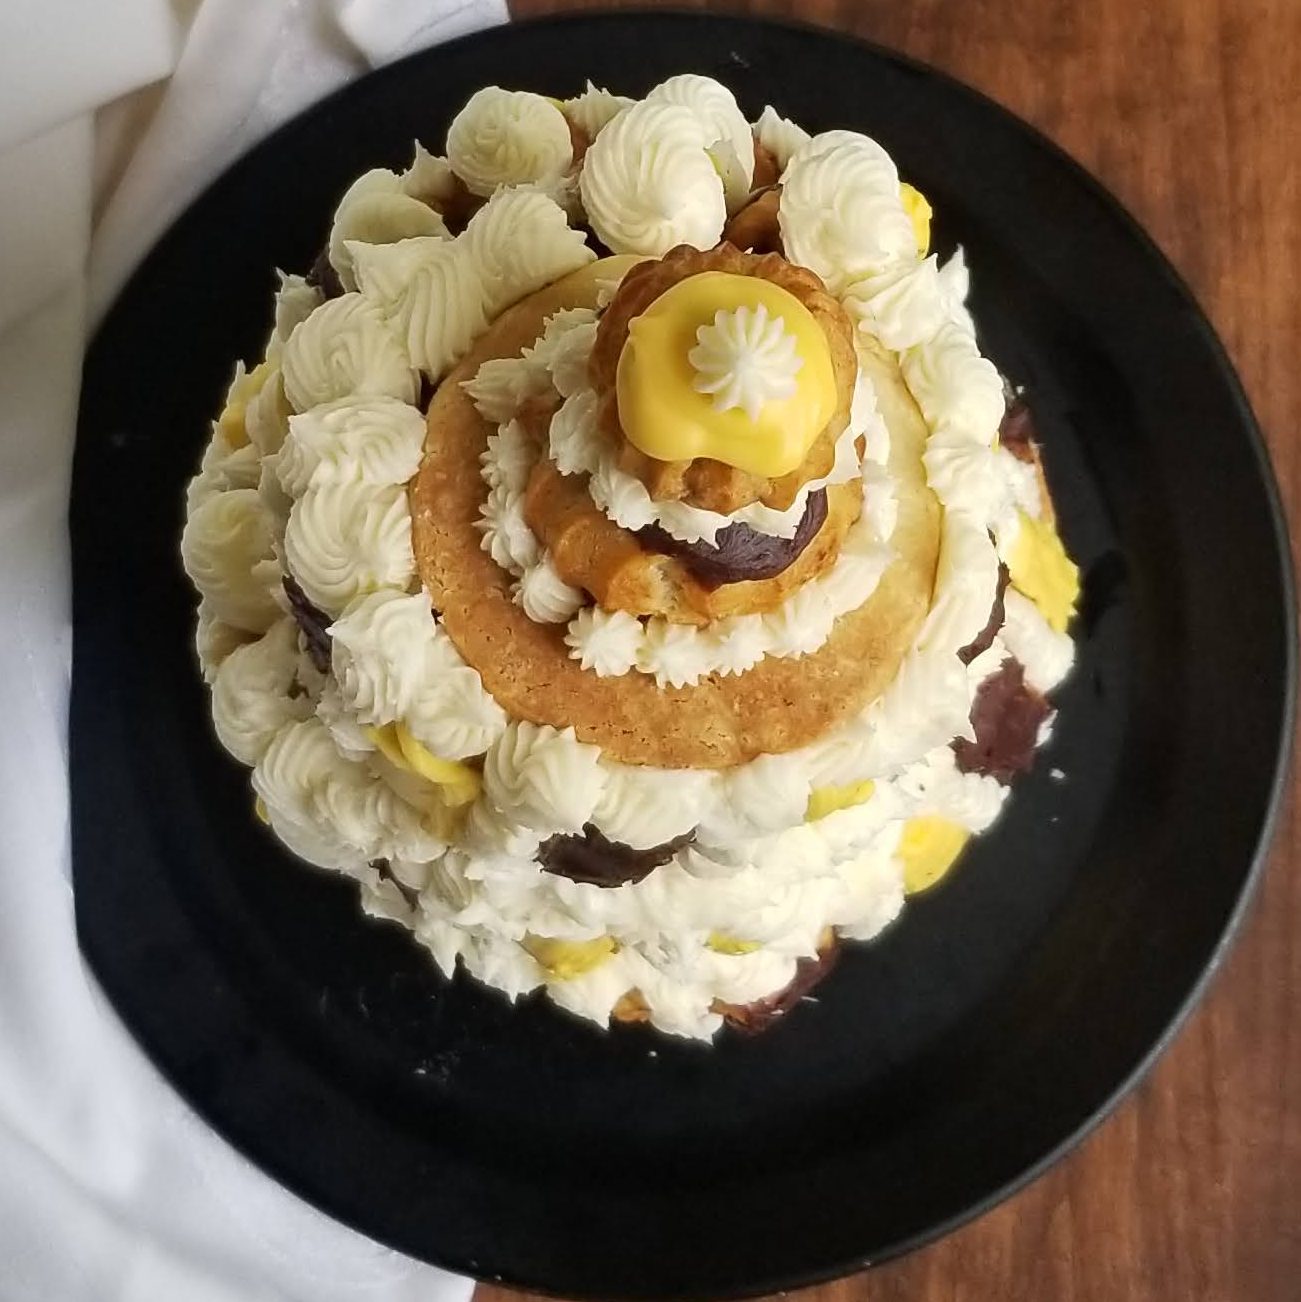
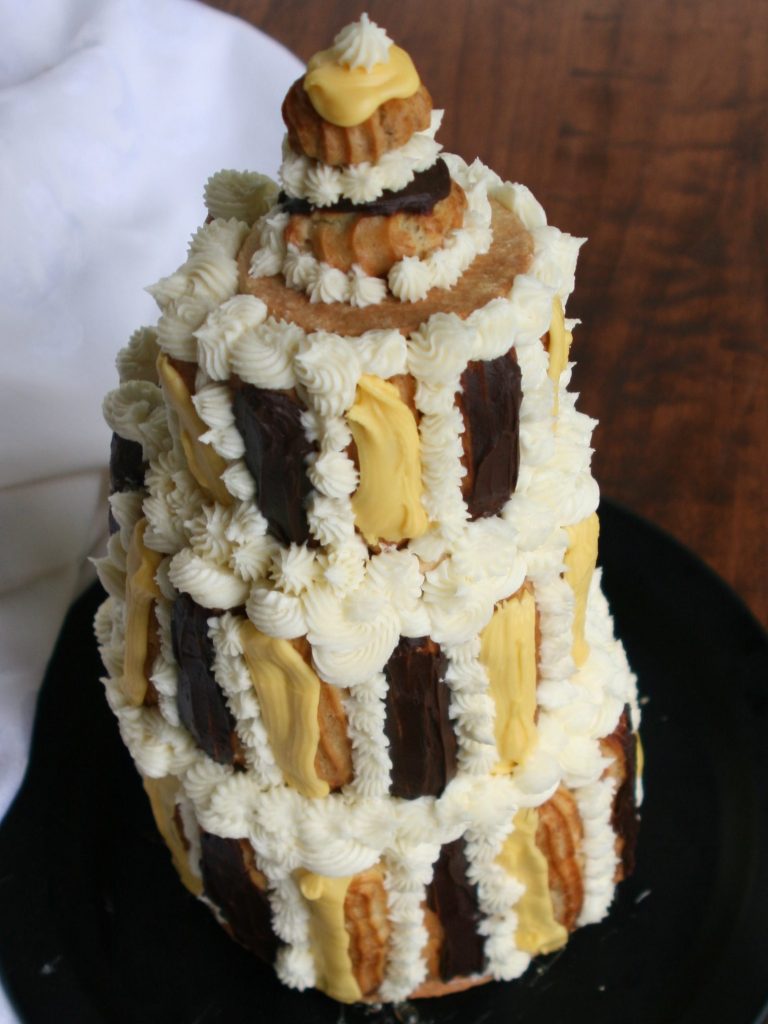
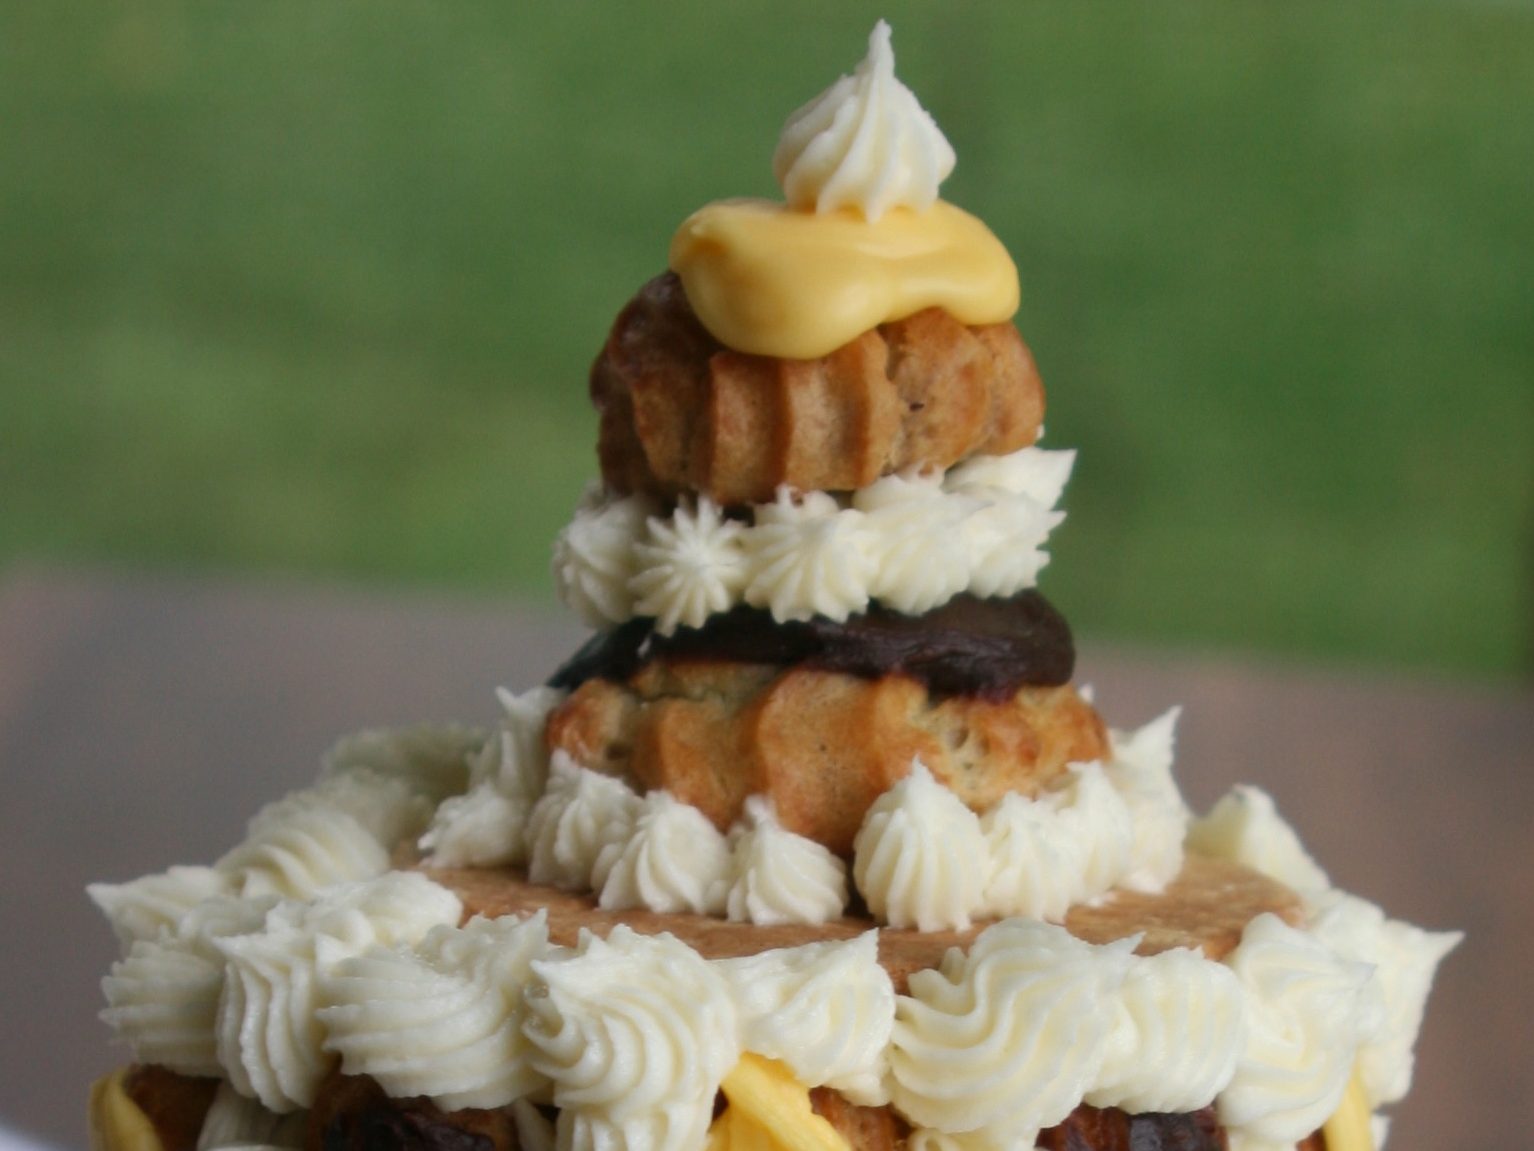
I’ve made religieuses before. Religieuse a l’ancienne, however, takes that technical challenge to a whole new level. Translated “old-fashioned nun,” the religieuse a l’ancienne is a towering feat of patisserie consisting of three tiers of éclairs stacked vertically, with disks of shortcrust pastry supporting each tier. On top are two cream puffs, one atop the other, representing the head of the ancient nun.
A few of the recipes for this bake that I found online (mostly in French — thank God for Google Translate!) called this a “forgotten pastry.” When it was popular, sometime in the latter half of the 19th century, it was often used as a centerpiece for parties or dinners, so it had to be able to stand up for two or three hours before it would have been devoured. So in this episode of Bake Off, the bakers in the Great White Tent had to assemble their creations, then leave the tent for a two-hour lunch break before coming back for the judging. You can imagine what happened.
Paul Jagger’s bottom tier collapsed completely, Nadiya’s partially collapsed, and Flora removed her top two tiers for the judges because she was afraid they would collapse (the tiers, not the judges). Only Tamal’s and Ian’s towering nuns still stood.
Watching this episode afforded some clues as to the secrets of success and pitfalls to watch out for. Both Tamal and Ian used bread flour (aka strong flour). Flora used a combination of bread flour and all-purpose flour (aka plain flour). Other tips offered along the way were to use a star nozzle when piping the éclairs to give them a sturdier structure, and to slightly overbake the choux pastry so the éclairs would be less likely to soften after being filled.
Fortunately, Paul Hollywood made a religieuse a l’ancienne on the corresponding Masterclass episode, so I could draw on his expertise for making and assembling this showstopper. I used his recipe for the choux pastry, sweet shortcrust pastry, caramel (to assemble the tower) and buttercream (to decorate and hide the flaws!).
Since the éclairs in the tower are supposed to alternate flavors, I chose blueberry with lemon icing and cherry with chocolate icing. For the blueberry-flavored pastry cream, I followed this recipe, and adapted it for the cherry filling using this recipe for cherry coulis.
Because this is one of those big bakes, I split it into multiple days: On day 1, I made the shortcrust pastry dough. On day 2, I made the blueberry and cherry coulis. On day 3, I rolled out and baked the pastry disks. On Day 4, I made the pastry cream and the éclair shells. On day 5, I made the icings, filled the éclairs, made the caramel and buttercream, and assembled the religieuse a l’ancienne.
I had read that you can make choux pastry dough ahead of time and keep it in an airtight container in the fridge before baking it. I also read that you can bake choux buns the day before and crisp them in the oven before filling them. I chose the latter. I didn’t want to risk the dough not rising because it was 24 hours old, and I theorized that reheating prebaked shells in the oven might make them stronger and able to stand up longer.

The shells did crisp up nicely, but I felt that they deflated slightly the second time in the oven — although this could have been my imagination. After making all the éclairs needed for my religieuse a l’ancienne, I had some choux dough left over, which I kept in the pastry bag inside a sealed glass jar in the fridge overnight, and when I baked it two days later (into profiteroles) they puffed up nicely, so now I know that that’s an option, too!

The hardest part, as expected, was assembling the tower. I made the caramel and started assembling the bottom tier. By the time I finished that part, the caramel was hardening in the pan. Paul’s recipe says to rewarm it gently, but when I put it back on the stove, it just crystallized. So I made a second (half) batch. That got me through the second tier before it crystallized, as well. So I made a third (quarter) batch. I didn’t quite finish the third tier when that caramel hardened also. I was done with making caramel, so the last few éclairs were attached with buttercream instead.
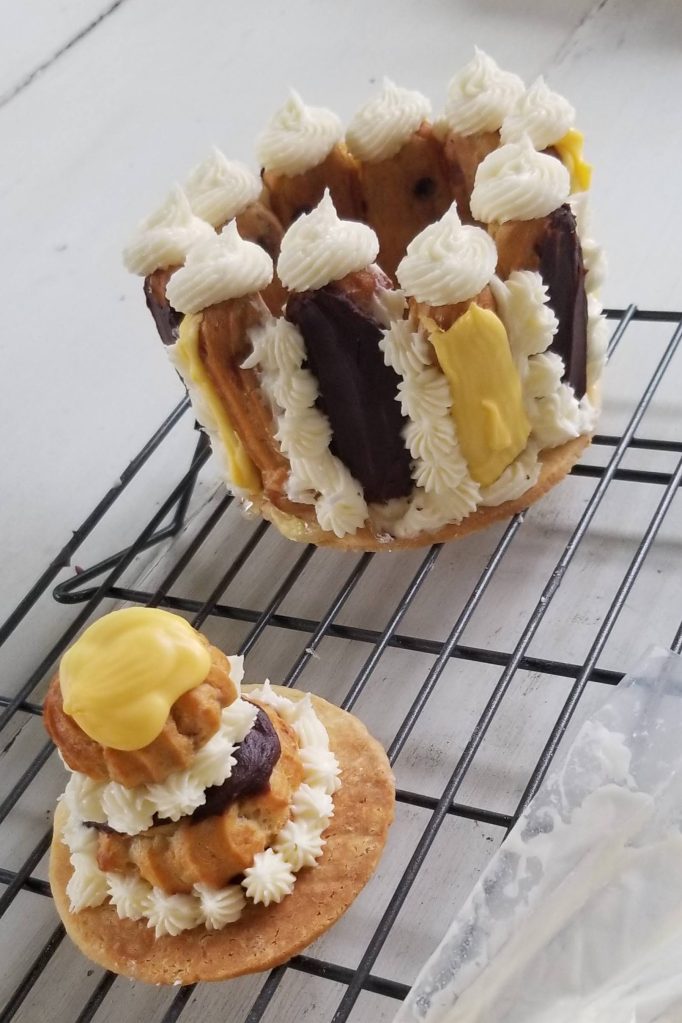
When it came time to stack the layers, I discovered another problem. Because the diameter of each shortcrust base is smaller than the one below it, the éclairs need to lean in slightly. Mine didn’t lean enough, so the bases balanced precariously on top of the éclairs. Especially the top tier. Also, I didn’t trim the tops of the éclairs to make sure each layer would be level — unlike some of the Bake-Off contestants, who used a level to make sure their tiers were perfectly even — so my religieuse a l’ancienne looked a lot like the Leaning Tower of Pisa.
Still, it was standing, and it stayed that way long enough for me to take some photographs. I left it on the table in my screen porch (where it was cooler than in the house) for a couple of hours while we ate dinner. (I was fortunate to have family over for my birthday so my husband and I would have help eating it.)
Unfortunately, the top tier sank into the center of the middle tier, making it look even more like a leaning tower. But it didn’t topple completely, and I was pretty proud that the bottom and middle tiers remained standing.

After dinner, we dug in. There’s really no elegant way to serve the religieuse a l’ancienne. You basically have to tear it apart. But the éclairs were still crispy, and the fillings and icings went well together. The only criticism I would have is that the blueberry and cherry flavors didn’t come through well enough.
As an architectural exercise, it was quite a challenge. I don’t know that I will ever make one again, but if you are adventurous enough to want to try it yourself, I’ve included all the instructions below. (I even included the breakdown of what I did each day, but you can break it up however you like.) On your mark, get set, … BAKE!!

Religieuse a l’ancienne
Credit for blueberry-lemon pastry cream: HollyHerrick.com
Credit for cherry coulis: DecoratedTreats.com
Credit for chocolate icing: BBCGoodFood.com
For the sweet shortcrust pastry:
- 1 1/3 c. all-purpose flour, plus extra for dusting
- ¼ c. ground almonds
- ½ c. chilled unsalted butter, cubed
- ¼ c. superfine (baker’s) sugar
- 1 large egg
For the blueberry-lemon coulis:
- 2 c. fresh (or 14 oz. canned) blueberries
- ¼ c. sugar
- 1 lemon, zested and juiced
- 3 T. water (if using fresh blueberries)
- Pinch of sea salt
For the cherry coulis:
- 12 oz. fresh sweet cherries (I used Bing cherries)
- ¼ c. sugar
- 2 t. lemon juice
- 1 T. cornstarch
- 6-10 T. water, divided
For the pastry cream:
- 3 1/3 c. milk
- 10 egg yolks
- 1 c. sugar
- 1 pinch salt
- 5 T. cornstarch
- 5 T. unsalted butter
- 4 t. vanilla
For the choux pastry:
- 7 oz. (14 T.) unsalted butter, cubed
- Pinch of salt
- 2¼ c. water
- 2 c. bread flour
- 4 large eggs, beaten (plus one more on standby)
- Powdered sugar, for dusting
For the lemon icing:
- 2 c. + 1½ T. fondant icing sugar*, sifted
- 5-7 t. lemon juice
- Yellow gel food coloring
For the chocolate icing:
- 3½ oz. semi-sweet chocolate
- 1¾ T. butter
- 1 T. powdered sugar
- 5 T. heavy cream
For the caramel:**
- 2½-5 c. superfine (baker’s) sugar
- 1-2 T. corn syrup
- 7-14 T. water
For the buttercream:
- 9 oz. (18 T.) unsalted butter, softened
- 3¼ c. powdered sugar
- 5 T. milk
Directions
- Day 1: To make the shortcrust pastry, stir the flour and ground almonds together in a large bowl. Add the butter and rub it in with your fingertips until the mixture resembles breadcrumbs. Stir in the sugar. Break in the egg and work it in with your fingers, bringing the mixture together to form a soft dough.
- Tip the dough onto a lightly floured surface and shape into a ball. Flatten the dough into a disk and wrap it in plastic wrap. Chill for at least 3 hours.
- Day 2: To make the blueberry coulis, bring blueberries, sugar, lemon zest, lemon juice, water (if using fresh berries) and salt to a simmer over high heat in a medium saucepan. Reduce heat to medium. Cook until blueberries begin to pop and soften, stirring occasionally, about 6-7 minutes total.
- Puree the mixture in a blender (or use an immersion blender) until very smooth. Return to the same pan, bring to a boil and reduce to a simmer until thickened and reduced to 1 cup. Refrigerate until thoroughly chilled.
- To make the cherry coulis, wash and pat cherries dry. Remove stems and cut cherries in half, removing the pits. Place pitted cherries in a saucepan with sugar and lemon juice. Add 4 tablespoons water. Cook over low heat until cherries soften, stirring constantly to prevent them from burning. Turn off the heat as soon as the fruit is soft. Remove from heat and leave to cool slightly.
- Transfer fruit to a blender or use an immersion blender and puree until smooth. Add another 2-4 tablespoons of water if needed. Pour the pureed fruit through a sieve back into the saucepan. Use the back of a spoon to press all the fruit through, leaving only the skins behind. Remember to scrape the bottom of the strainer to get all the cherry puree.
- Mix the cornstarch with 2 tablespoons water until smooth. Pour cornstarch solution into the coulis. Turn the heat on low and stir the mixture quickly. Continue to cook, stirring constantly, until it thickens. Turn off the heat and let the sauce cool before pouring it into a clean container. Refrigerate until ready to use.
- Day 3: Preheat oven to 375°F. Roll out the chilled pastry dough on a lightly floured surface to 1/4 inch thick. Using plates or cake pans as templates, cut out four circles that are 7 inches, 6 inches, 4½ inches and 3¼ inches in diameter, respectively. Place the pastry circles on a parchment-lined baking sheet. Cover pastry with another sheet of parchment and place another baking sheet on top of that. Bake for 12 minutes. Remove the top baking sheet and parchment and bake for another 10-15 minutes until pastry is golden brown and dry. Remove from oven and leave on baking sheet to cool.
- Day 4: To make the pastry cream, pour milk into a pan and heat over medium heat until it reaches a very low simmer, about 3 minutes.
- In a medium bowl, use an electric mixer to whisk the egg yolks on medium-high speed until they are thick and lemony in color, about 2 minutes. Sift together sugar, salt and cornstarch and add all at once to the egg yolks. Whisk on medium-high for another minute. The mixture will have a glossy sheen.
- Very gradually at first, drizzle a little of the warm milk into the egg mixture, whisking continuously. Slowly add the remaining milk, whisking the whole time, then pour the mixture through a sieve back into the same pan.
- Whisk the mixture vigorously by hand over medium-low heat. The pastry cream will start to thicken almost instantly. Bring to a boil and continue cooking for 1-2 minutes, or until it is thick enough to hold in a spoon, like a custard or pudding. Using a spatula, guide the pastry cream into a clean, glass bowl. Whisk in the butter and vanilla extract until well-combined. Cover with plastic wrap, pressing it onto the top of the custard to prevent a skin from forming. Refrigerate until chilled and set.
- To make the choux pastry, preheat the oven to 425°F. Line three baking sheets with parchment paper. On the first sheet, draw 16 lines 4½ inches long, spaced well apart. On the second sheet, draw 14 lines 3½ inches long, spaced well apart. On the third sheet, draw 12 lines 2½ inches long and two circles, one 1¼ inches in diameter and the other 1½ inches in diameter, spaced well apart. Place a silicone mat on top of the parchment, making sure you can see the lines through the mat. (Alternatively, turn the paper over so the pencil marks are underneath.)
- Measure and prepare all ingredients. Put butter, salt and water into a large saucepan. Heat gently until the butter melts, then bring to a boil. (Don’t let the liquid boil too long, or too much will evaporate.) Remove from heat and tip the flour into the pan. Beat with a wooden spoon to form a smooth ball of dough that leaves the sides of the pan clean.
- Return saucepan to the heat and cook for about 2-3 minutes while mixing vigorously. You’ll know it’s done when there’s a film of dough sticking to the bottom of the saucepan. (Also, if you stick a spoon in the dough it should stay upright.)
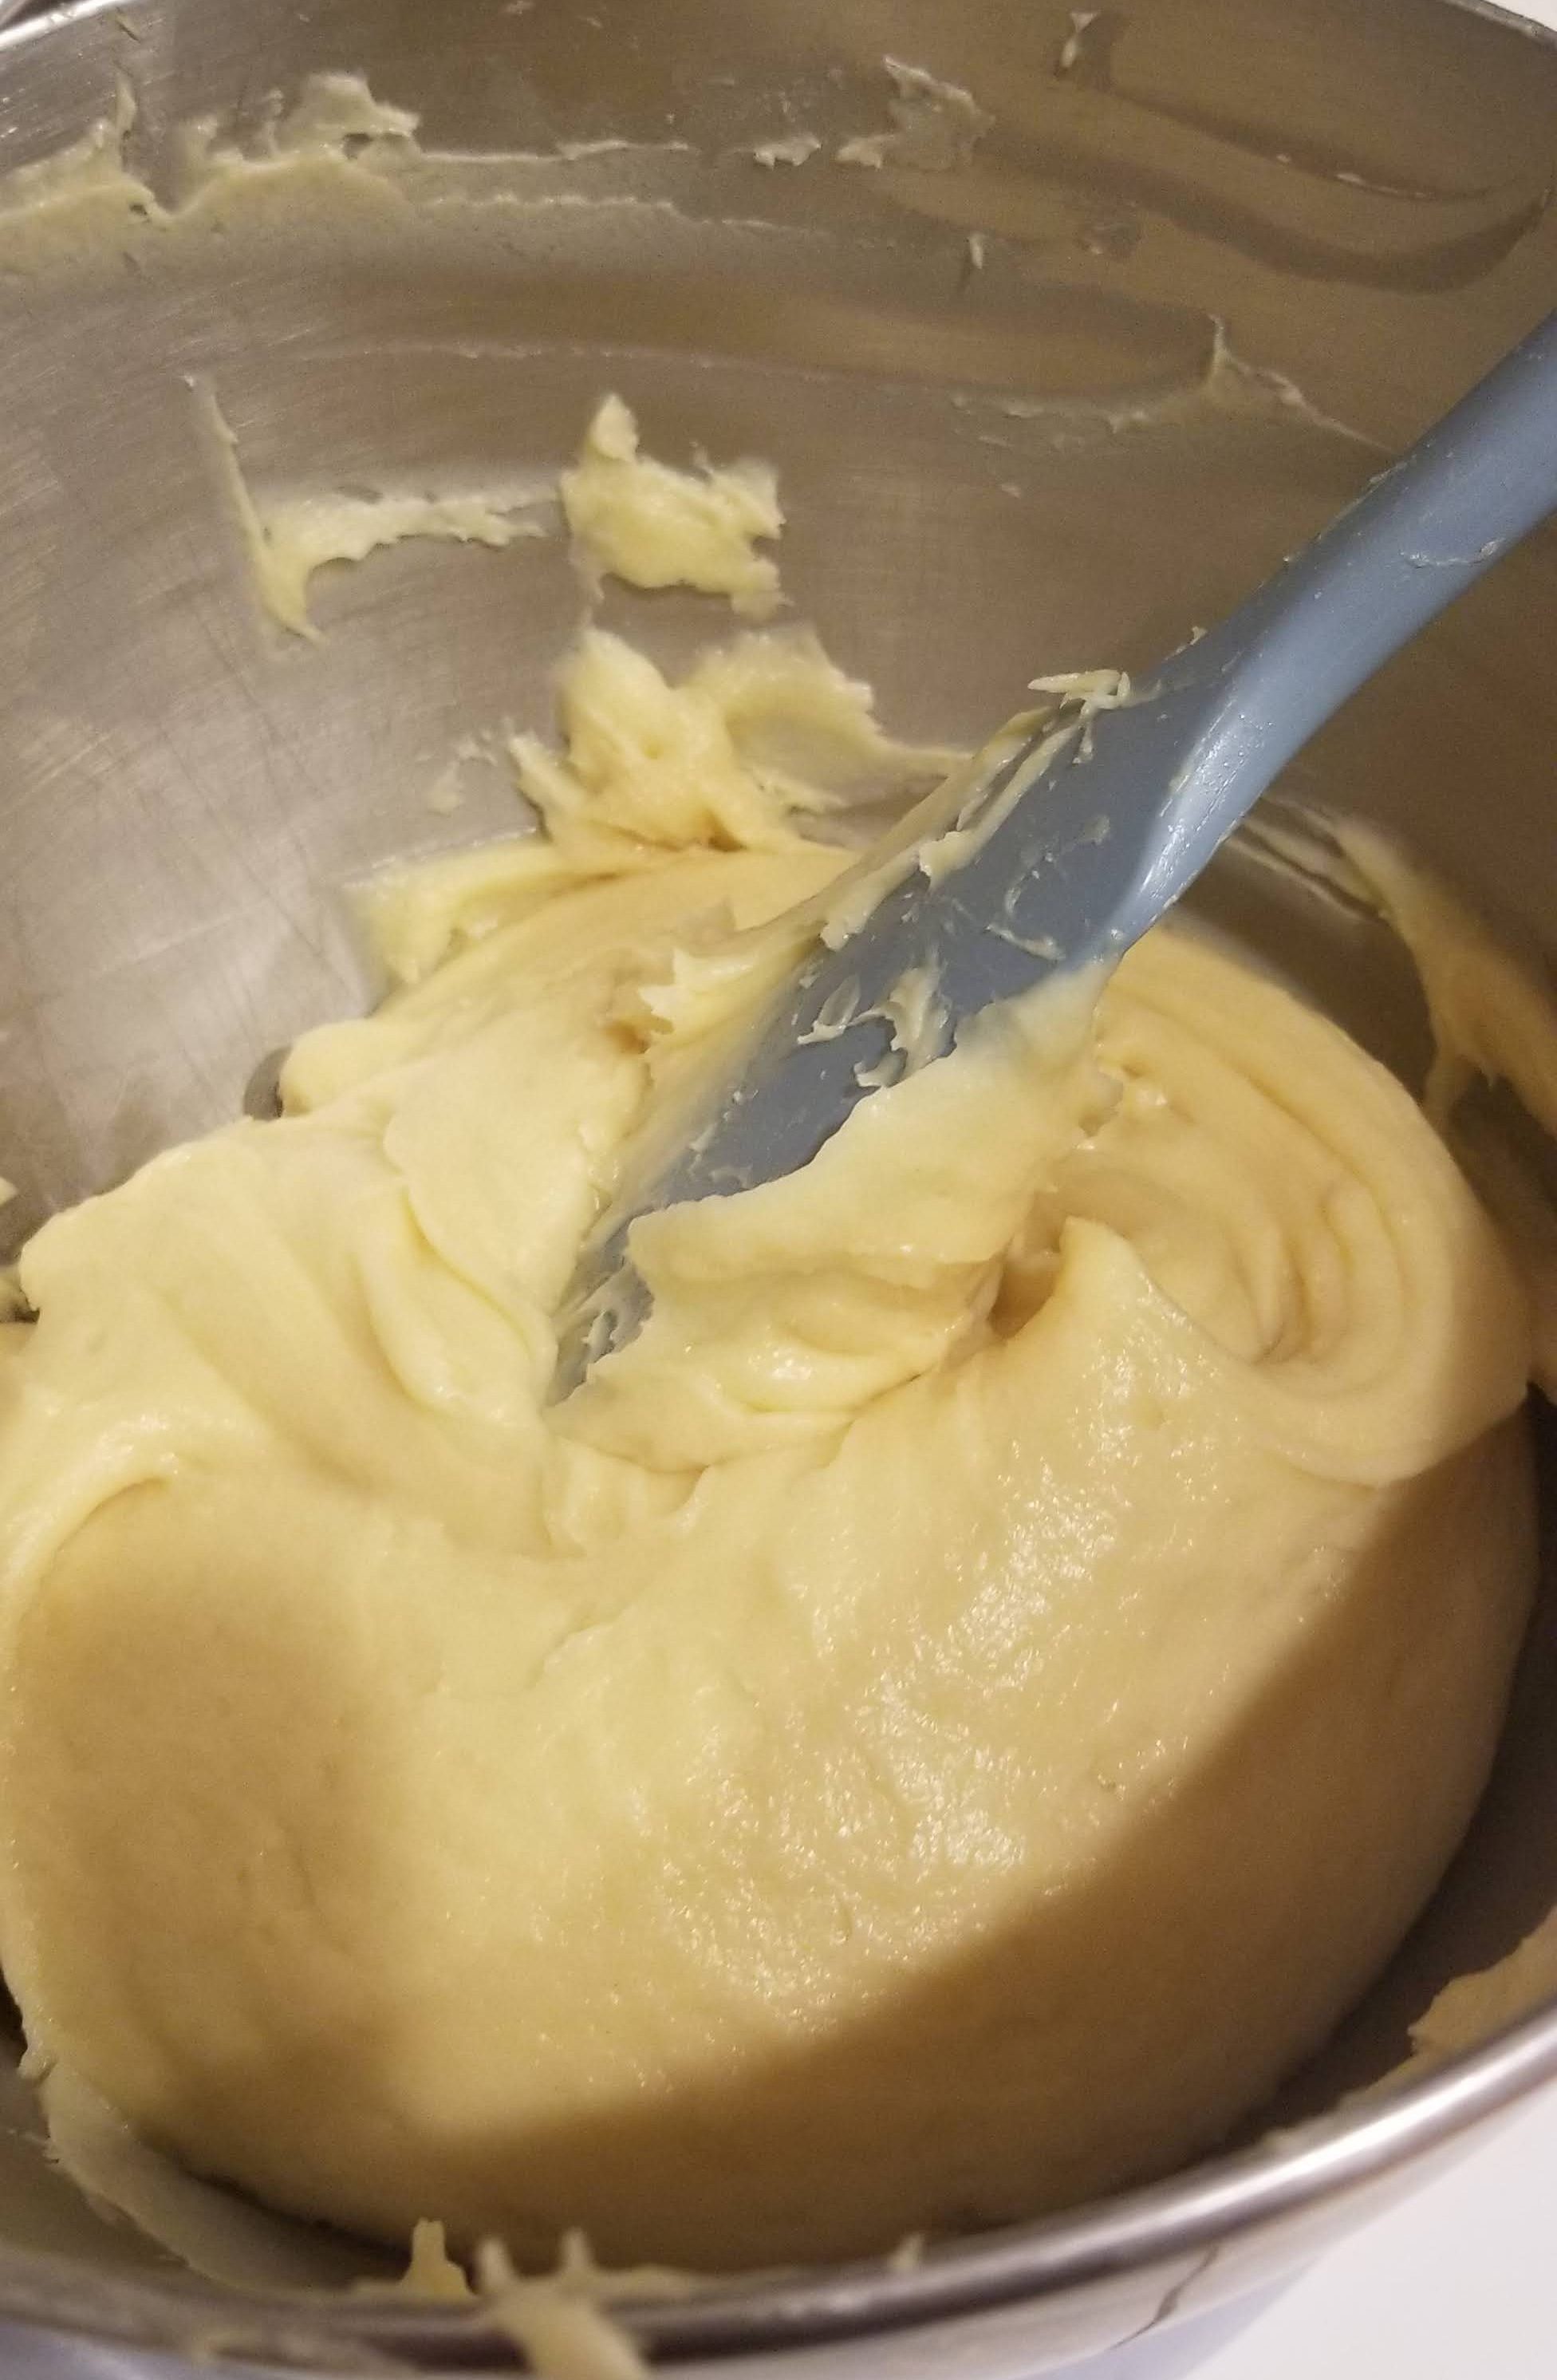
- Transfer dough to the bowl of a stand mixer fitted with a paddle attachment. Spread the dough around the sides of the bowl until it cools to 160°F.
- Add the eggs a little at a time, beating vigorously the whole time. The dough will become stiff and glossy. Check the consistency of the dough after each addition. The dough should be glossy and pipeable but thick enough to hold its shape. When you drag your finger along the surface, it should create a trough that stays upright and doesn’t collapse. Also, when you scoop some up with a spatula, it should fall in a V shape from the spatula. If, after adding all 4 eggs, the dough still seems too stiff, whisk up another egg and add a little at a time, being careful not to let the dough get too runny.
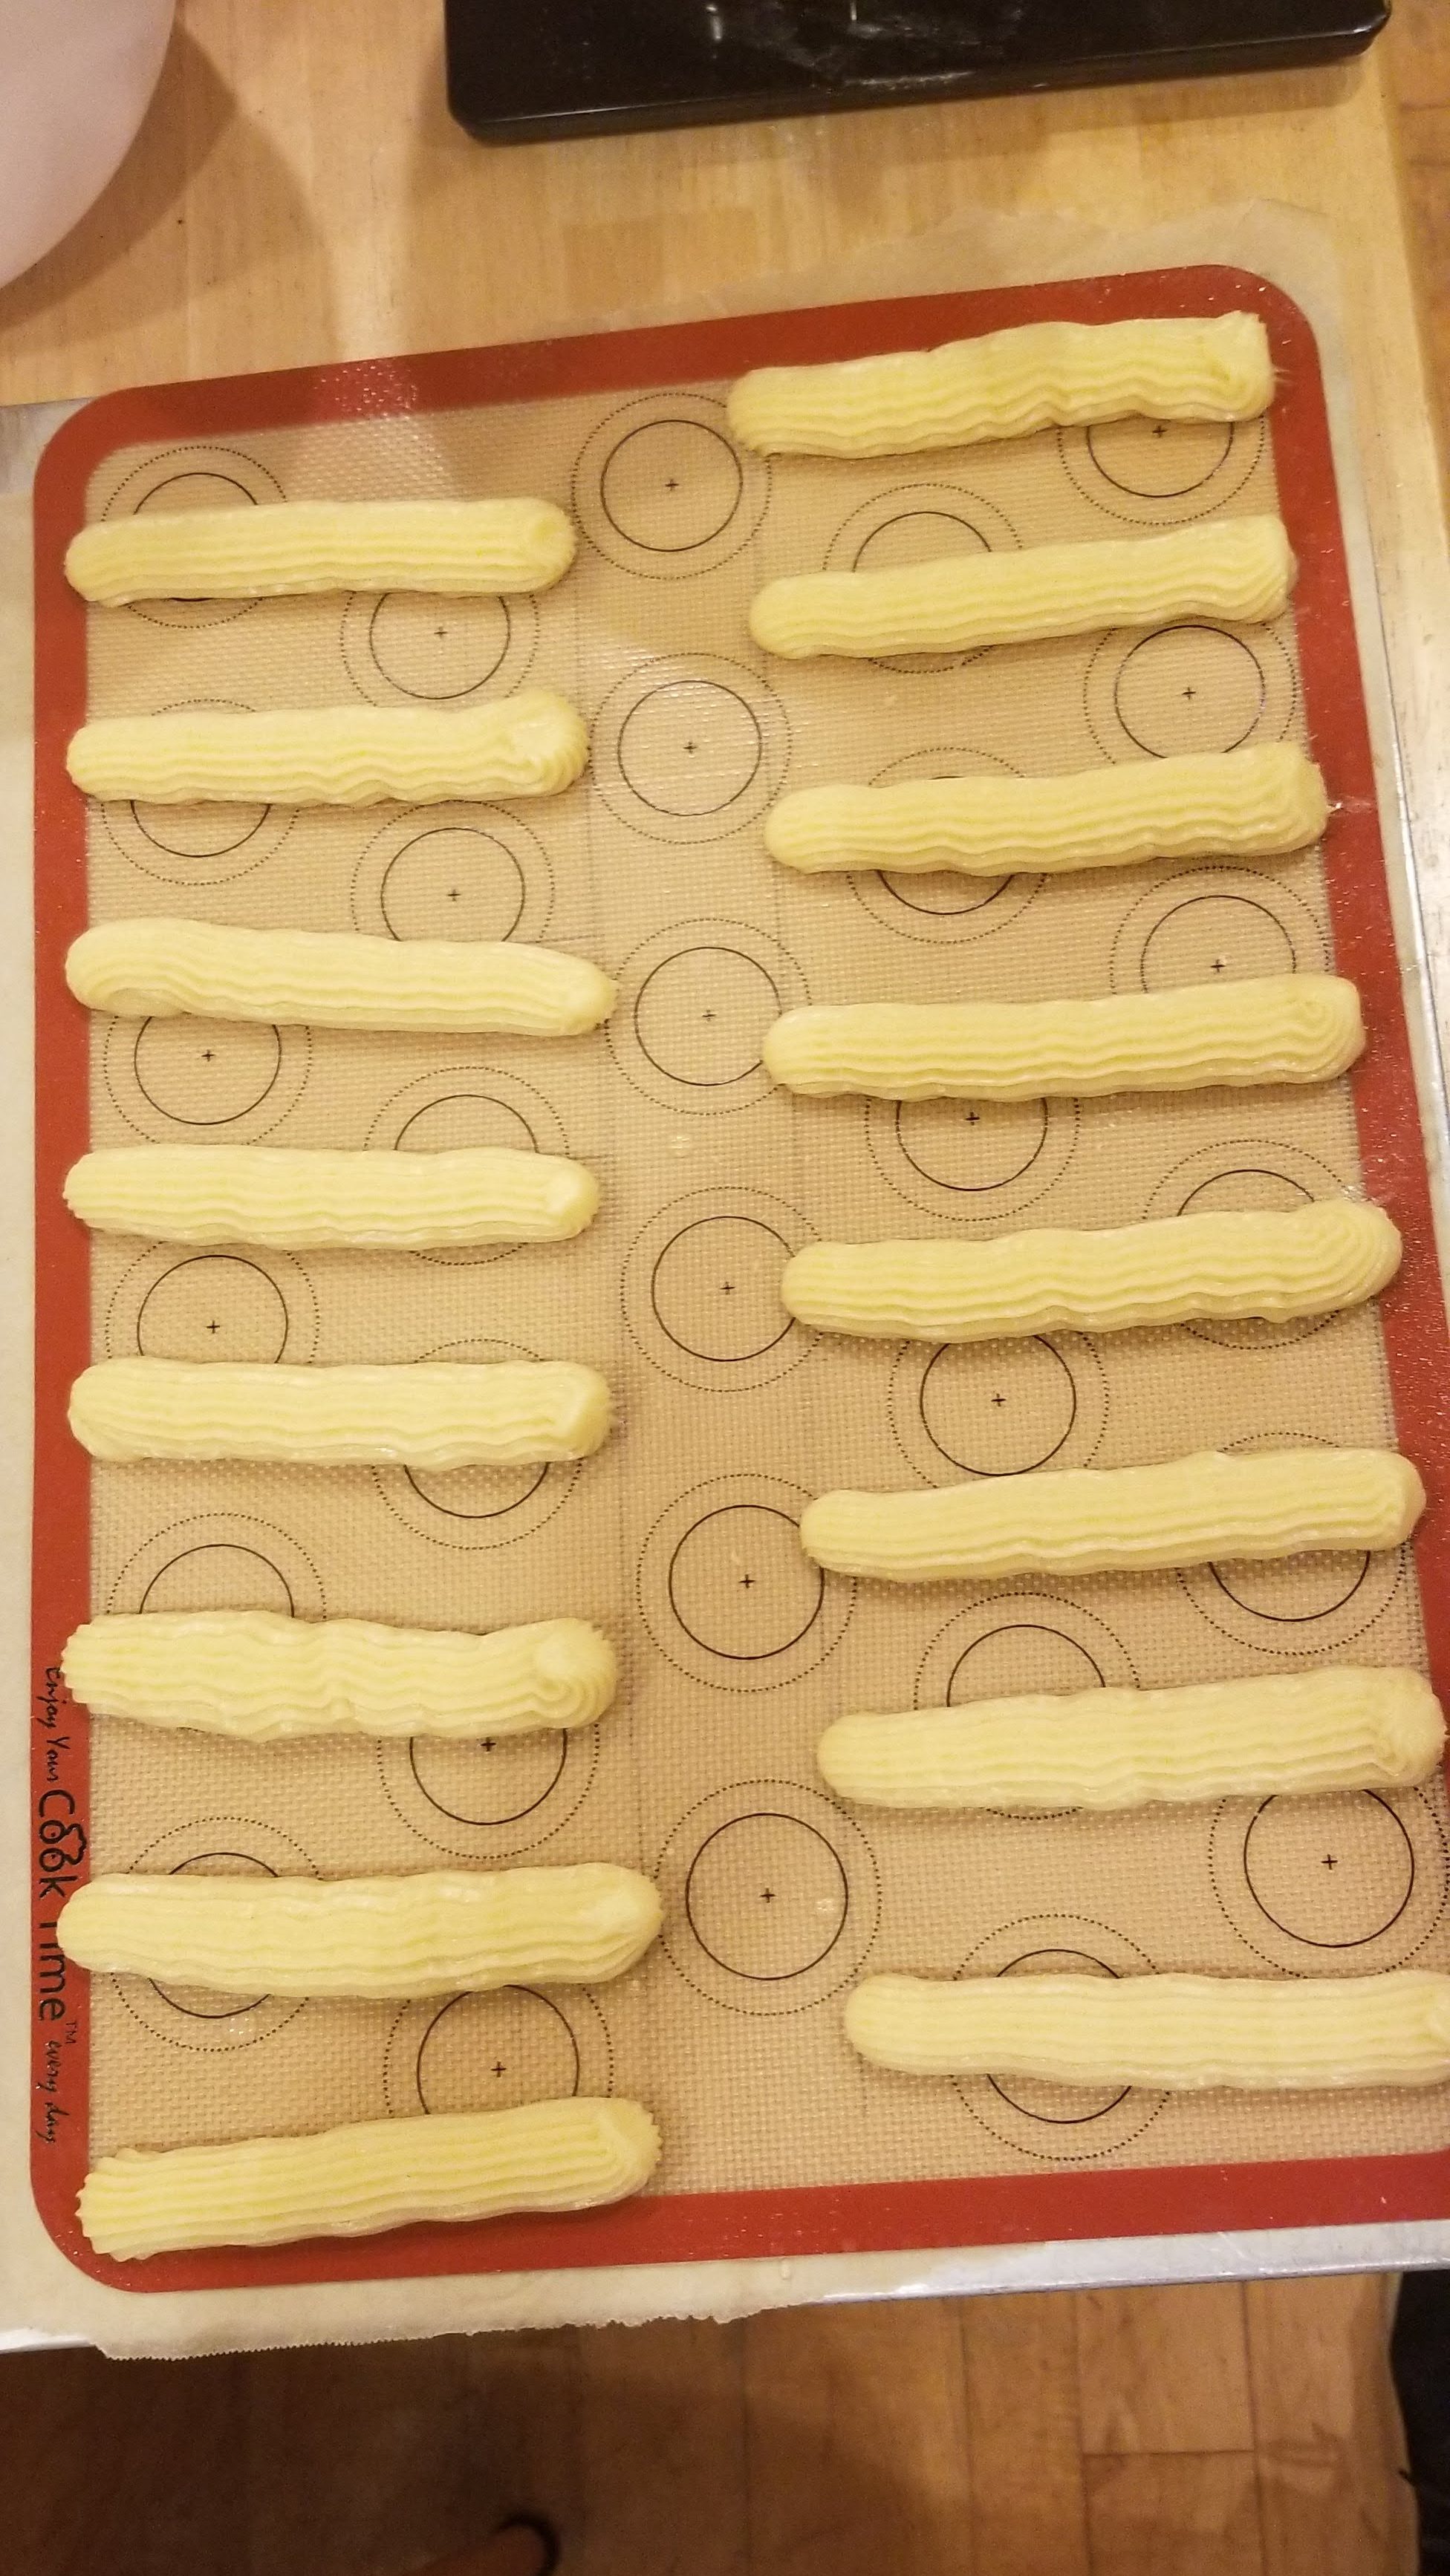
- Spoon the mixture into a piping bag fitted with a ½-inch French star nozzle. Pipe éclairs onto the silicone mats, using the templates drawn on the parchment. Keep the pastry bag at a 45-degree angle to the baking sheet, with the piping tip touching the surface. Maintain consistent pressure on the bag, but make the ends of the éclairs slightly larger than the middle. Twist the bag at the end of each éclair. Lastly, fill the circles drawn on the parchment with dough, holding the piping bag directly above the circles so the tip is slightly embedded in the dough. Use a moistened finger to tamp down the peaks at the ends of the éclairs and the tops of the circles. Dust the choux dough with powdered sugar before baking.
- Bake in preheated oven for 10 minutes, then reduce oven temperature to 375°F and bake for another 25-30 minutes until dark golden brown. (Don’t open the oven door for the first 25 minutes!) When baked, the pastry should be crisp and dry. As soon as you remove the éclairs from the oven, transfer them to a cooling rack and pierce each one gently with a skewer on the bottom in three places to allow steam to escape (and create holes for filling). Pierce the round choux buns on the bottom as well. Place on wire racks to cool. Once completely cooled, they can be stored in an airtight container overnight.
- Day 5: Preheat oven to 300°F. Place éclair shells and choux buns on baking sheets and bake in preheated oven for about 5 minutes. Transfer to cooling racks to cool completely before filling.
- To make the lemon icing, stir the lemon juice into the fondant icing sugar. Add enough yellow gel food coloring to make a pale yellow icing. It should be stiff and glossy but still pipeable. Spoon the icing into a piping bag fitted with a flat tip.
- To make the chocolate icing, melt the chocolate and butter together in a heatproof bowl over a pan of barely simmering water. (Make sure the bottom of the bowl does not touch the surface of the water.) Once the chocolate is melted, remove bowl from heat and stir in the cream and 1 tablespoon sifted powdered sugar. Allow to cool slightly.
- In a medium bowl, whisk together 2 cups of chilled pastry cream with enough of the cooled blueberry coulis to give it a good blueberry flavor and color. (You may not need to use all of the coulis.) The mixture should be smooth and well-blended but not runny. In another bowl, whisk 2 cups of pastry cream with the cherry coulis until smooth and well-blended.
- Use a sharp knife to cut a small X on the bottom of each pastry shell where it was pierced earlier (three holes on the bottom of each éclair and one hole on the bottom of each cream puff). Fill two pastry bags fitted with small round tips (or use a coupler if you only have one such tip) with the two flavors of pastry cream. Gently pipe the cream into the three knife piercings on the bottom of each éclair, filling half of each size of the éclairs with blueberry cream and half with cherry filling. Fill the large cream puff with blueberry cream and the smaller one with cherry cream.
- Ice the blueberry éclairs with lemon icing and the cherry éclairs with chocolate icing. Ice the large choux bun with lemon and the small choux bun with chocolate. Leave to set while making the caramel.
- To make the caramel, put 2½ cups of sugar in a heavy-bottomed saucepan (not nonstick) with 7 tablespoons of water and 1 tablespoon corn syrup. Bring to a boil and cook until mixture reaches 338°F on an instant-read thermometer. Remove pan from heat and plunge the base of the saucepan into a sink (or large bowl) of cold water to stop the cooking process.
- To assemble, place the largest pastry disk on a serving platter. Put an empty bowl upside down in the middle of the disk to help support the éclairs during assembly. Dip the end of one large blueberry éclair in the hot caramel and quickly but gently press it onto the outer edge of the pastry disk, leaning it against the bowl to help it stand up. Use a palette knife to spread some caramel on one side of the éclair. Dip the end of a large cherry éclair in the hot caramel and quickly but gently press it onto the pastry base against the side of the first éclair, using the caramel like glue to stick them together. Repeat this process, placing all of the large éclairs around the base, alternating colors. (Remove the bowl before completing the circle or it may be impossible to remove it.)
- Let the caramel set, then trim the tops of the éclairs so they form a level base for the 6-inch disk. Build the next two layers the same way (but don’t stack them yet), using a smaller bowl or drinking glass to support the éclairs as you attach them to the base. If the caramel starts to harden, heat it gently until soft again. (If the caramel crystallizes, you may need to make another batch. You can halve or quarter the ingredients for the caramel to make a smaller batch, e.g., for a half batch, use 1¼ cups sugar, 3½ tablespoons water and ½ tablespoon corn syrup.)
- Finally, stick the large choux bun to the smallest pastry disk and the small choux bun on top of it. Leave the tiers to set while making the buttercream.
- To make the buttercream, place butter in the bowl of a freestanding mixer fitted with a paddle attachment and beat until soft and fluffy. Add powdered sugar and mix, gently to begin with, gradually increasing the speed until mixture is well-combined. Add the milk, 1 tablespoon at a time, beating after each addition, until mixture is white and fluffy and of piping consistency. (You may not need all the milk.) Spoon buttercream into a piping bag fitted with a star nozzle.
- Pipe a small mound of buttercream on top of each éclair, then stack the tiers together. Then pipe buttercream around the edge of each pastry disk and in the gaps between the éclairs. Pipe around the bottom of each of the cream puffs to create a fluffy white “collar.”
- Serve right away or within a few hours. Refrigerate any leftovers. Best when eaten within 24 hours.
*Fondant icing sugar is a finely sifted powdered sugar made from sucrose and dried glucose syrup. If you are unable to find it, you can substitute regular powdered sugar and add a little corn syrup, but reduce the amount of liquid accordingly.
**Ingredient amounts for caramel vary depending on how many batches you’ll need.
Up next: A Chocolate Tart
Discover more from Here's the Dish
Subscribe to get the latest posts sent to your email.

1 thought on “Religieuse a l’ancienne”