
While the British have a long history of meat dishes baked in pastry (Four and twenty blackbirds, anyone?), there is apparently no definitive evidence of a dish called Beef Wellington until the end of the 19thcentury, when it was featured on the menu of the Hamburg-America ship line as “Filet de Boeuf à la Wellington” served with “Sauce American” on November 10, 1899.
Even if it wasn’t around during the Duke of Wellington’s lifetime, however, it could very well have been named after him. One theory is that the dish originated as Steig Wellington in Ireland, where the duke was born. Another is that it is related to the French specialty filet de boeuf en croûte but was renamed by the British after Wellington defeated Napoleon at Waterloo.
No matter how you slice it, a traditional Beef Wellington is a tasty preparation of beef tenderloin, usually surrounded by a pâté or duxelles, then wrapped in puff pastry and baked. But for this challenge, Paul and Mary only specified that the Wellington be at least 8 inches long and be completely covered in pastry. They didn’t specify what the filling should be. Paul said he was looking for some interesting fillings, but for him it was more about the pastry surrounding the filling.
Most of the bakers in the Great White Tent chose to make rough puff pastry. Manisha and James were the only ones that used a traditional puff pastry, and neither got great comments from the judges in the end, so I opted for the easier rough puff, as well.
The fillings in the tent ran the gamut from John’s venison and haggis to Danny’s Vegetarian Wellington, with a couple of fish fillings and lamb, as well.

In my research of various Wellington recipes, I discovered that the meat is often wrapped in prosciutto to keep the meat moist and prevent the pastry from soaking up the juices. Since I don’t care for mushrooms, I thought that would be a nice alternative to the duxelles. When trying to come up with a meat that would go well with prosciutto, I thought of chicken cordon bleu.
A cordon bleu is similar to a Wellington except that it is breaded and fried instead of baked. It usually involves stuffing a chicken breast with cheese and ham before breading it. Turning that idea a bit inside out, I thought I would stuff the poultry with cheese, then wrap it in prosciutto (an Italian variant of ham) and then pastry.


But to make a large Wellington at least 8 inches long, I decided to use a turkey breast. Fortunately, it was just a week or so after Easter, and I was able to find two breast halves in my grocer’s meat case. Following this video on cooksillustrated.com, I boned the turkey breasts. Then, using this recipe for a stuffed turkey roll, I flattened the breasts with a mallet, overlapped them to prevent gapping in the middle and put a generous amount of shredded gruyere cheese on one side of the flattened meat. Rolling it up lengthwise, I then tied it up at about 1½-inch intervals. Then I browned it in a large skillet on the stove to get it partially cooked.
After it was browned, I stuck my turkey roll in the fridge to cool while I prepared my pastry. One thing I learned from watching this episode of GBBO is that the meat should be chilled before you wrap it in the pastry. If it’s hot, it will melt the butter in the pastry and you’ll lose the flakiness, or the whole covering could collapse, which is what happened to Sarah-Jane’s.
I already had my pastry rolled out, folded and chilling in the fridge. I had used the same recipe I used for my tarte tatin. While the turkey was chilling, I rolled out the pastry again, forming a rectangle about 18 by 14 inches, and laid the prosciutto on top, leaving a three- to four-inch border all around. I then brushed one long edge of the pastry with a beaten egg and brought both sides up around the turkey, pressing and crimping the edges together to seal. Similarly, I folded up the ends and sealed them with egg wash.


I had been following this recipe for guidance, but here’s where I wish I had followed a little more closely. The recipe has you chill the Wellington again before baking. It doesn’t say how long, but at least as long as it takes to bring the oven to temp. I think this would have resulted in the pastry baking all the way through and the meat not drying out quite so much. But I had already heated my oven, and my husband and I were counting on my Wellington for dinner. It was getting late (Read: We were getting hungry!), so I popped it in the oven right away.

I wasn’t sure how long it would take the Wellington to bake. I didn’t want the turkey to go much past 160°F, but I also wanted the pastry to be fully baked. The turkey roll recipe said 25 minutes at 375°F, but the recipe from bbcgoodfood.com said 1 hour 15 minutes to 1 hour 25 minutes. I set the timer for 25 minutes, brushed it with egg wash, then set the timer for 10 more minutes. After about 45 minutes I stuck an instant-read thermometer into the middle and it read 170°F, so I took the Wellington out of the oven.
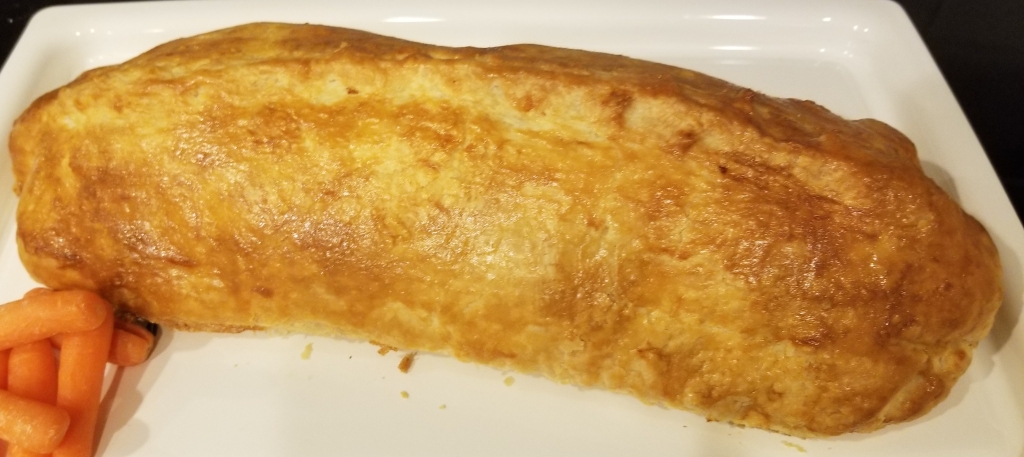
It was a lovely golden brown on the outside and smelled wonderful! I waited about 15 minutes before transferring it onto a platter, which gave it time to firm up a bit. When we sliced into it, the cheese just oozed out of the center, and I must confess it tasted wonderful! My only criticism was that the pastry was slightly raw on the inside, and the turkey a little dry at the ends; so again, I would chill it before baking, and maybe cut down on the amount of time I browned the meat on the stovetop. Other than that, it was scrummy!


Turkey Cordon Bleu Wellington
Credit for turkey roll: TatyanasEverydayFood.com
- 1¾ c. white bread flour
- 1 t. salt
- 1 c. + 2 T. unsalted butter, room temperature but not soft
- 5 oz. cold water (approx.)
For the pastry:
- Sift the flour and salt into a large bowl. Roughly break the butter into small chunks, add them to the bowl and rub them into the flour loosely with your fingers. You still need to see bits of butter in with the flour. Make a well in the flour mixture and pour in about 3 ounces of water, mixing until you have a firm, rough dough, adding more water if needed. Cover with plastic wrap and let rest for 20 minutes in the fridge.
- Turn out onto a lightly floured board, knead gently and form into a smooth rectangle. Roll the dough in one direction only, until three times the width, about 8 x 20 inches. Keep edges as straight and even as possible. Don’t overwork the butter streaks; you should have a marbled effect. Fold the top third down to the center, then the bottom third up and over that. Give the dough a quarter turn and roll out again to three times the length. Fold as before, cover with plastic wrap and chill for at least 20 minutes before rolling to use.
- 2 boneless, skinless turkey breast halves, or 1 boneless breast (about 4 lbs. total)
- Kosher salt and pepper to taste
- 8 oz. gruyere cheese, shredded
- 2-3 T. olive oil
For the turkey filling:
- Using a sharp knife, butterfly the meat along its natural sectioning, creating a more flat piece of meat. Cover the meat with 2 layers of cling wrap and use a meat mallet to pound the meat thin, to about 1/2 inch thickness. (For a video demonstrating how to debone, butterfly and flatten a turkey breast, go to https://www.canadianliving.com/section/video/2632482637001.)
- If using two breast halves, overlap them slightly to form one large rectangle. Season the meat with kosher salt and black pepper. Pile the shredded cheese on one long side of the rectangle. Gently roll the meat lengthwise, like a log, so the cheese ends up in the center. Use kitchen twine to secure the roll, tying about every 1 to 1½ inches.
- Preheat a large skillet over medium heat and add a generous drizzle of olive oil. Place the turkey roll seam side down into the hot pan. Brown the roll on all sides, using tongs to turn it. When it’s browned on all sides, transfer it to a platter to cool; then place it in the refrigerator to chill.
- 8 slices prosciutto, about 3×5” each (about 4 oz. total)
- 1 egg, beaten
Additional Ingredients:
- Remove rough puff pastry from refrigerator. Roll out on a lightly floured surface into a rectangle approximately 18-by-14 inches. Lay the prosciutto slices in a row on top of the pastry, slightly overlapping each piece, but reserve a couple of pieces for the top. Place the turkey roll, seam-side down, in the center of the prosciutto. Cut and remove the string. Bring the prosciutto up and around the turkey. If it doesn’t completely cover the roll, use the reserved pieces to lay across the top lengthwise.
- Brush one long edge of the pastry with the beaten egg, then bring both sides up and fold to seal or crimp together. Brush inside of both ends with egg wash and fold to seal in the filling. Place on a baking tray covered with parchment paper and return to refrigerator to chill.
- Preheat oven to 375°F. When heated, place baking tray with Wellington in the oven. After 25 minutes, brush Wellington with egg wash. Return to oven for another 10-15 minutes. When pastry is golden brown, stick an instant-read thermometer into the center of the turkey. The Wellington is done when the internal temperature of the turkey reaches 160°F. Remove from oven and let it rest for 15 minutes before transferring to serving platter. Slice to serve.

It looks delish!! 🙂
LikeLiked by 1 person
Hello, beautiful blog!! We are following you,follow us back if you want! 😊https://eatdessertfirstgreece.com/ 😊❤️
LikeLiked by 1 person
Thank you! Yours looks good too!
LikeLiked by 1 person