
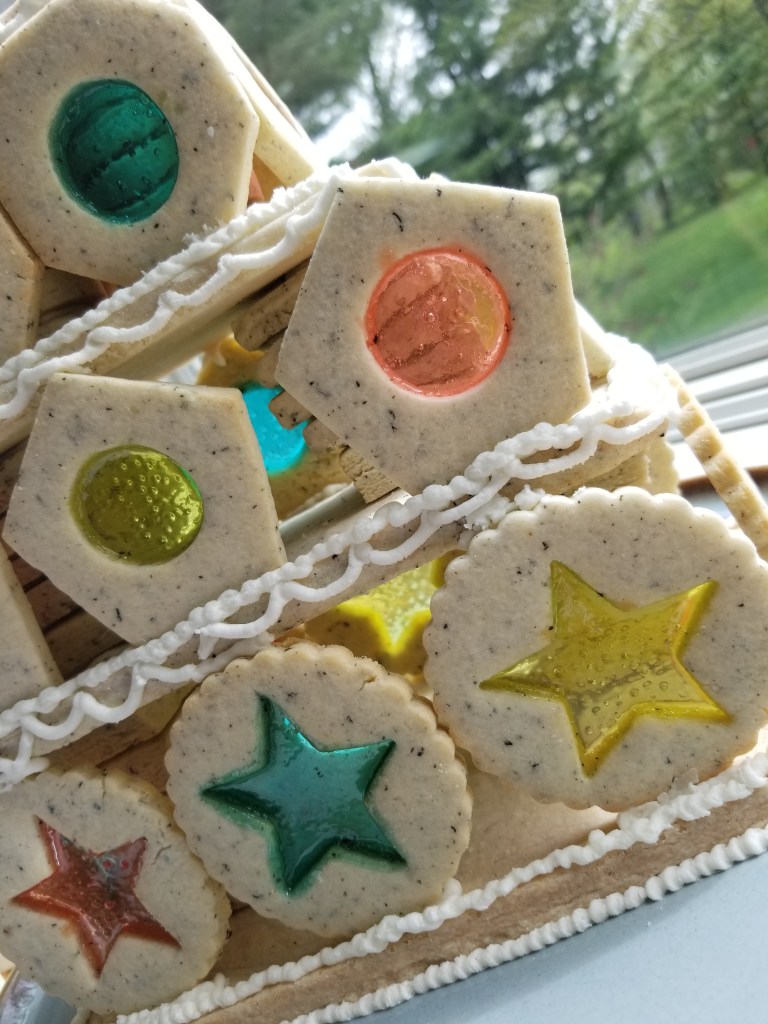
I really wanted to capture the essence of a treasure box with this biscuit (i.e., cookie) tower, or the delight a young child gets upon opening her mother’s jewelry box — all those glittering beads and sparkly jewels!
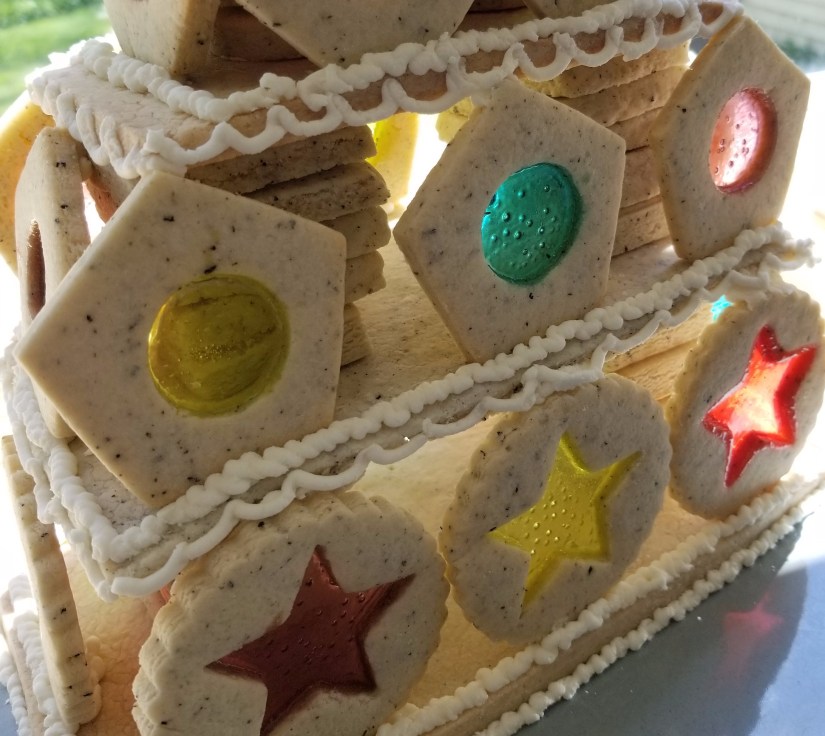
And now that it’s done, I just can’t get enough of it! Even three days after I’ve finished, I can’t stop snapping pictures of it as the light from my kitchen window glints through the “jeweled” panes of my shortbread biscuits. It’s so bright and colorful that I don’t want to eat it, but my husband keeps asking if I’m done taking pictures so he can have some.
Not that he hasn’t had a taste already. I had a few leftover biscuits that we got to try, so I already know what it tastes like. I used a different flavor in each of the three doughs: lavender, earl grey and jasmine green tea. The lavender is the strongest, as I would have expected, while the earl grey and jasmine are more subtle. Next time, I would consider adding more tea leaves to the mixture to give them a stronger flavor.
And then, of course, the flavors of the “jewels,” made up of Jolly Rancher candies, are bold and strong. A little overpowering even. But if you eat around them, or just eat the pieces that make up the tower structure, you don’t have to worry about the interfering flavors of blue raspberry, green apple and watermelon.
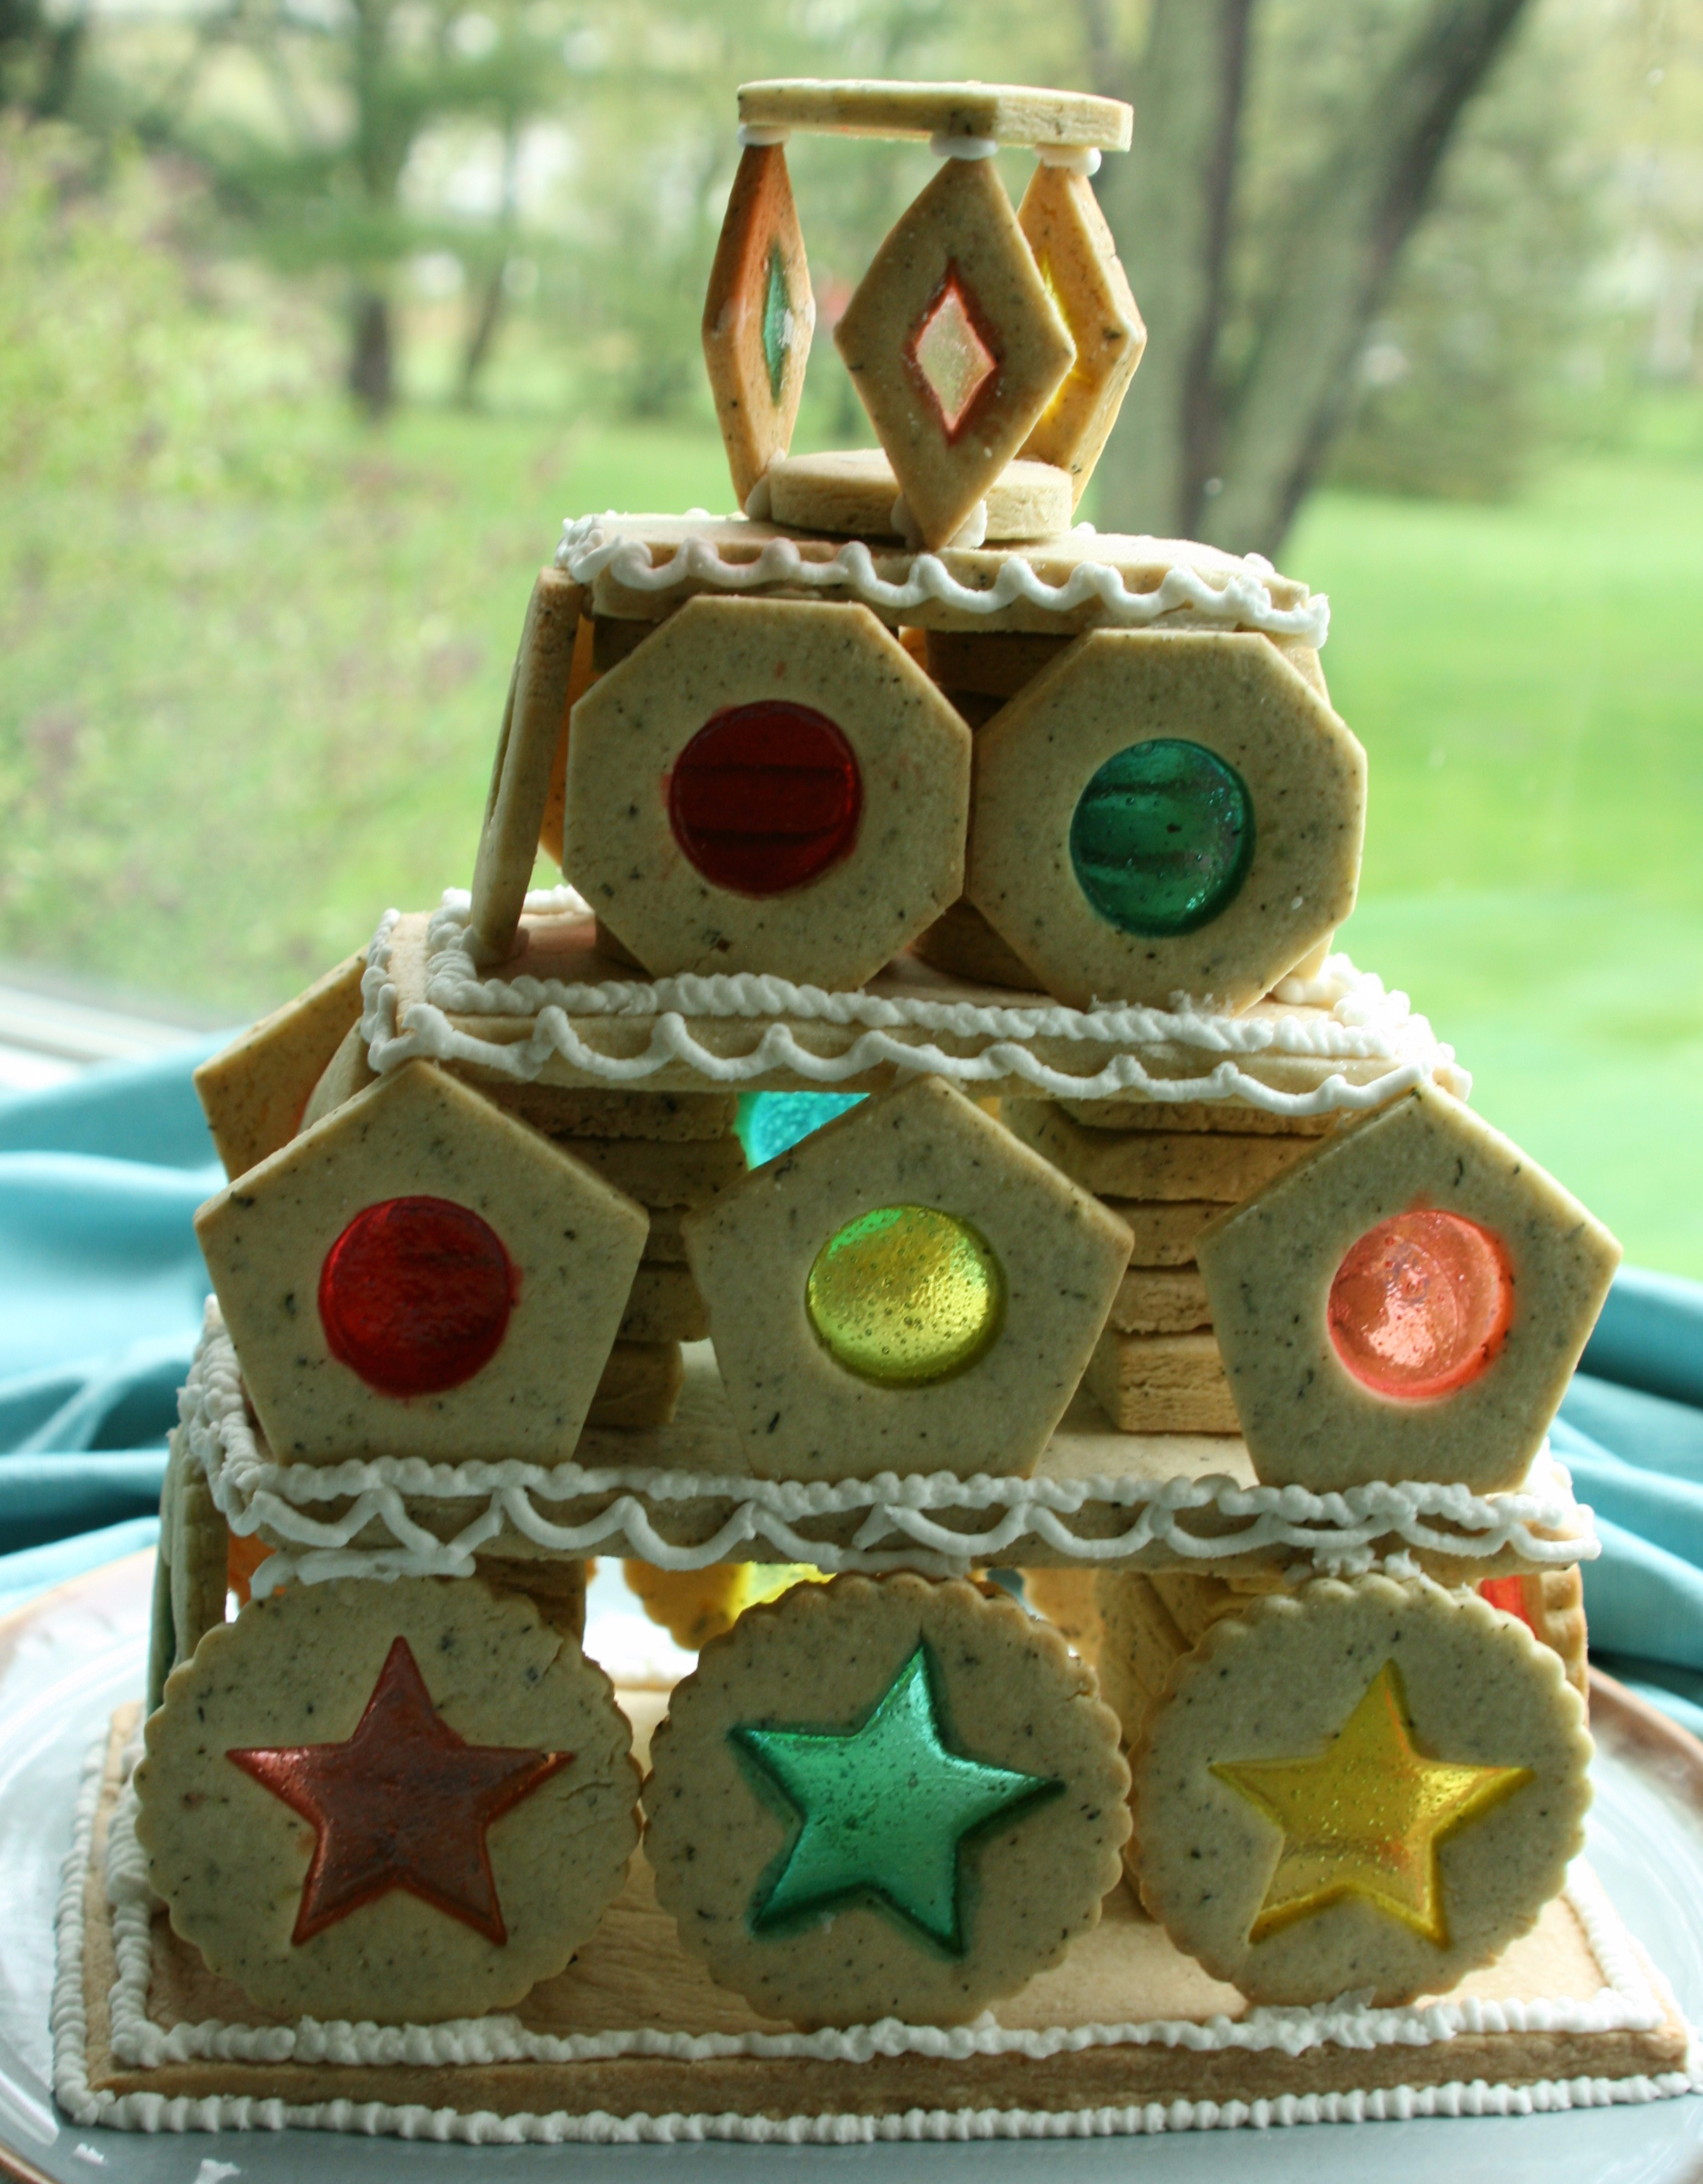
The brief for this showstopper challenge was to create a 30cm-high tower, about a foot tall. You may recall some of the creations of the GBBO bakers: Christine made a Bavarian clock tower; Frances’ tower of buttons and beads unfortunately collapsed; and Rob’s unforgettable biscuit Dalek impressed with its looks but not with its flavors.
My jewel-box tower was partially inspired by Beca’s teatime centerpiece, made to look like a multitiered cake stand, and the flavors of Howard’s Japanese pagoda tea tower, which incorporated earl grey and green tea.
I chose to use shortbread for the structure because it’s very stable and doesn’t spread during baking. For the jeweled biscuits, I used this recipe from PreppyKitchen.com, also basically a shortbread cookie, but it has two eggs added to the mixture, which I found did cause some spreading, so in the future I would probably just use regular shortbread.
The key to a solid, stable structure is to keep the shortbread dough about ½-inch thick and to make sure it’s well-baked. We don’t want any soggy structures that collapse under weight! To make sure my dough was rolled out evenly, I rolled out each batch in a gallon-sized zip-lock back, creating a near-perfect 10½-inch by 9-inch rectangle. This was a great tip from TheFlavorBender.com, whose shortbread recipe I adapted for this bake.
And, of course, you need a good “glue” to hold everything together, which in this case was the same royal icing I used for my gingerbread Eiffel Tower. I like this recipe because it calls for heating the egg whites over a hot-water bath (a.k.a., bain-marie or double boiler) until they reach 160°F, so you know they’re safe to eat.
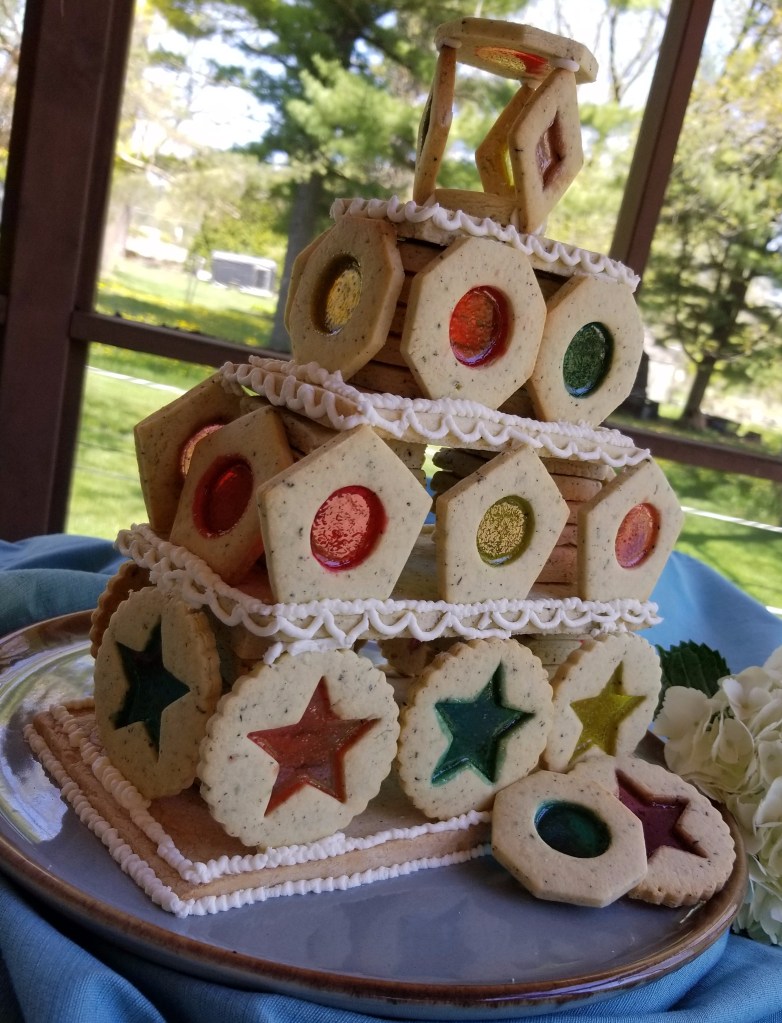
Once the pieces were all baked and cooled, it was time to assemble my jewel-box. I had counted the number of support pieces I would need to stack on top of each tier to reach the prescribed height, but I ended up not needing quite so many, since the icing added a little height as well. But having a few extra pieces is not a bad thing — I ended up using one on the top tier to stabilize my crowning jewels. (I’ve added that to my instructions below.) I also had plenty of icing left over, so I was able to use some to decorate the edges of each tier, giving it almost a wedding-cake appearance.
Unfortunately, the weekend I made this it rained solidly for three days, so the other reason I didn’t let my husband demolish it right away was so I could take photos on a sunny day. Now that we’re back to more typical May weather, I’m looking forward to having shortbread with my tea on the screen porch!

Jewel-Box Biscuit Tower
Jewel cookie recipe adapted from PreppyKitchen.com
For the shortbread structure:
- NOTE: You’re basically making two separate batches of shortbread, so everything is divided in half except the lavender and earl grey tea leaves.
- Crush the earl grey tea leaves with a mortar and pestle or in a bowl with the back of a spoon. Then combine them with 1 cup of butter and let sit at room temperature for 2 hours to allow the flavors to blend.
- Crush the lavender buds the same way, making them as fine as possible. (I ended up using the pestle to crush the buds through a small sieve.) In a large mixer bowl, blend lavender with the other 1 cup of butter on medium speed with a paddle attachment until creamy, 2-4 minutes. Add 1 1/8 cup of powdered sugar and ¼ teaspoon salt and mix another 1-2 minutes, until mixture is nice and creamy.
- Add 2 cups of flour and 1/3 cup + 1 tablespoon cornstarch and mix on lowest setting until the flour is completely mixed in and the dough forms clumps. Do NOT overmix.
- Using floured hands or a spatula, bring the dough together to form a ball, then flatten it into a disk shape. Place the disk in a gallon-size zip-lock bag on a flat, smooth surface. Without closing the bag, gently roll the dough with a rolling pin, maintaining an even thickness. Roll the dough into the corners of the bag to form a 10½-inch by 9-inch rectangle. The dough should be about ½ inch thick. Keeping the bag open while you do this will allow excess air to escape and prevent the bag from exploding.
- When the dough is rolled out evenly, close the bag and carefully place it on a cookie sheet. Let it chill in the fridge for 30-60 minutes.
- Once the butter with the earl grey tea leaves has sat for two hours, use the same method to make a second batch of shortbread, using 1 1/8 cup of powdered sugar, ¼ teaspoon salt, 2 cups of flour and 1/3 cup plus 1 tablespoon of cornstarch. Blend as described above and roll out in another gallon-size zip-lock bag. Chill for 30-60 minutes.
- Preheat oven to 350°F. Take one bag of dough out of the refrigerator and carefully remove it from the bag. (I ended up cutting the bag open with scissors.) On a flat surface, cut out one 10×5-inch rectangle and one 4×2-inch rectangle and carefully transfer them to a parchment-lined cookie sheet. With the leftover dough, cut as many 1½-inch squares as you can. You will need a total of 10. Transfer the squares to a parchment-lined cookie sheet as well, placing them at least an inch apart.
- Bake the smaller pieces for 15-20 minutes until they are lightly browned on the edges. Bake the larger pieces for 30-40 minutes, rotating the pan if one side is browning faster than the other. The center of the rectangles should feel somewhat firm to the touch. Carefully transfer baked pieces to a cooling rack to cool.
- While the first batch is baking, take the second zip-lock bag out of the fridge and remove the dough from the bag. Cut out one 8×4-inch rectangle and one 6×3-inch rectangle and place them on a parchment-lined cookie sheet. Use the rest of the dough to cut out 10 2½-inch by 1½-inch rectangles and as many 1½-inch circles as you can. You may need to reroll some of the dough to cut more shapes. Try to keep the dough as close to ½-inch thick as possible.
- Bake these pieces until lightly brown around the edges and firm in the center, 15-20 minutes for the smaller pieces and 20-30 minutes for the larger pieces. Transfer to a cooling rack to cool. (If you’re unable to get 10 each of the circles, squares and 2½-inch by 1½-inch rectangles out of the dough, don’t worry, you can use some of the leftover dough from the jewel cookies.)
Directions
For the jewel cookies:
- 2 t. jasmine green tea leaves
- 1 c. unsalted butter, room temperature
- 1 c. sugar
- 2 eggs
- 4 c. all-purpose flour
- ½ c. cornstarch
- ¾ t. kosher salt
- 1/3 c. hard candies, divided by color
- Crush jasmine green tea leaves with a mortar and pestle or in a bowl with the back of a spoon. Cream tea leaves, butter and sugar together with a stand mixer fitted with the paddle attachment. Add eggs one at a time while mixing on low. Scrape down sides of bowl.
- Sift the flour, cornstarch and salt into a separate bowl. Add to butter mixture and mix till well blended.
- Separate dough into two flat disks. Wrap each in plastic wrap and chill for about an hour.
- Once chilled, transfer one disk to a flat, lightly floured surface and roll to a thickness of ¼ inch. Cut shapes out of the dough using round or jewel-shaped cookie cutters. (I used four different sizes, ranging from 2 to 3 inches wide.) Using a smaller cookie cutter or a knife, cut a “window” out of the center of each cookie. Place cookies on a silicone mat–lined cookie sheet.
- You will need 8 cookies for each of the lower two tiers of the tower, 6 cookies for the third tier and 3 or 4 cookies for the top tier. Roll out the leftover dough to a thickness of ½ inch and make more of the squares, circles or rectangles for supporting the tiers, as described in the directions for the shortbread structure, above. In addition, you will need one more small circular cookie to support the jewel cookies that stand on the top layer.
- Preheat oven to 375°F.
- Keeping the hard candies separated by color, crush them in a heavy zip-lock bag with a meat tenderizing mallet or a rolling pin. Place a half teaspoon to a teaspoon of crushed candy in the center “window” of each cookie shape, spreading it evenly in the hole.
- Bake for 12 minutes. Then remove cookie sheets from oven and allow cookies to cool on the silicone mat. When cooled, carefully peel cookies off the mat.
Directions
For the royal icing:
- 2 egg whites
- 2 2/3 c. powdered sugar, sifted and divided in half
- In a heat-proof mixing bowl, whisk the egg whites with half of the powdered sugar until the sugar is dissolved. Place the bowl over a pan of simmering hot water over low heat. (The bottom of the bowl should be higher than the surface of the water.) Whisk the egg white and powdered sugar mixture constantly until it reaches 160°F. Then remove the bowl from the pan and, using an electric mixer, beat the egg white mixture on medium speed while adding the remaining 1 1/3 cup of powdered sugar, a spoonful at a time.
- When all the sugar is incorporated, beat on high speed until the icing holds stiff peaks when the beaters are lifted out of the bowl. If needed, add more powdered sugar, a tablespoon at a time. Place a clean, damp towel over the bowl of icing to prevent it from drying out until you’re ready to use it.
- Fill a piping bag fitted with a small round tip with royal icing. Twist the top closed and tie it tightly with a string or wire twist-tie to keep the icing from squeezing out the top.
Directions
For assembly:
Next week: A Sweet Tea Loaf
Discover more from Here's the Dish
Subscribe to get the latest posts sent to your email.
