
This challenge was the final test the bakers in the Great White Tent had to pass to get to the semifinals: a showstopper gingerbread structure. Paul Hollywood said he was looking for architectural genius, but it had to have a good flavor as well.
With five contestants remaining, we saw them build a chocolate- and orange-flavored Buckingham Palace (Cathryn); a ginger syrup and pomegranate molasses Big Ben (Danny); a fantasy birdhouse (Brendan); a derelict barn (James); and, the showstopper of showstoppers, a colosseum made with over 100 pieces of gingerbread sitting on peanut praline gravel (John). And all that accomplished within four hours. Whew!
Fortunately, as I explained when I set out to complete all the challenges of The Great British Baking Show, I am not constrained by the same time limits as the bakers under the tent, so this challenge actually took me about three days to complete. Having that extra time is helpful because it allows you to assemble the structure in sections, letting each one dry before adding on more pieces.

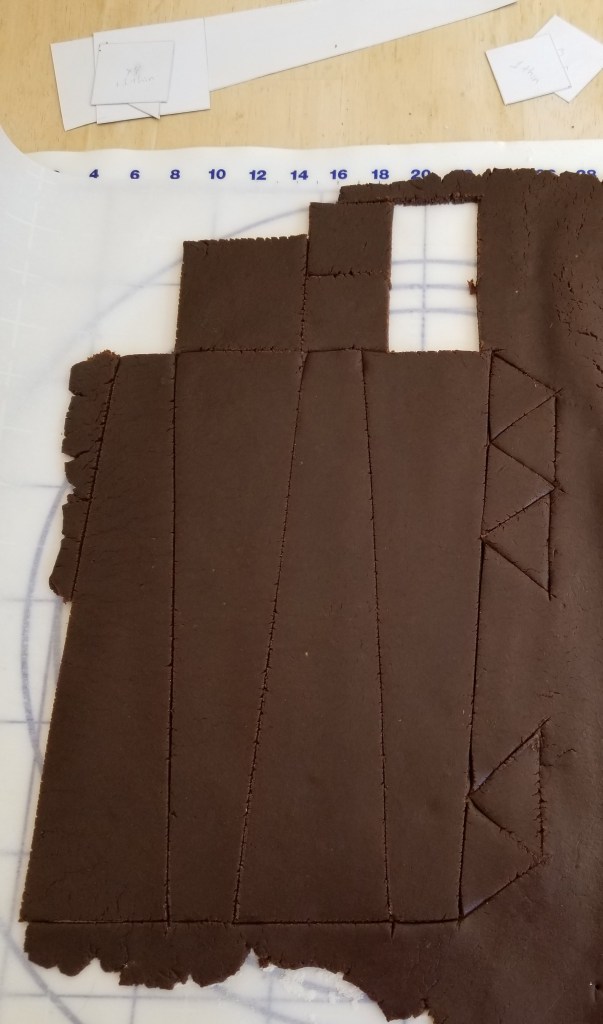
I chose to make a gingerbread Eiffel Tower, so I first looked up the schematics of the real thing in order to get an idea of its proportions. I didn’t make it exactly to scale, but I wanted it to look like a good facsimile, at least. Once I figured that out, I drew a pattern onto graph paper that was about 12 inches tall. I wanted it to be a bit bigger than that, so I took the pattern to a copy store and enlarged it to 150%. I then traced the pattern onto parchment paper, cut out the pieces and traced them again onto cardstock. These were the pieces I used to cut out the gingerbread.
For the gingerbread, I researched several recipes, including Mary Berry’s. I noticed hers doesn’t call for eggs, which makes sense, since you don’t want it to rise, but her recipe uses 2 pounds of flour, and I didn’t think I’d need that much dough. In the end, I settled on this recipe, which does use 2 eggs, but most recipes I found do call for eggs, so I figured it would still work.
Here’s the process I used to make my gingerbread Eiffel Tower:
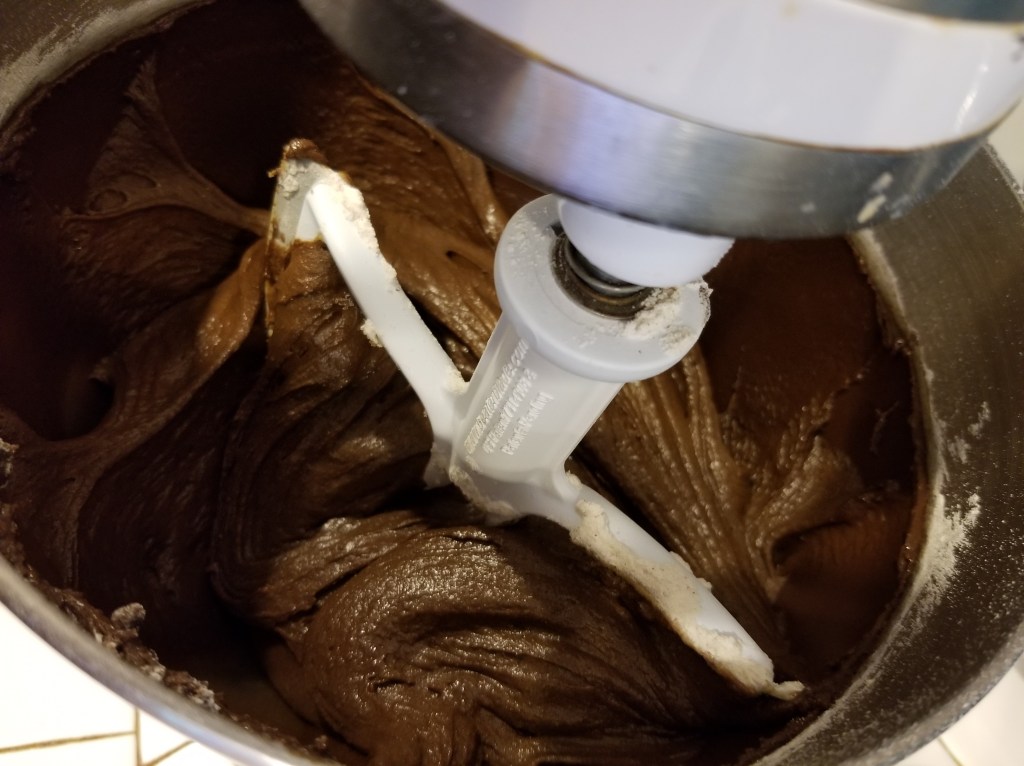
Day 1: Make the dough. This really only took half an hour, but it’s recom-mended that the dough be refrigerated overnight, so I made it before I went to bed.
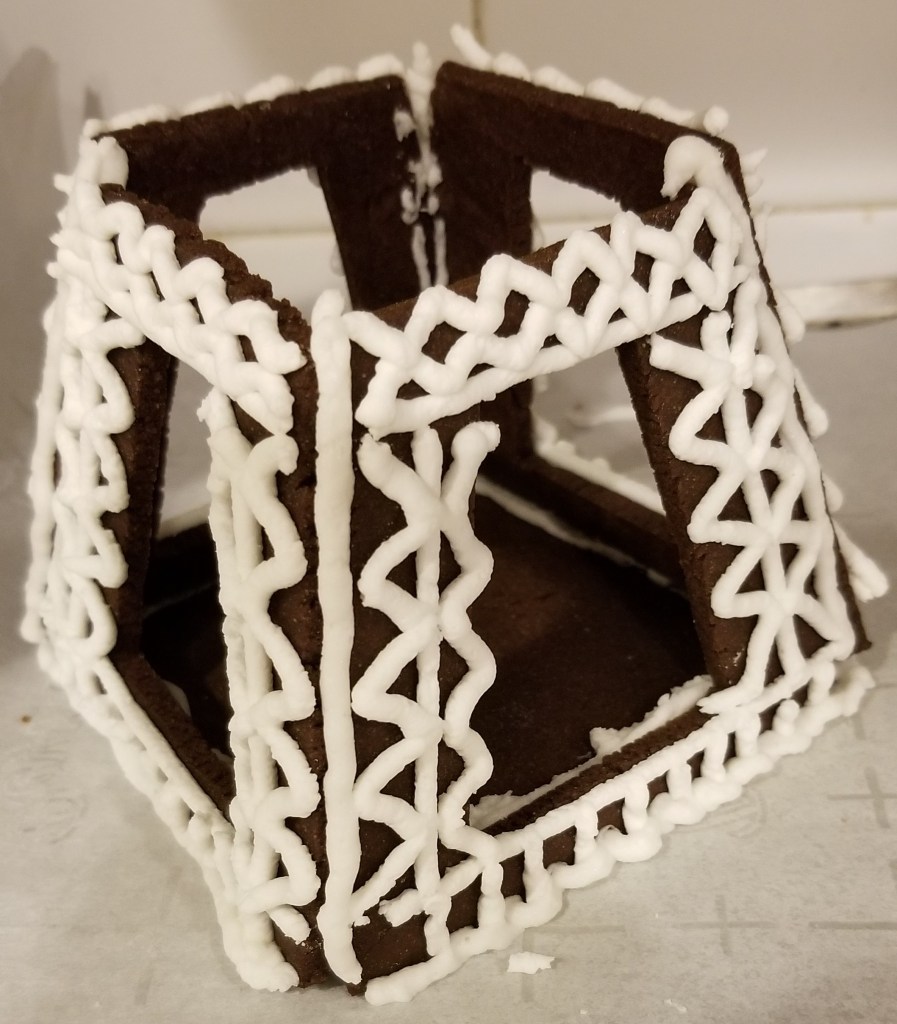
Day 2: Roll, cut and bake the pieces; decorate and start assembly. The rolling, cutting and baking took me a couple of hours in the morning. While the pieces were cooling, I made the royal icing and used that to pipe on the decoration, which is basically the criss-cross pattern of iron bars that make the Eiffel Tower distinctive. After decorating, I left the pieces to dry and came back in the evening to start the assembly process.


Starting with the lower portion of the tower, I glued the four sides to the square “feet” and then glued the side pieces together. It took me a couple of tries to get the hang of it—figuring out how much icing was needed, what angle the pieces had to be to fit together, and how long to hold them while the icing dried. After that, it got easier. While the base was drying, I assembled the middle section, and while that was drying I assembled the third, tallest section. I then let them dry completely overnight before putting all three sections together.


Day 3: Finish assembly and make pinnacle. Because I had quite a bit of dough left over, I decided to make a couple more pieces to stabilize my tower. While most people warn of the gingerbread spreading while baking, I seemed to have the opposite problem. Some of my pieces seemed to have shrunk! Perhaps this was due to the fact that I substituted vegetable shortening for butter (a conscious choice, because I know that butter causes dough to spread more while baking) or simply a design error because, when I sized the pieces, I forgot to add in the width of the dough that makes up the sides of the tower. Either way, the square bases I had planned to use between sections of my tower were slightly too small, so I used some of the leftover dough to make slightly larger ones. I also made some stylized Eiffel Tower cookies to give away to friends. Once my new bases were cooled, I glued them to each of the tower sections and assembled the whole thing.

For the top of the tower, I wasn’t sure if I wanted a gingerbread pyramid on top or to do something a bit more creative. I had cut out the triangles from my original drawings, but putting them together to form a pyramid was harder than I imagined (something Danny commented on, as well, when she was designing her gingerbread Big Ben). In the end, I decided to make four arches out of white chocolate to create a design that looked somewhat like the original drawings of the Eiffel Tower’s peak. While I was at it, I created a French flag out of chocolate to fly atop my tower. Once these were affixed onto the pinnacle, my creation was complete. C’est magnifique!
As for taste, of course I sampled the dough along the way and ate some of the leftover pieces as they came out of the oven. The flavor is good, but as they cool, they become quite hard, as a gingerbread structure should. So they would make a great dunking biscuit!


SPECIAL OFFER! For a limited time, you can receive a free copy of my Eiffel Tower template! Simply subscribe to my blog, and contact me here. I will email you a PDF of my plans (for personal use only).

Gingerbread Eiffel Tower
For the gingerbread:
- In a large bowl, whisk together flour, baking powder, salt and spices. In a separate large mixer bowl, beat shortening and brown sugar on medium speed until fluffy and well blended, about 5 minutes. Beat in eggs and molasses until well combined.
- Using the paddle attachment of a stand mixer, stir half of the flour mixture into the molasses mixture until well blended and smooth. Gradually add the remaining flour mixture, switching to a dough hook attachment when it gets stiff and scraping sides as necessary. If there is still flour at the edges or bottom of the bowl, remove dough from bowl and knead by hand until all the dry ingredients are incorporated.
- Divide the dough into two round disks, wrap in plastic wrap and refrigerate at least two hours, but preferably overnight. (Can be made up to three days ahead of time.)
- When you are ready to cut out and bake the dough, remove one disk of dough from the refrigerator and let it sit at room temperature for at least 10 minutes. Spread parchment paper on a flat surface and dust it lightly with flour. With a lightly floured rolling pin, roll out the dough to a thickness of about ¼ inch. Using a template, cut out as many pieces as possible with a sharp knife, wiping the knife on a paper towel frequently.
- When you have as many pieces cut out as will fit on this piece of dough, carefully remove the excess dough around the pieces and cut the parchment paper between them so you can transfer the pieces with the parchment paper onto your baking sheets. Make sure your baking sheets are as flat as possible and won’t warp in the oven.
- Space the pieces an inch apart on the baking sheets. If the dough stretches during the transfer process, push it back into shape on the baking sheets. Bake at 350°F until the pieces feel firm to the touch and edges are just beginning to darken. This should take 6-8 minutes for small pieces and 11-15 minutes for large pieces. Rotate the baking sheets 180 degrees about halfway through the baking time for more even browning.
- While your first batch is baking, roll out the leftover dough and cut out the rest of the pieces. If you need to, remove the second disk of dough from the refrigerator, let it sit at room temperature for at least 10 minutes, and roll it out as well. When you have all your pieces for the Eiffel Tower, you can use the rest of the dough to make cookies, or wrap it up and save it in the refrigerator in case some of the pieces break or you need more reinforcements, like I did.
- When the gingerbread pieces are done, remove baking sheets from the oven and place on cooling racks, but leave cookies on the baking sheets. While the pieces are still warm, lay the pattern pieces over them, and using a large straight chef’s knife, trim any parts that have spread beyond the pattern pieces. Then transfer pieces to a cooling rack to cool completely.
- 2 egg whites
- 2 2/3 c. powdered sugar, sifted and divided in half
- ½ c. white chocolate chips
- Red and blue food coloring
- Toothpicks
- While gingerbread pieces are cooling, make the royal icing. In a heat-proof mixing bowl, whisk the egg whites with half of the powdered sugar until the sugar is dissolved. Place the bowl over a pan of simmering hot water over low heat. (The bottom of the bowl should be higher than the surface of the water.) Whisk the egg white and powdered sugar mixture constantly until it reaches 160°F. This will cook the egg whites enough so they are safe to eat.
- When the mixture has reached 160°F, remove the bowl from the pan and, using an electric mixer, beat the egg white mixture on medium speed while adding the remaining 1 1/3 cup of powdered sugar, a spoonful at a time. When all the sugar is incorporated, beat on high speed until the icing holds stiff peaks when the beaters are lifted out of the bowl. If needed, add more powdered sugar, a tablespoon at a time. Place a clean, damp towel over the bowl of icing to prevent it from drying out until you’re ready to use it.
- Fill a piping bag fit with a small round tip (or a freezer bag with a small hole cut from a corner) with royal icing. Twist the top closed, and tie it tightly with a string or wire twist-tie to keep the icing from squeezing out the top.
- While all the pieces of gingerbread are lying flat on the cooling racks, pipe the criss-cross pattern on each piece, following the design on the template. Leave to dry for at least an hour, or overnight. (TIP: To keep the royal icing fresh overnight, I placed my entire piping bag full of icing into a sealed, airtight container and stored it in the refrigerator. Aside from having to break off the dried piece at the opening of the piping tip, it worked beautifully the next day, although you may need to let it sit at room temperature for a few minutes to soften it up.)
- Choose a flat base for your Eiffel Tower, either a thick piece of cardboard, a baking sheet or a flat platter. Line it with aluminum foil or parchment paper, if desired.
- To assemble the base of the tower: Starting with the pieces for the base of the tower and the four square “feet,” pipe a line of icing along two adjacent edges of one square and along the side of one base piece. Place that base piece onto the square so that one of its “legs” lines up with the icing on one side of the square. Place another base piece on the other side of the square with icing on it, adjacent to the piece that’s already there. You’ll have to hold them together for a few minutes while the icing dries. Once they are somewhat stable, you can use props (like food cans) to hold them upright. You might also want to enlist the help of another person to hold the pieces together while you pipe more icing along the seams, filling any gaps and sealing the edges together.
- Repeat the previous steps with all four feet and all four sides of the base of the tower. When the icing is dry enough that they are stable, go on to the middle section of the tower.
- To assemble the middle section: This section has one square piece for the “floor.” Pipe a line of icing along two adjacent edges of the square and along one side of one piece of the “wall” of the second tier. Place the wall piece on top of the floor piece, aligning the bottom edge of the wall with the icing on one edge of the floor. Place another wall piece on top of the other edge of the floor with icing on it, and bring the two wall pieces together, using the icing on the side of the wall piece as mortar to hold them together. Hold them in place for a few minutes until dry enough to stand on their own. Again, fill in any gaps in the seams with more icing, sealing the edges together.
- Repeat the previous steps with all four walls of the second tier of the tower. When the icing is dry enough that it will stand on its own, go on to the third tier of the tower.
- To assemble the third tier: This section also has a square for its base. Follow the instructions for the middle section, using the long narrow pieces for the third tier. When it is stable enough to stand on its own, leave it to dry for at least an hour, or overnight.
- When the three sections of the tower are assembled and the icing is stiff and hard, it’s time to put them all together. Starting with the base, pipe the icing all around the top edges of all four sides of the base. Place the second section on top of that, aligning the icing with the sides of the floor of the second tier. Fill in any gaps with more icing. Leave that to dry for about an hour, then repeat with the third section, holding it in place until you know the icing is hard enough to support the weight of the tower. Pipe more icing into any gaps in the seams to give it more stability. Allow that to dry for about an hour.
- While waiting for the icing to dry, you can make the top of the tower. Pour the white chocolate chips into a microwave-safe bowl, reserving one chip to use as a base for the flag. Microwave on low (50%) power for 30 seconds at a time, stirring in between until most of the chips have melted. Stop microwaving at that point, and continue stirring until all the chocolate is melted. Fill a small zip-lock bag with the melted chocolate, and snip a tiny piece of one corner off—just enough to let a small stream of chocolate through.
- Using the template, draw an arch on a plain piece of paper the same width as the top of the third tier, and about the same height. Place a piece of wax paper over your drawing, and pipe the white chocolate over the lines of the drawing, creating an upside-down U shape. Close off the U at the bottom (so it now looks like a sideways D). You may want to go over the shape again to make the chocolate thicker. Move the template so the drawing appears under a clean section of wax paper and repeat the piping process to create another arch. Do that again two more times so you have a total of four arches. Let them dry.
- Place a toothpick on another section of the wax paper and pipe a small rectangle, about 1-inch by ½-inch, with the toothpick overlapping the left side and hanging down below it to create a flagpole. While the chocolate is still soft, put a couple drops of blue food coloring in a small dish and, using a toothpick, transfer a little food coloring at a time to the rectangle, filling the left third of the flag with blue food coloring. Repeat with red food coloring on the right side of the flag to create a miniature French flag.
- When the flag has hardened, peel it off the wax paper and turn it over. Pipe another line of chocolate on the back of the flag where the toothpick overlaps the chocolate. This will make it sturdier. When that is dry, stick the toothpick into the reserved chocolate chip.
- You should have three more small squares of gingerbread left. Use the royal icing to glue them together, stacking one on top of the other. Then “glue” them to the top of the third tier of the tower.
- Use a little more icing to glue the base of the flag to the top square, and hold it until it dries. (You may need to use more icing to reinforce it.) Then pipe a line of icing around the edges of the square and affix the chocolate arches to it. Let dry thoroughly. Et voilà! Your Gingerbread Eiffel Tower is complete!
Directions
For assembly and decorating:
Directions
SPECIAL OFFER! For a limited time, you can receive a free copy of my Eiffel Tower template! Simply subscribe to my blog, and contact me here. I will email you a PDF of my plans (for personal use only).
Next week: Petits Fours
Discover more from Here's the Dish
Subscribe to get the latest posts sent to your email.

Amazing!! Great job, it looks perfect!
LikeLike