
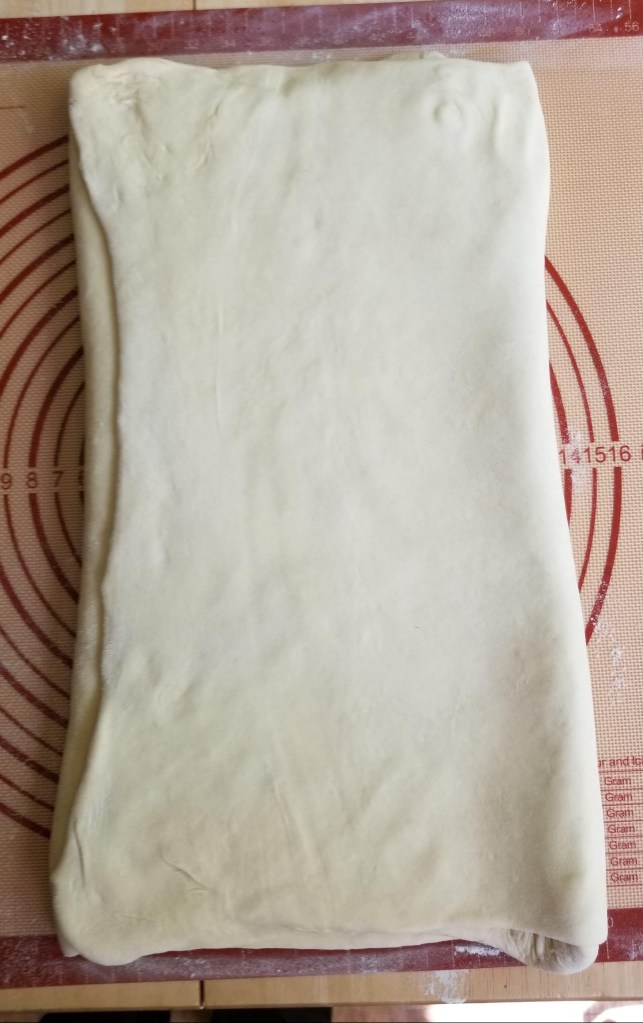
I’ve been looking forward to this moment ever since I started this whole blog/baking journey/Great British Baking Challenge thing. It’s time to make my first full puff pastry!
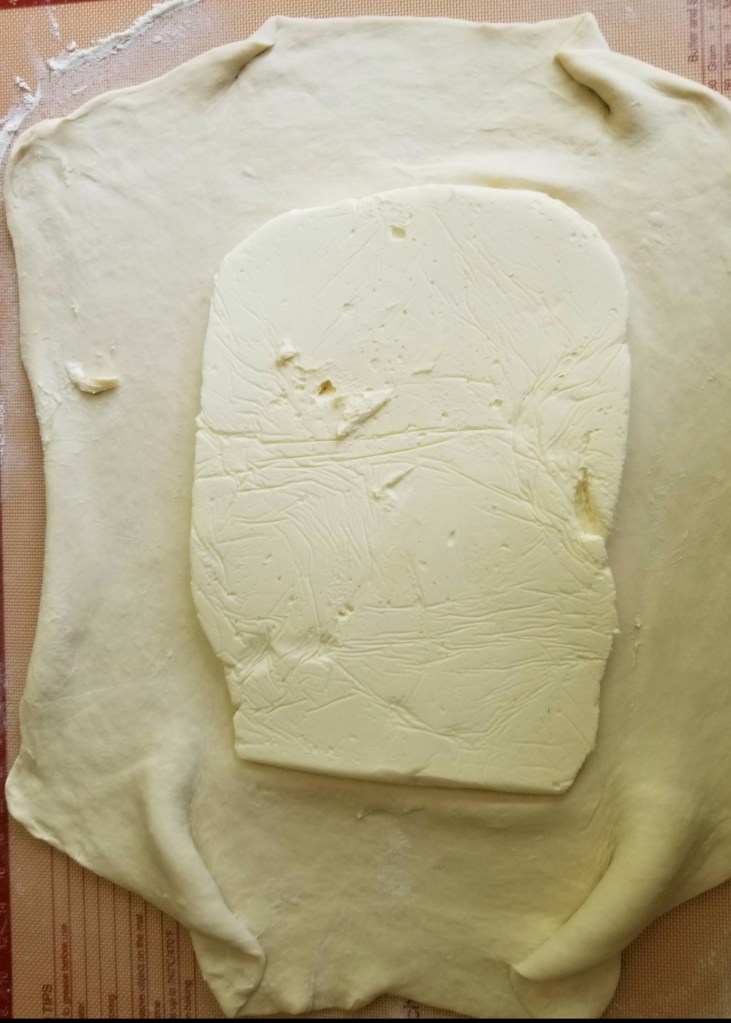
Oh, sure, I’ve gone the rough puff route plenty of times. But there’s nothing quite like the first time you take that big block of butter out of the fridge and lay it on top of your rolled-out pastry dough, carefully fold the edges over the butter and gently roll it in, then fold, chill, roll again, fold, chill, roll, repeat.
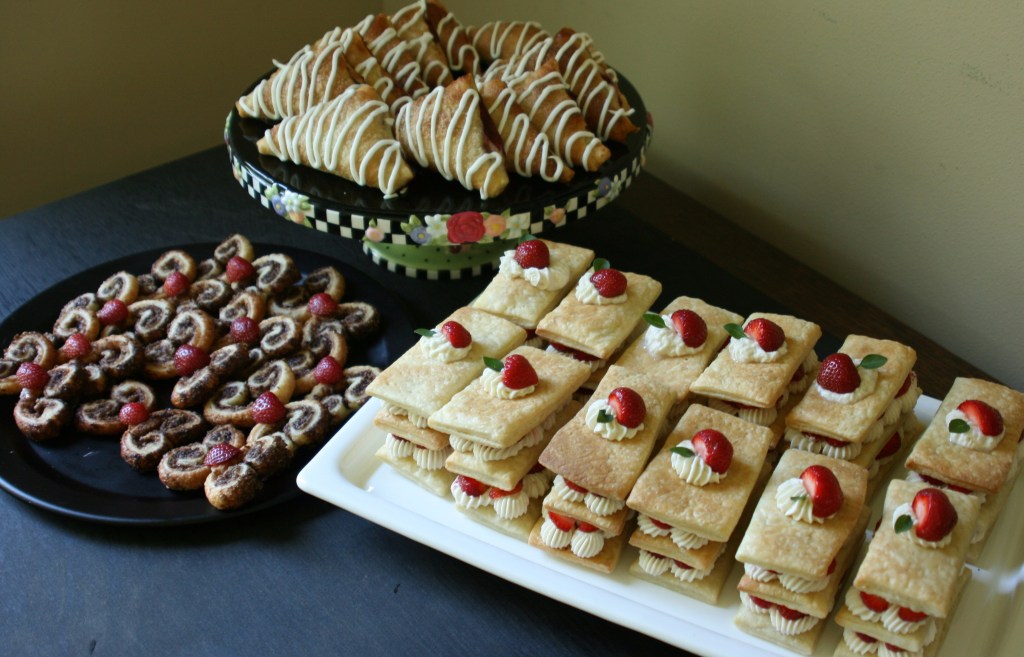
The challenge for this pastry week showstopper was to make not one, not two, but three varieties of pastries from the full puff pastry. The bakers in the Great White Tent had to present 12 of each: one filled, one iced and one that could be whatever they wanted. Mary Berry wanted to see a professional finish, even bakes, good flavors and good textures.
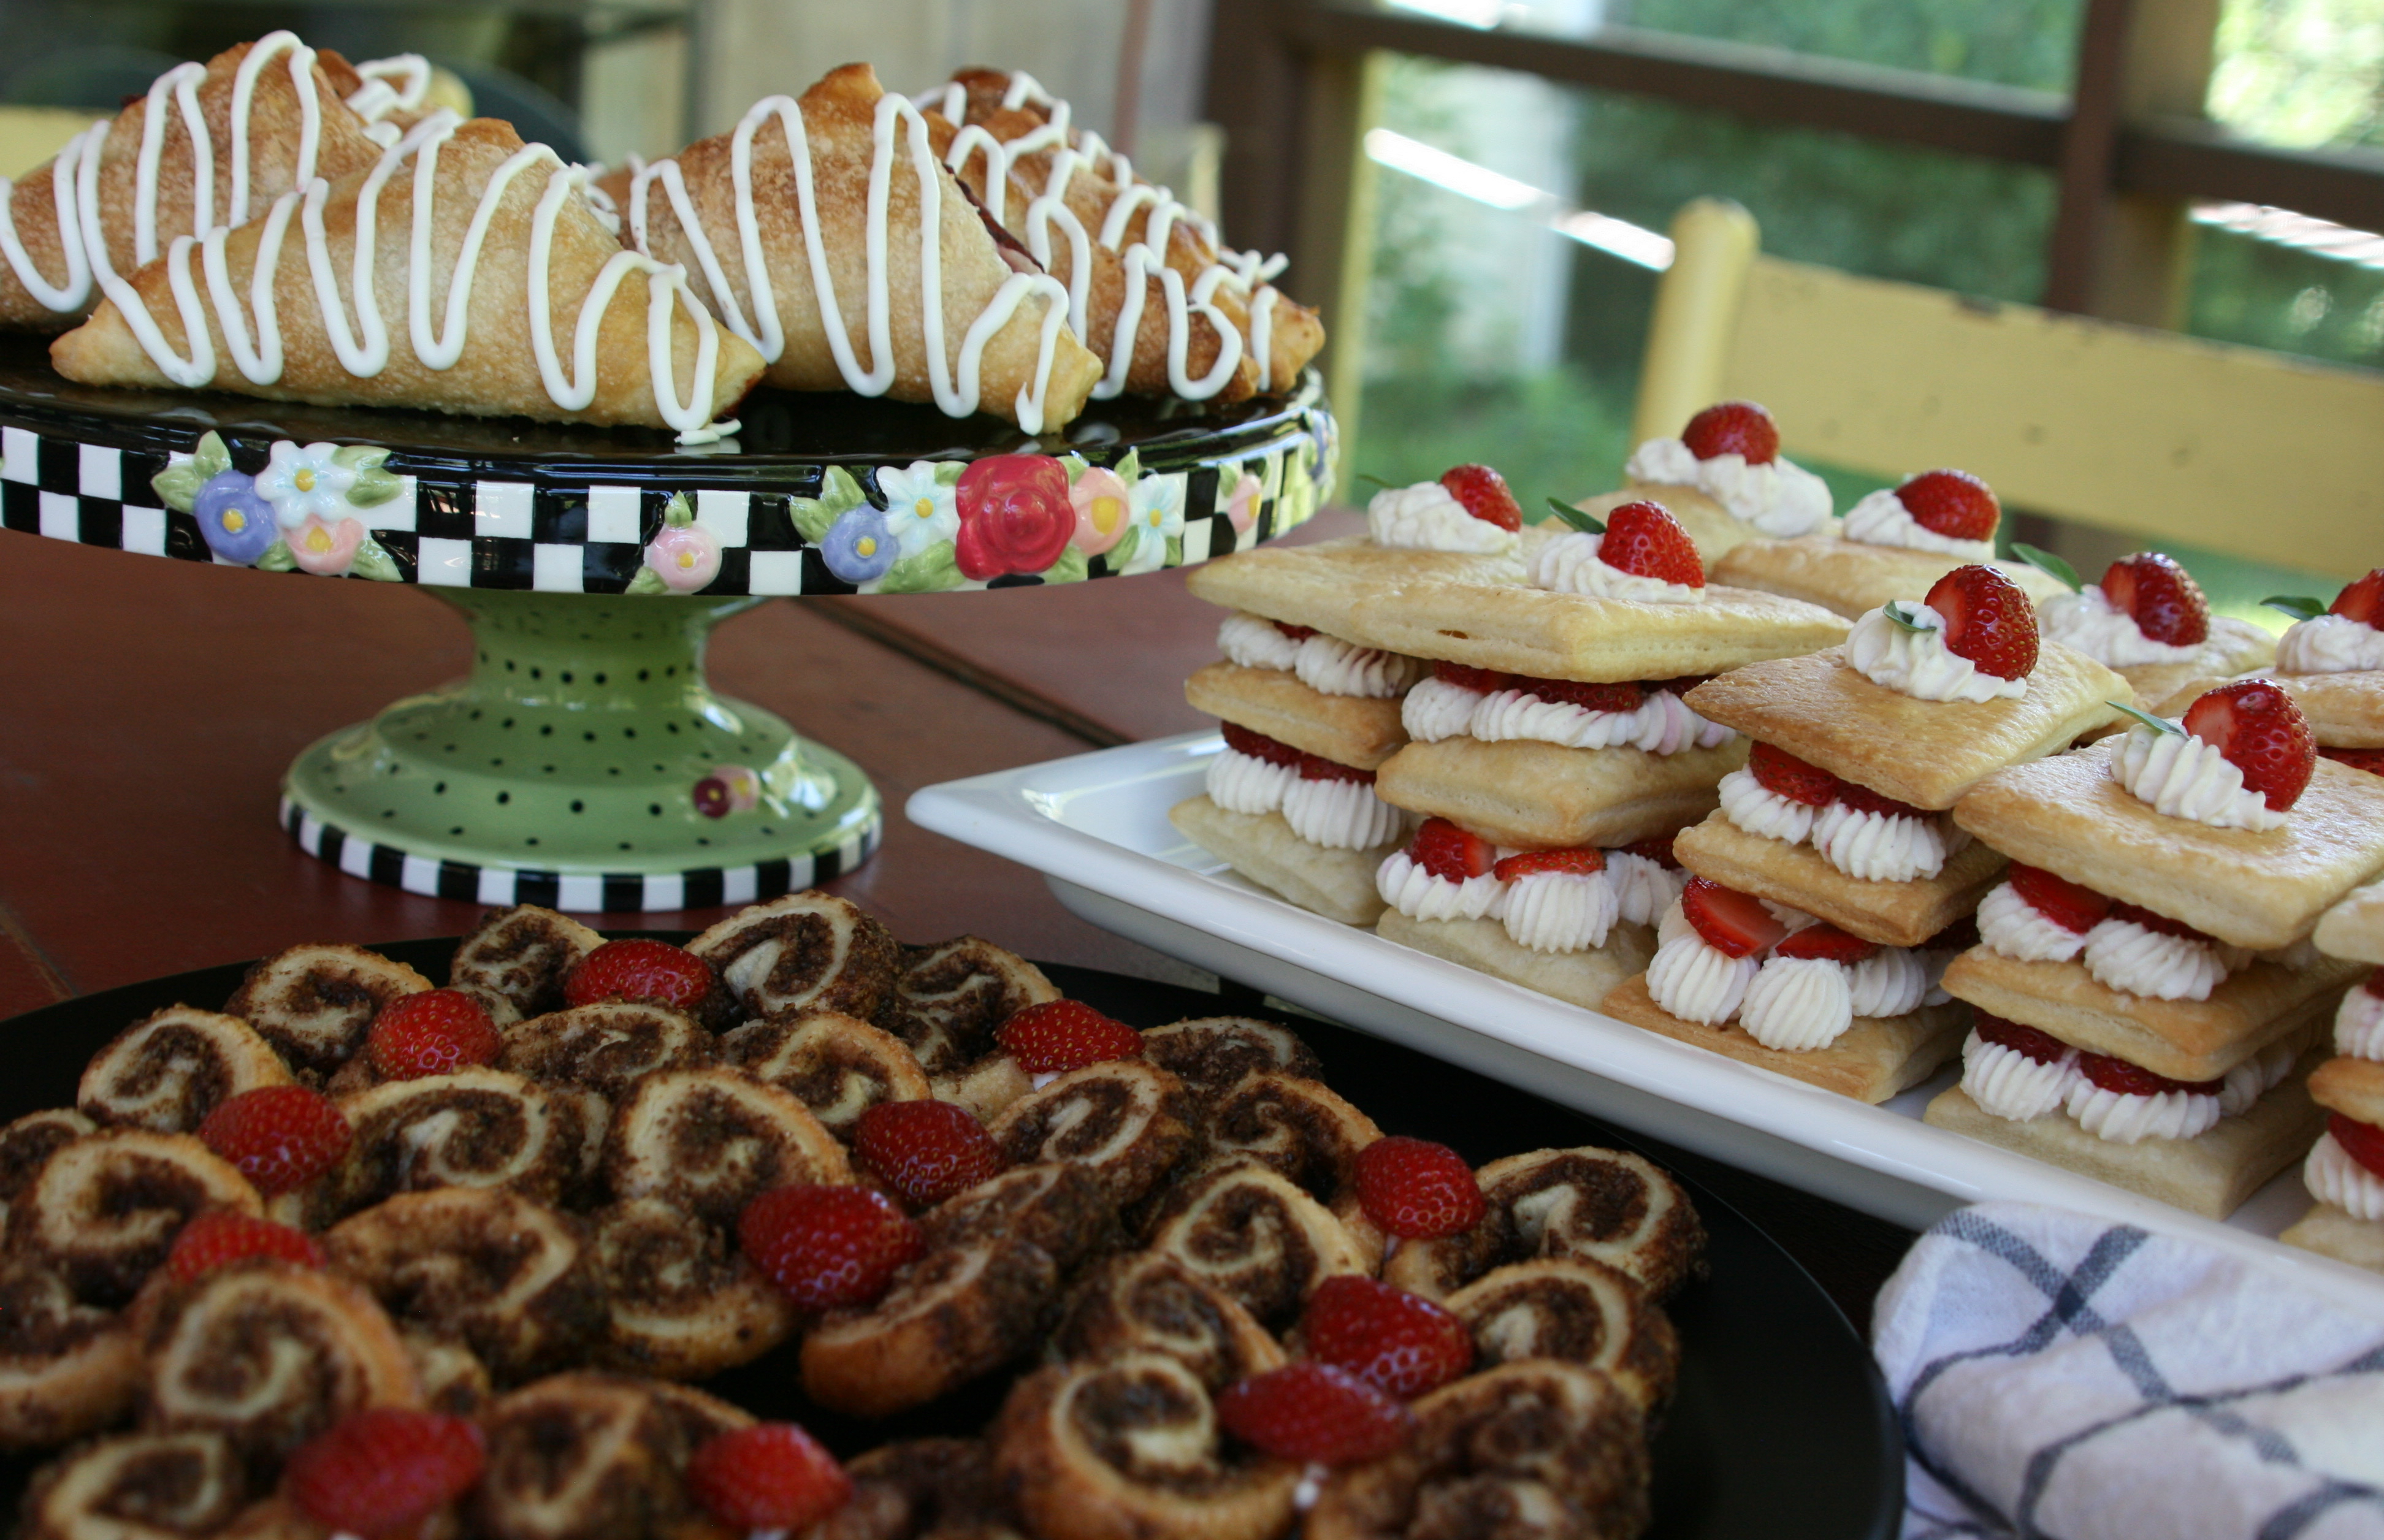
Because the week I made these fell toward the end of Wisconsin strawberry season, I wanted to celebrate this short but oh-so-flavorful season with strawberry-themed pastries. I chose to make strawberry mille-feuilles with basil-infused mascarpone cream, strawberry Nutella turnovers and chocolate pecan palmiers. (Okay, the palmiers aren’t strawberry-themed, but I “glued” them together with royal icing to make palmier butterflies and garnished each one with a strawberry heart!)
My first dilemma was figuring out how much pastry I would need. I decided to make a double batch, which meant using 2¼ pounds of butter! It was quite clear after I rolled the butter into the dough and made my first fold that this was way too much pastry to roll out at one time, so I divided it in half and alternated rolling and folding each half. I only ended up using three-quarters of the dough, so I could have made do with 1½ batch, but fortunately the dough freezes well, so I can save it for another bake!
If, like me, you’ve never made full puff pastry before, I encourage you to read this recipe carefully, as it provides clear, step-by-step instructions on the rolling and folding process. If you’re more of a visual learner, there are helpful photos and a video you can watch on this link. The main difference between the puff pastry in the former recipe, on TheSpruceEats.com, and that of the latter is that the first recipe (which I used) calls for mixing some flour into the butter before folding it into the dough. I wasn’t sure why until I stumbled upon this answer on SenseAndEdibility.com: “The flour helps absorb some of the water that the butter is going to release, but not so much that it prevents the puff pastry dough’s layer from rising as a result of the steam being released during baking.
The whole idea behind the painstaking process of folding, rolling and chilling the dough up to six times is to create layers of butter and dough so that, when the chilled dough hits the hot oven, the butter melts and creates steam that rises and separates the layers. That’s how you end up with a light, flaky pastry without using any leavening agents.

Once I was done rolling, folding and chilling my dough, I started to assemble the pastries. The turnovers were the easiest. Using a quarter of the dough, I simply rolled it out and cut it into 3½-inch squares. I spread a bit of Nutella on each one and topped it with a couple teaspoons of diced strawberries. Folding the dough over the filling to form a triangle, I sealed it with a little water (or strawberry juice, as it started to leak out a bit), brushed it with egg wash and sprinkled it with sugar before baking. After they had cooled, I piped on some royal icing.
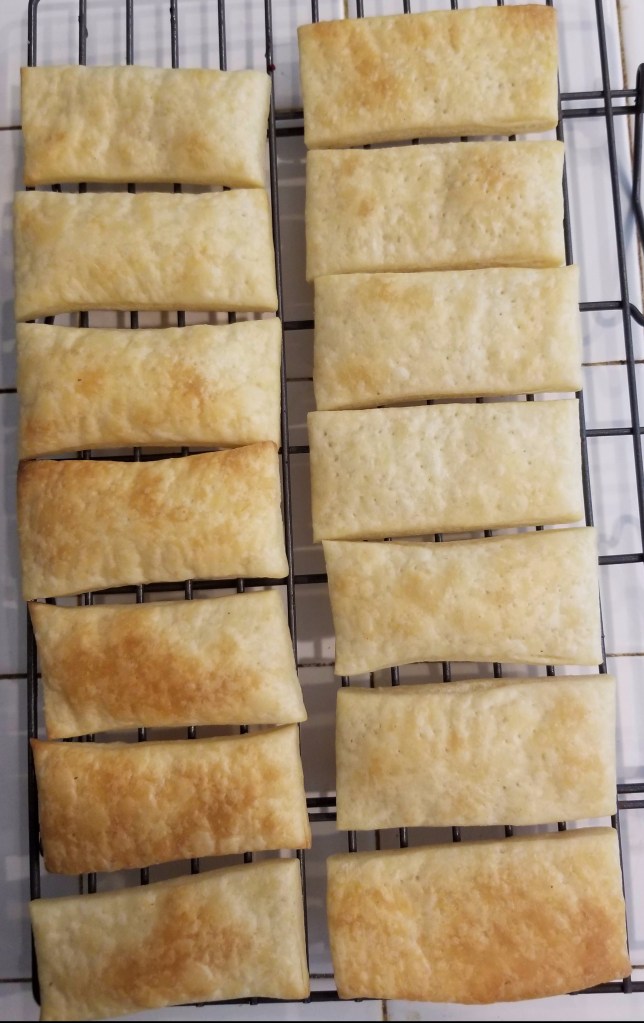
The mille-feuilles (often referred to as Napoleons, although there is a technical difference between the two pastries) were slightly more complicated in that the dough is first rolled into a rectangle, then transferred to a parchment-lined baking sheet before being cut into 2-by-4-inch rectangles (to prevent them from getting misshapen when transferred). The dough also has to be weighted down while baking, so it is topped with another piece of parchment paper and another baking sheet before being popped into the oven. This is to prevent the dough from rising too much. The flatter the pastry, the more elegant the mille-feuille will be (not to mention easier to eat).
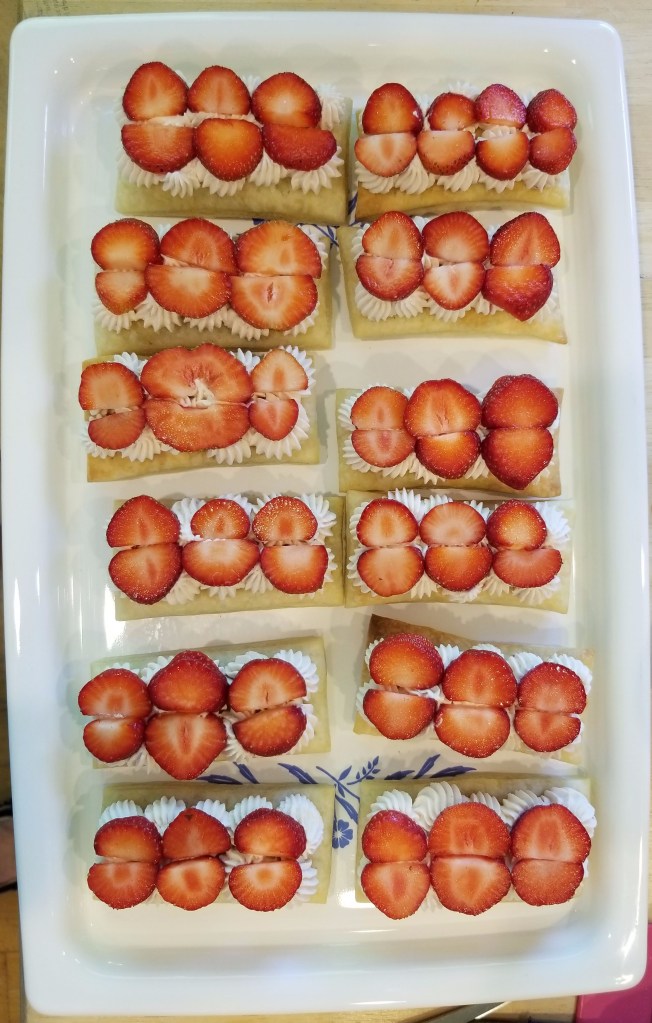
After the rectangular pastries were baked and cooled, the mille-feuille could be assembled. I had infused some cream with fresh basil from my garden the night before, and I whipped that up with mascarpone cheese and a little sugar to create a subtly refreshing, pleasingly flavored piping cream. I piped that onto two-thirds of the rectangles and topped them with sliced strawberries. Then I stacked half of those layers on top of the other half and topped each one with a plain pastry rectangle. I garnished them with another dollop of cream and half a berry, as well as a tiny little basil leaf.

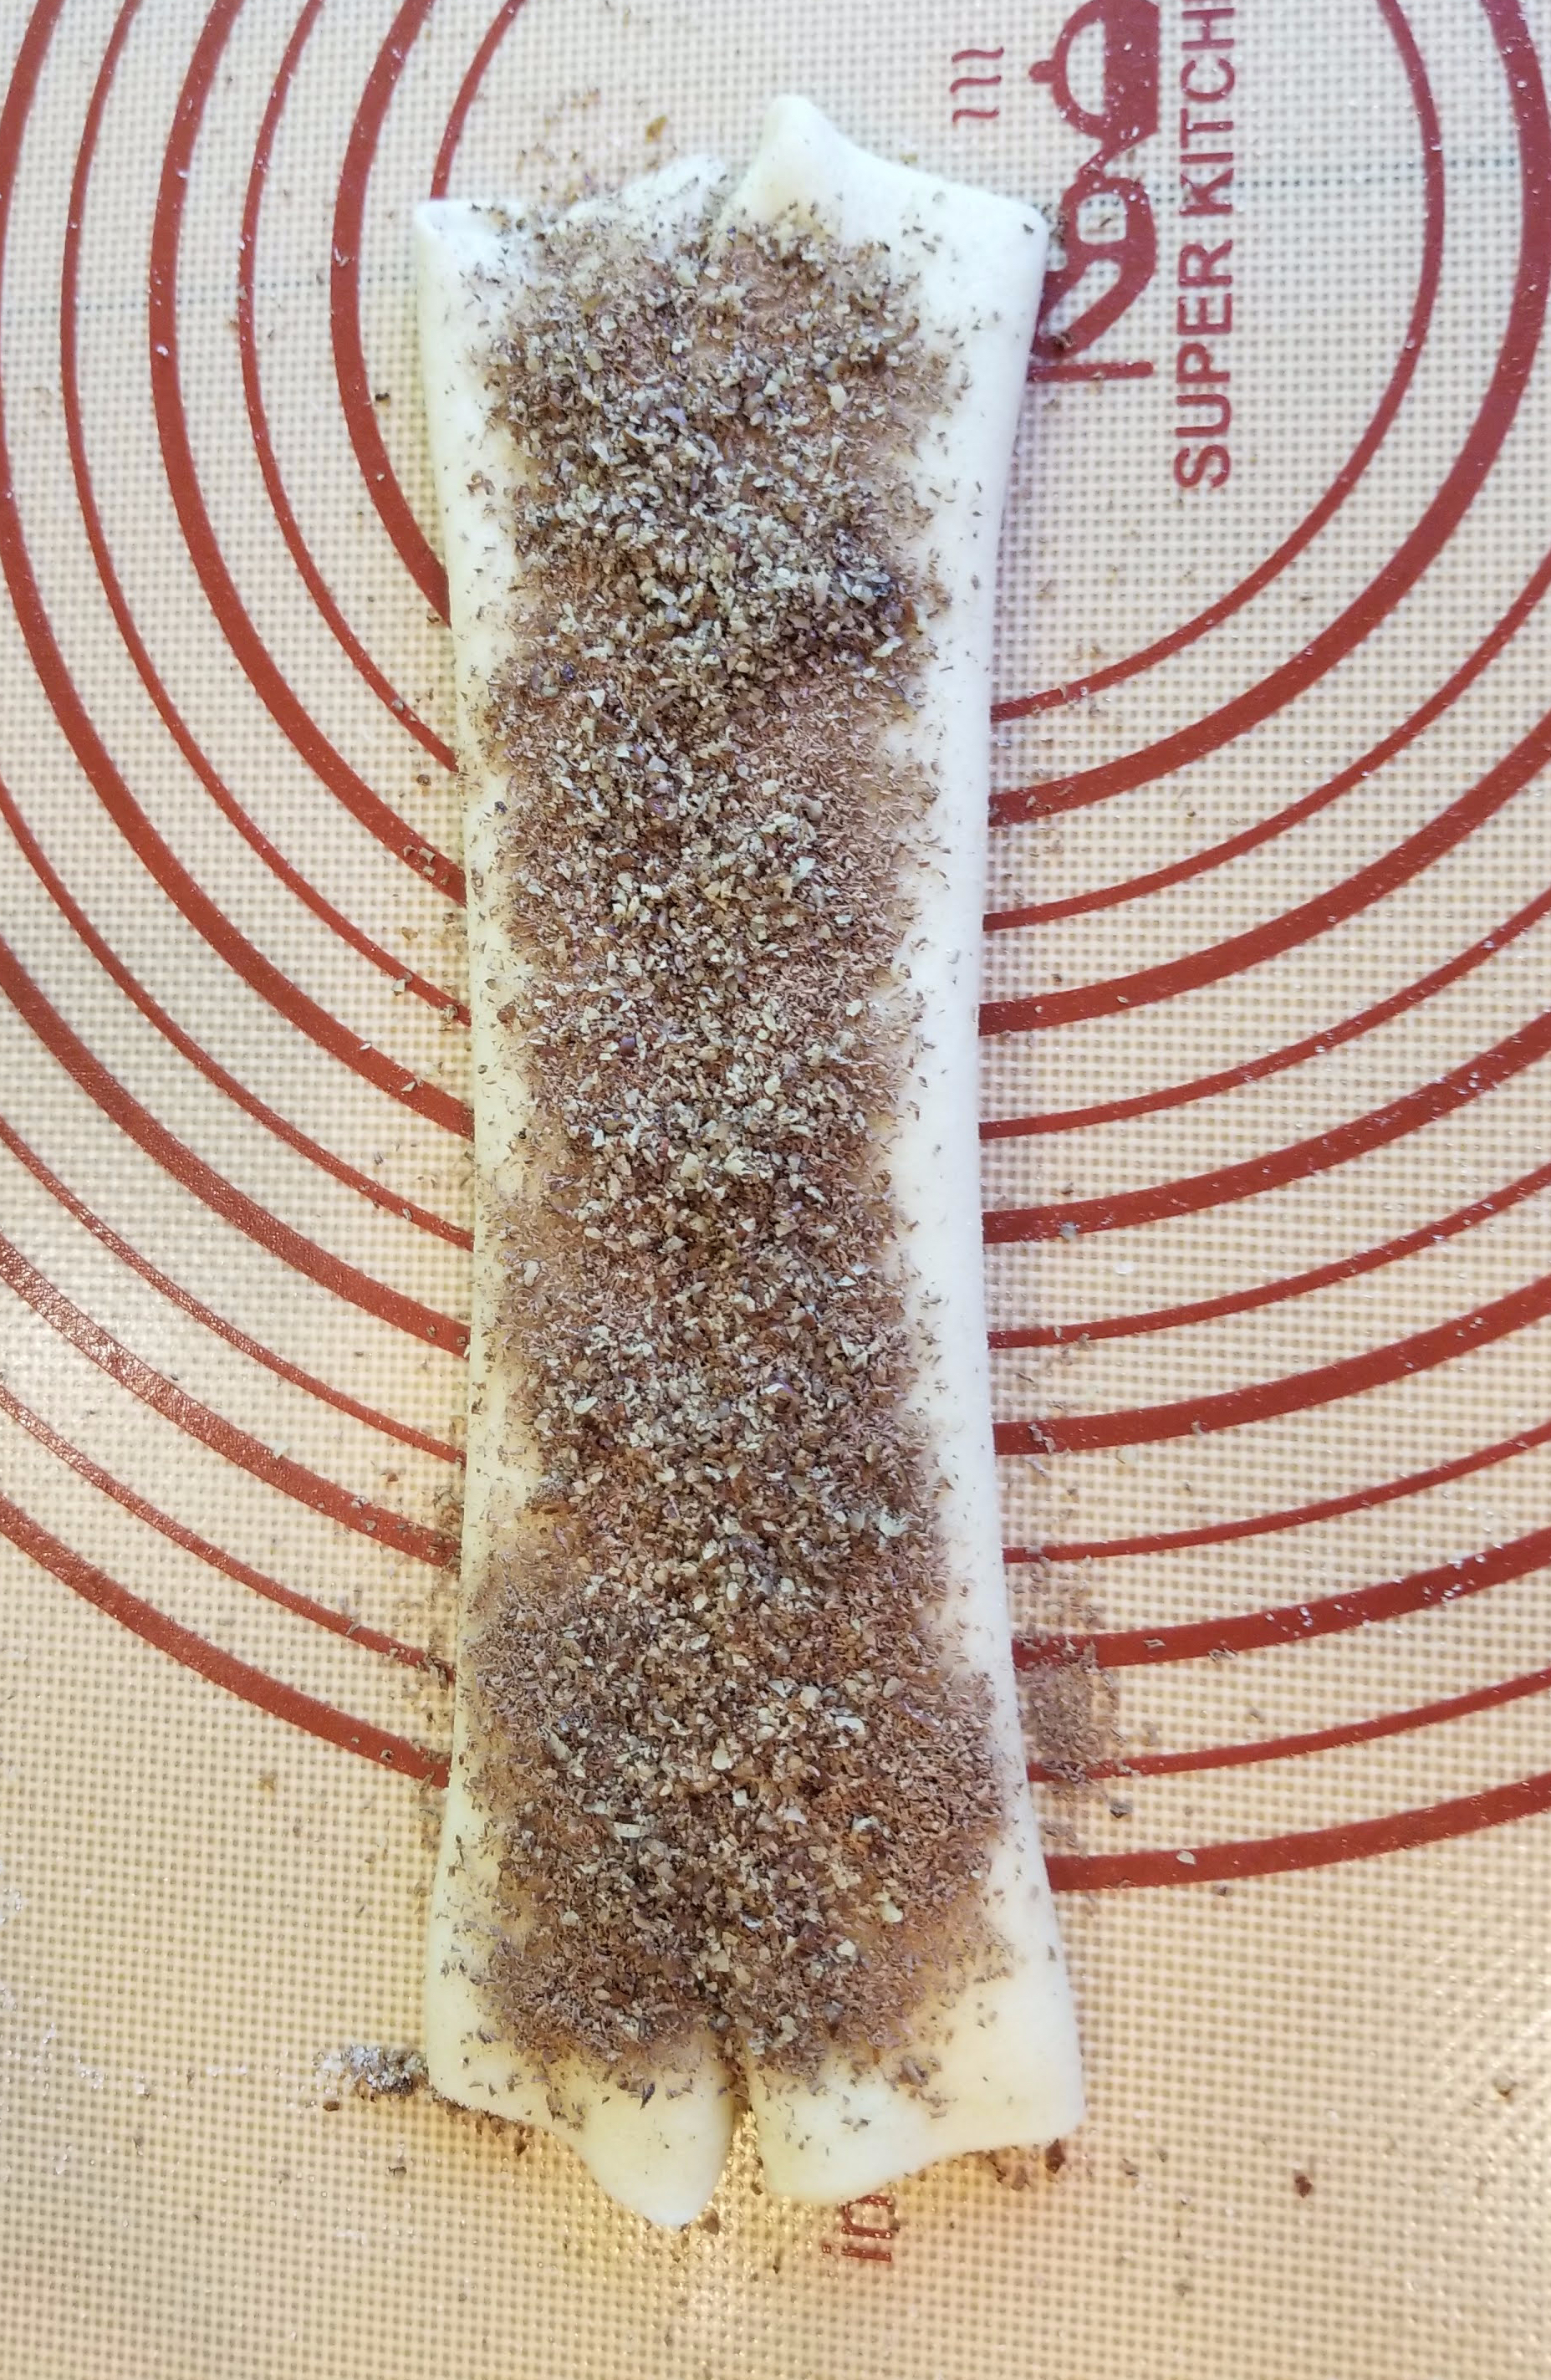
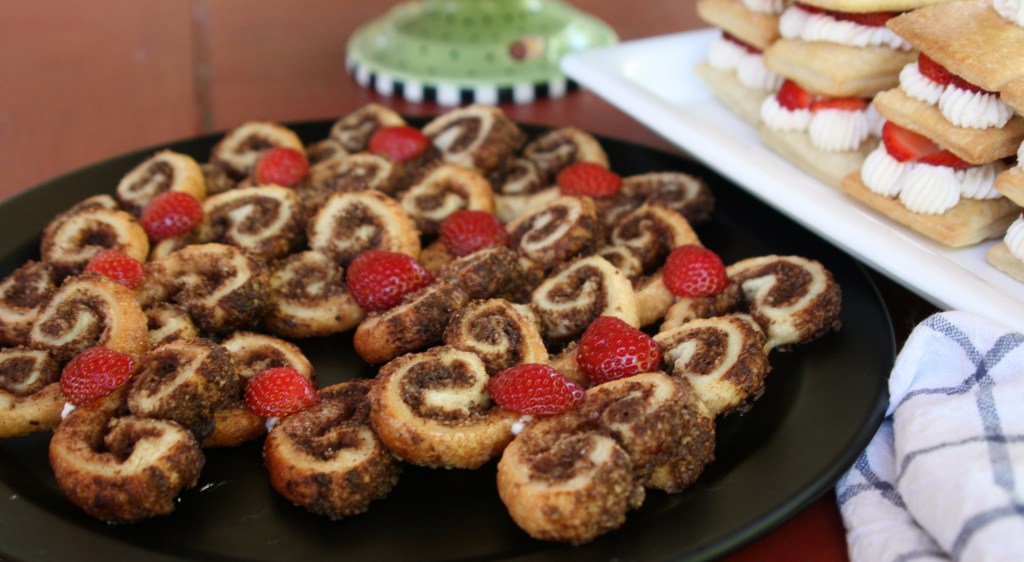
Palmiers, also called elephant ears or palm hearts, are not difficult to make but a little putzy. I followed this recipe but added grated chocolate and finely ground pecans. The secret to the classic shape of a palmier is how the dough is folded after it’s rolled out. First, the dough is rolled into a square and sprinkled with sugar (and any other toppings you’re using); two edges are folded halfway to the center and then folded again to meet in the middle. (See photos below.) After more sugar or other toppings are sprinkled over that surface, the whole thing is folded in half lengthwise and chilled for at least 30 minutes before being sliced and baked. As they bake, the little pastries puff up and spread out to look like leaves or ears (or the tops of fiddlehead ferns).


I must say, biting into a freshly made mille-feuille reminded me of the fresh pastries one gets in the patisseries of Paris! In fact, all my pastries turned out pretty tasty. The mille-feuilles are best eaten the same day they’re made, since the cream will soften the pastry. The turnovers will keep a little longer, but they don’t remain as crisp and flaky on day two. The palmiers keep nicely in an airtight container for up to a week, if they last that long!

Puff Pastry Triple Play
This recipe is long! But it’s really four different recipes, so it’s easy to divide into manageable pieces. You can make the pastry dough alone, divide it into fourths and freeze it for later use. You can also make half a batch of pastry and use it for either the turnovers, the mille-feuilles or the palmiers and still have leftover dough. Once you have the building blocks, there are countless things you can do with them. Let your imagination be your guide!
Puff Pastry
Ingredients
- Measure 8 cups of flour and 4 teaspoons salt into a large bowl and stir to mix. Add the chilled butter and blend it into the flour with a pastry cutter or your fingers until the mixture looks like coarse meal. Add the cold water and stir briskly with a fork until a rough dough forms and pulls away from the side of the bowl. (If necessary, you can add more cold water, one tablespoon at a time.)
- Knead the dough on a floured surface for two or three minutes until smooth, adding more flour if necessary to keep the dough from sticking. Wrap dough in plastic wrap and chill for 30 minutes.
- While the dough is chilling, mix the softened butter with the 1 cup of flour. Transfer the butter-flour mixture to a large piece of plastic wrap. Cover with another piece of plastic wrap. With your hands or rolling pin, flatten and shape the butter into a square or rectangle about ¾-inch thick. Set it into the fridge to firm up.
- After the dough has chilled for 30 minutes, remove it from the fridge. On a lightly floured surface, roll it out so that it will cover the butter when folded. Set the chilled butter slab in the center of the dough and fold the edges in around the butter to enclose it completely. Press the edges together to join them.
- The dough encompassing the butter must now be rolled out and folded six times. Depending on how warm your kitchen is, you’ll need to chill between each folding (called a “turn”) or after every two turns. This is to prevent the butter from becoming so soft that it oozes out while you work with the dough.
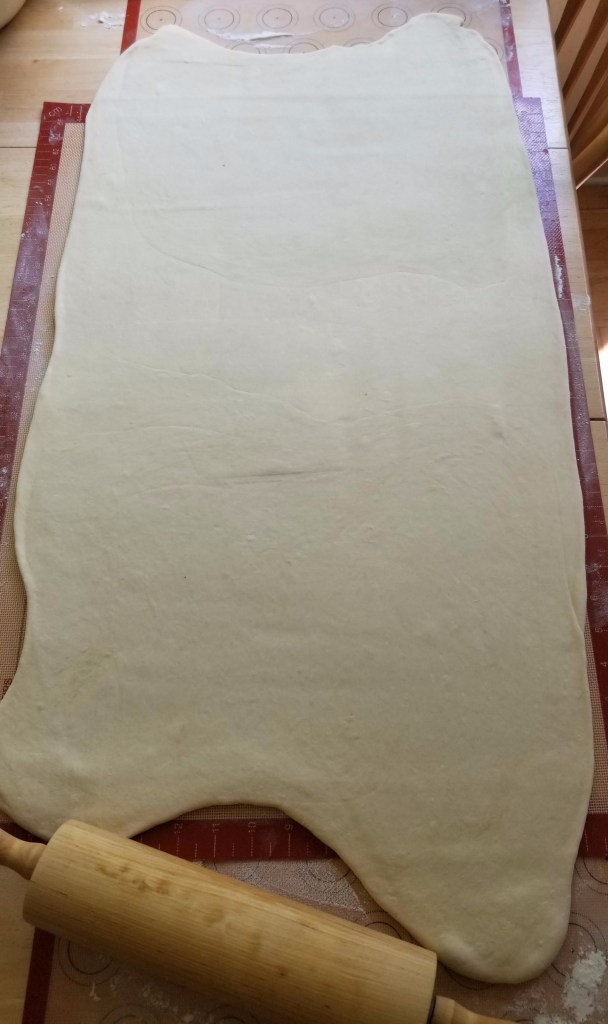
- Lightly flour your surface. With the side of a rolling pin, hit or firmly tap the dough (and enclosed butter) into a rectangle. Once the rectangle has taken shape and the butter has softened a bit, roll the dough to shape it into an elongated rectangle about ¼-inch thick. Turn the dough several times while you roll it, and dust the work surface with more flour as needed to prevent the dough from sticking. (This is where my dough got too big for my pastry mat. Once I rolled it out the first time, I divided it in half and then took turns rolling, folding and chilling each half.)
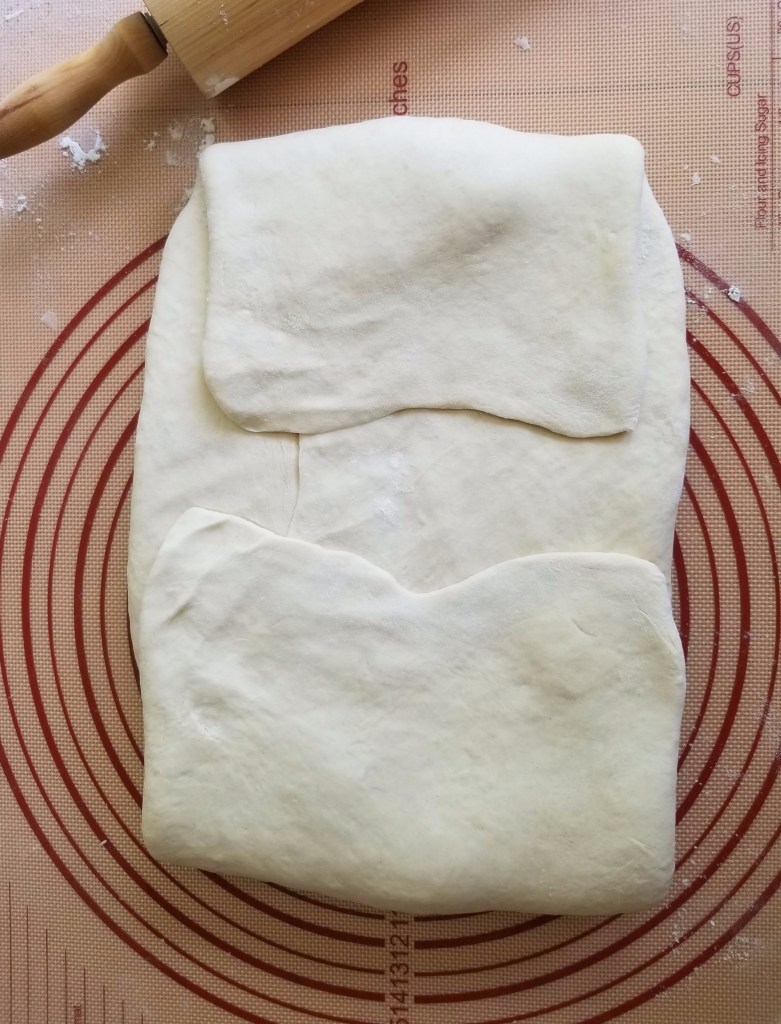
- Straighten the edges of the rectangle with your hands. Then fold the rectangle into thirds, like you would a letter—folding one short side in one third of the way, then folding the other short side over it to form three layers. Brush off any excess flour as you fold, and align the edges as neatly as possible. This is the first turn.
- If the butter hasn’t started oozing out, proceed to the second turn. Otherwise (or if you need to divide it in half), wrap the dough in plastic wrap and chill in the fridge for 20-30 minutes.
- For the second turn, rotate the dough a quarter turn and roll it into another rectangle about ¼-inch thick. Again, turn the dough several times as you work and flour your surface as needed. Straighten the edges and fold into thirds again, brushing off any excess flour and aligning the edges. This completes the second turn. Wrap in plastic and chill for 20-30 minutes.
- Repeat the rolling and folding four more times, for a total of six turns, chilling between every one or two turns, as needed. (Do not complete more than two turns without chilling the dough in between.) It might help to mark the plastic wrap with hashmarks or 1, 2, 3, etc. so you remember which turn you’re on. This is especially helpful if you’ve divided your dough in half and are alternating turns.
- When all six turns have been completed, wrap the dough and chill it for an hour or two before using. It will keep in the fridge for two days, or you can divide it into portions for freezing. Well-wrapped, frozen puff pastry dough will keep for a year. Thaw at room temperature for 30 minutes or overnight in the fridge. (Note: This recipe makes about 6 pounds of dough, more than is needed for the following three pastries. You will have some left over. Reserve for future use.)
Directions

Strawberry Nutella Turnovers
Ingredients
- Mix the strawberries with the cornstarch, tossing to combine. Set aside. Line two baking sheets with parchment paper.
- Using one quarter of the dough made in the recipe above, roll it out on a lightly floured surface to ¼-inch thick. Cut into 3½-inch squares (or divide dough into twelve equal squares) and transfer each square to a parchment-lined baking sheet. Space them 2-3 inches apart.
- Preheat oven to 400°F.
- Spread a teaspoon or two of Nutella onto each square, concentrating on one half of the square if it were divided diagonally. Top with 2-3 teaspoons of diced strawberries. Dip a finger in water and run it along two adjacent edges of each square and fold the other half over so the edges meet to form a triangle. Press to seal. (If strawberry juice seeps out the sides, use a paper towel to sop up as much as possible.)
- Lightly beat the egg with 1 tablespoon water and brush the tops of each turnover with the egg wash. Sprinkle with sugar and bake in preheated oven for 15-20 minutes or until golden brown. (Rotate baking sheets halfway through baking time to ensure even browning.) Transfer to a rack to cool.
- When cool, drizzle with icing. (Note: I used some leftover royal icing, but you could just as easily use a hot water icing, combining 1 cup of powdered sugar and a few teaspoons of hot water, adding the water 1 teaspoon at a time to avoid getting it too runny. It should be the consistency of thick paint or glue.)
Directions

Strawberry Basil Mille-Feuille
Ingredients
- Pour 1 cup of cream into a small saucepan and add 2/3 cup of torn basil leaves. Heat over medium heat until milk starts to steam. Simmer for 2 more minutes and remove from heat. Let cool for 30 minutes. Pour through a strainer to remove basil and transfer to an airtight container. If you’d like more basil flavor, add a few more torn basil leaves and refrigerate at least 30 minutes or overnight.
- To make the pastry layers: Line two baking sheets with parchment paper. Preheat oven to 400°F. Using about 3/8 of the dough made in the recipe above, divide the dough in half and roll out one half on a lightly floured surface into a large rectangle (about the size of a baking sheet) about ¼-inch thick. (Keep the other half in the fridge until you’re ready to roll it out.) Transfer to one of the parchment-lined baking sheets and trim with a pizza cutter or knife so the edges are straight. Then cut the rectangle into 18 smaller rectangles, about 2 inches by 4 inches. Spread them apart slightly and dock with a fork. Place another piece of parchment paper on top of the rectangles and place another baking sheet on top of the parchment. This weighs the pastry down during baking so it doesn’t puff up too much.
- Bake in the preheated oven for 15 minutes. Remove the top baking sheet and parchment paper and bake for another 4-5 minutes or until very golden brown, turning the baking sheet 180 degrees if needed to ensure even browning. Remove baked pastry to a cooling rack.
- Repeat the rolling, cutting and baking process with the second half of the dough.
- Using an electric mixer fitted with a whisk attachment, whisk mascarpone cheese until light and fluffy. Add powdered sugar and whisk until fully incorporated. If desired, add a few crushed strawberries to give it a slight pink color. Remove the basil-infused cream from the refrigerator and pour through a strainer to remove basil leaves. Add to mascarpone mixture. Add the other 1 cup of whipping cream and whisk together, starting on low speed and gradually increasing until stiff peaks form. Watch it closely so you don’t over whip it!
- Transfer the cream to a piping bag fitted with a ¼-inch plain or star tip and refrigerate until ready to use.
- Reserve six well-shaped strawberries for garnish. Slice remaining berries into 1/8-inch-thick slices and place in a single layer on paper towels to absorb excess juices.
- To assemble, arrange one third of the puff pastry rectangles on a serving platter. Pipe dots of cream to cover each rectangle, then arrange sliced berries on top of cream in a single layer. Add a couple small dollops of cream on top. (This will help the next layer of pastry remain in place.) Place another pastry rectangle on top of the berries and cream and repeat with dots of cream, berries and a couple small dollops. Top each with a third rectangle of pastry.
- Cut the six reserved berries in half. Garnish the top of each mille-feuille with a dot of cream and half a berry. Add a small basil leaf, if desired. Serve immediately, or refrigerate for up to five hours.
Directions
Chocolate Pecan Palmiers
Ingredients
- Divide the dough in half and keep one half chilled while you work with the other half.
- Mix the sugar and salt together and divide in half (about ¼ c. each).
- Spread 2 tablespoons of the sugar-salt mixture onto a clean work surface and, on top of the sugar, roll out half the dough into a 12-inch square (approximately). Sprinkle 2 more tablespoons of the sugar mixture on top, and lightly roll it into the dough with the rolling pin so that both sides of the dough are evenly coated. Sprinkle 1 tablespoon chocolate and 1 tablespoon ground nuts over the dough as evenly as possible.
- Fold two opposite sides of the square inward about 2 inches so they come about halfway to the center, leaving about 4 inches open in the center. Then fold the folded sides in two more inches so they meet in the center. Sprinkle with another tablespoon of chocolate and another tablespoon of pecans. Then bring the two folded edges together to form a log with a seam on one side. Wrap in plastic wrap and chill for 30 minutes in the fridge or 15 minutes in the freezer.
- Repeat the process with the other half of the dough, sugar-salt mixture, chocolate and nuts.
- While dough is chilling, preheat oven to 425°F. Line two baking sheets with foil and then parchment paper. (This prevents the sugar from burning.) Use a sharp knife to slice each log into ½-inch slices. Place them on the foil-and-parchment-lined baking sheets 3 inches apart. Bake for 10-15 minutes until dark golden brown. Transfer to cooling racks to cool. Store in airtight container.
Directions

Next week: A Wheat-Free Loaf
Discover more from Here's the Dish
Subscribe to get the latest posts sent to your email.

3 thoughts on “Puff Pastry”