
As the snow on the ground here in Wisconsin is finally starting to melt, I thought it would be okay for one last winter-themed bake. The brief for this showstopper challenge was a 3D biscuit scene. The bakers in the Great White Tent created a wide array of scenes, from Luis’ George and the Dragon to Iain’s Wild West Scene to Richard’s star baker–worthy Pirate Scene.
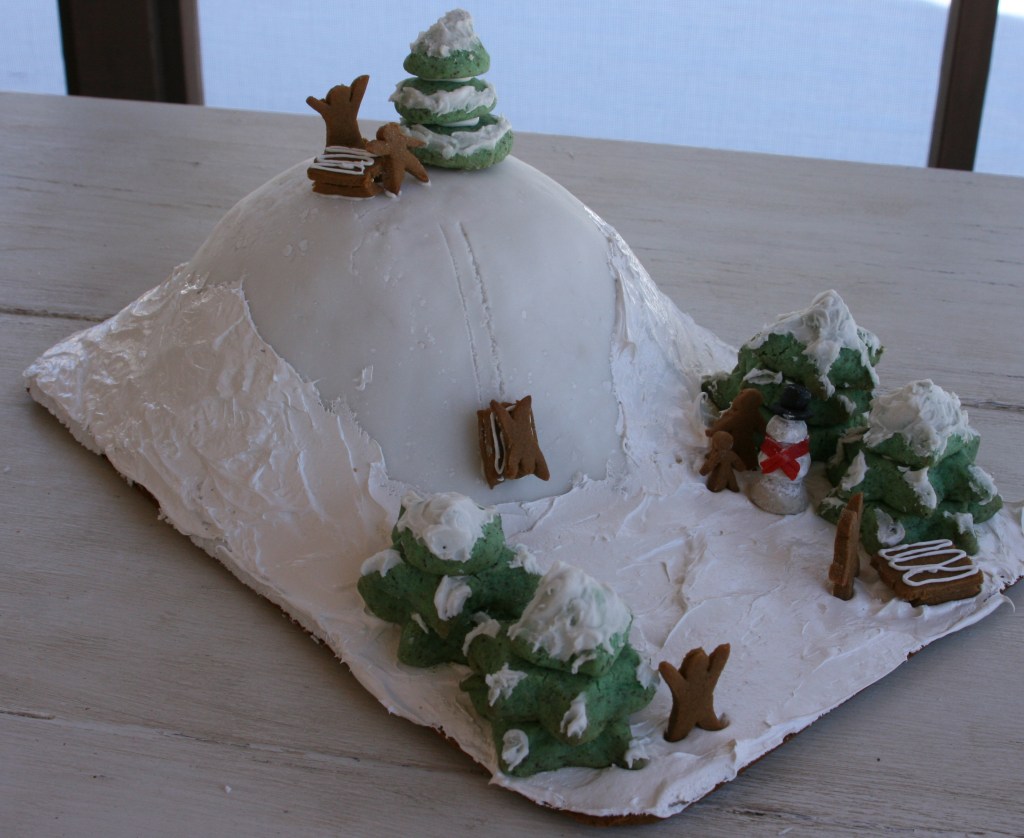
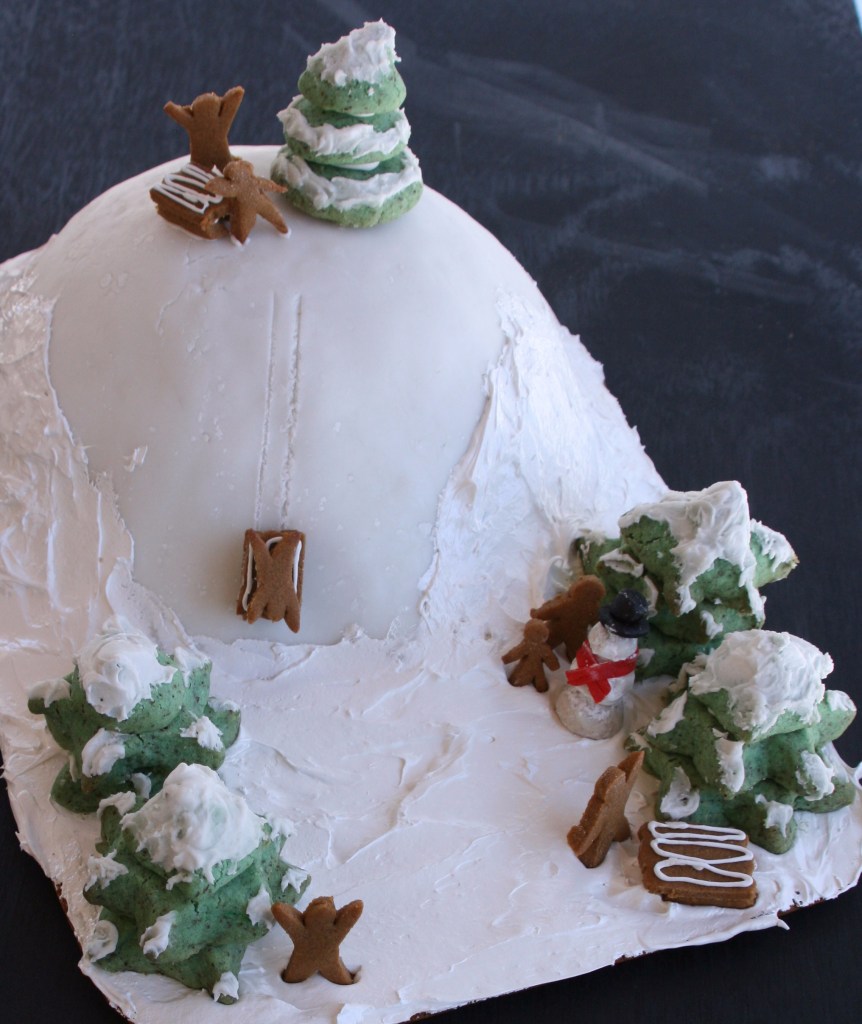
Partially inspired by Martha’s Ski Village Scene, I decided to make something reminiscent of my own childhood, The Sledding Hill.
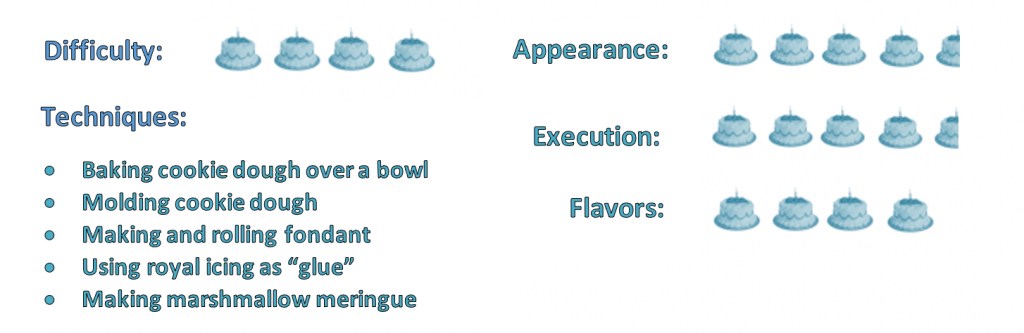
Starting with the base, I used the gingerbread recipe from my Gingerbread Eiffel Tower. I was surprised to find that the dough turned out dry and crumbly this time. It may be due to the dry air in my house this time of year, but next time I would only add enough flour for the dough to come together in a malleable ball.
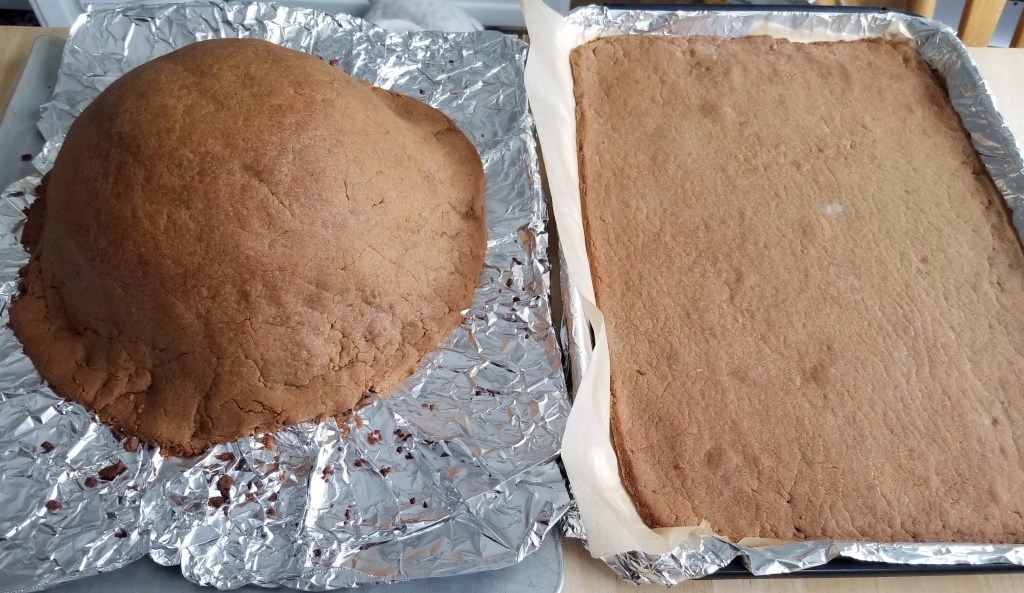
I lined a large baking tray (the kind with sides) with parchment paper so I would be able to use it to lift the base out of the pan after it had cooled. Because the dough was so crumbly, I ended up having to piece it together in the pan, since it kept falling apart after I rolled it out. To make the hill, I covered a heatproof bowl with aluminum foil (molding the foil into more of a hill shape as I went) and covered that with gingerbread as well.
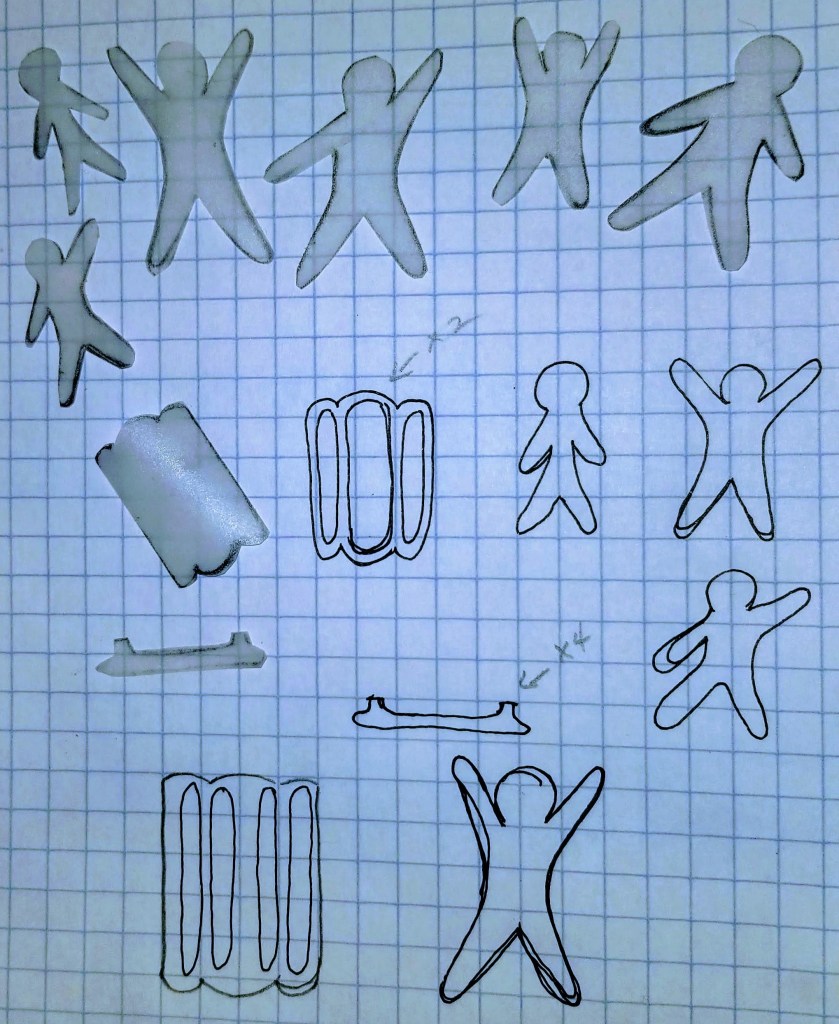
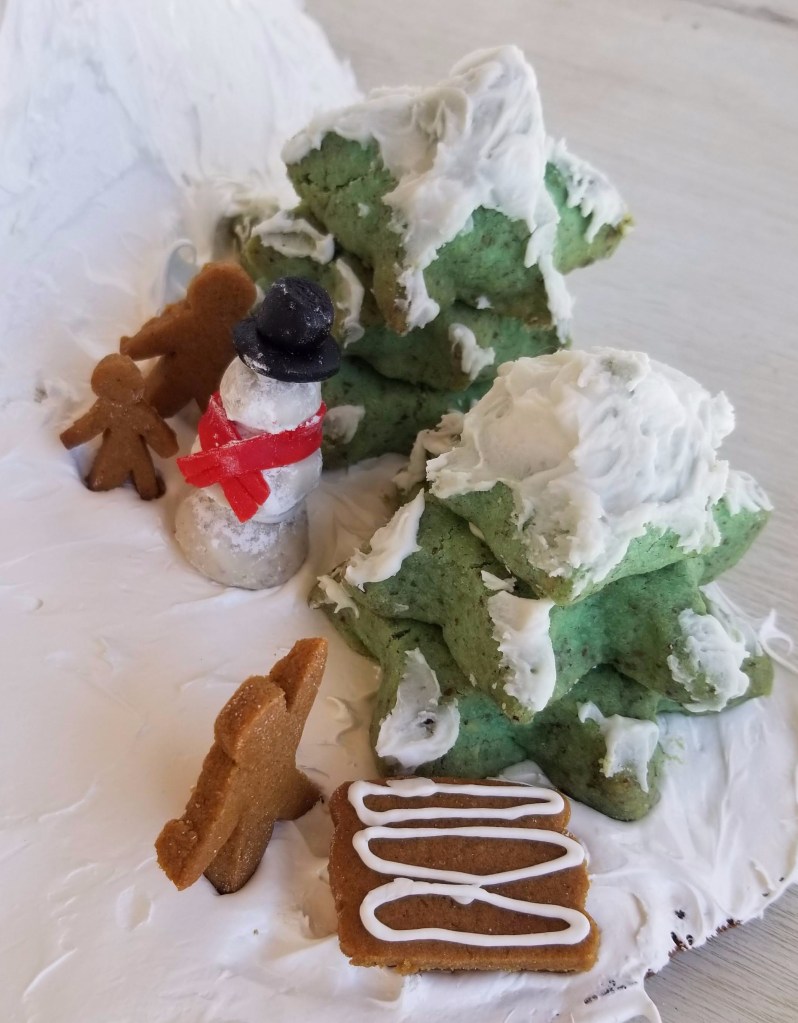
To make the people and their sleds, I drew the figures on graph paper first to make sure I had the proportions right. Then I traced them onto vellum, which I cut out to use as my pattern. While the base pieces were baking, I cut these figures out of the leftover gingerbread dough.
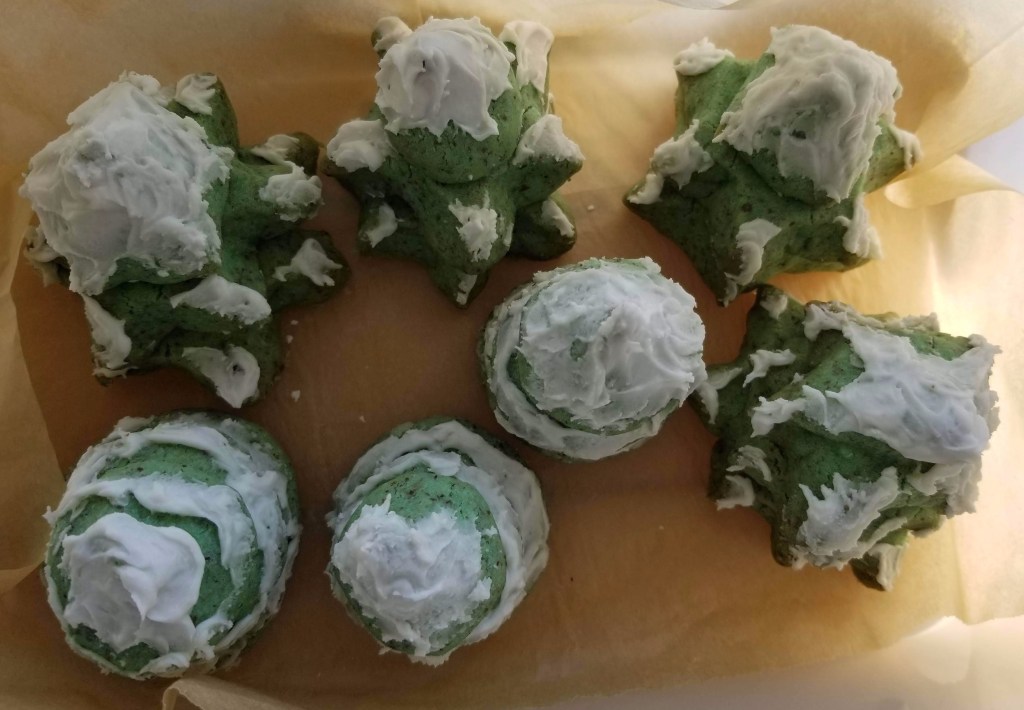
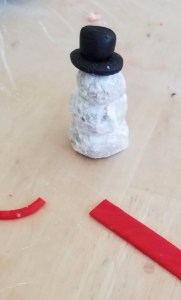
I used a different cookie recipe for the trees and snowman. The Nutty Butter Balls my mom used to make every Christmas (and I still do!) are similar to a shortbread and can be molded into different shapes as they don’t spread much while baking. When I make them at Christmastime, I roll them in powdered sugar, which makes them look like little snowballs, so I thought they would make perfect snowmen. For the trees, I colored part of the dough green and made different-sized balls, which I flattened somewhat so they could be stacked to look like trees. I formed the top pieces with a point on top (like Hershey’s Kisses). I also formed some of them into star shapes to make them look more like tree branches.

Once all the pieces were baked and cooled, it was time to begin assembly. To re-create snow, I made white fondant to cover the hill, using the same fondant recipe that I used to form the goose that laid the golden egg, which sat on top of my hidden design cake. Then I made royal icing to assemble the trees, the snowman and the sleds and to add “snow” to the trees.
While that was drying, I made a marshmallow meringue for the snow on the ground. This is a cooked meringue, the one from Paul Hollywood’s Chocolate Marshmallow Tea Cakes, so it’s very stable. I spread it on the gingerbread base and used it to keep the trees, people and snowman in place.
I did not try to accomplish this challenge within the four hours’ allotted time that the Bake Off contestants were given. It was a busy week at work, so I spread this project out over a week and did a little each day. This is a bake that allows you to let your creative juices flow. I’ve included the recipes for each of the elements below, but I hope you will make it your own and come up with a design of your choosing. Let me know what you come up with!
Gingerbread
Ingredients
- 6 c. all-purpose flour
- ½ t. baking powder
- ½ t. salt
- 4 t. ground ginger
- 4 t. ground cinnamon
- ½ t. ground cloves
- 14 T. butter-flavored vegetable shortening
- 1½ c. packed brown sugar
- 2 eggs
- 1 c. molasses
Directions
- In a large bowl, whisk together flour, baking powder, salt and spices. In a separate large mixer bowl, beat together shortening and brown sugar on medium speed until fluffy and well-blended. Beat in eggs and molasses until well-combined.
- Using the paddle attachment of a stand mixer, stir half of the flour mixture into the molasses mixture until well-blended and smooth. Gradually add the remaining flour mixture, switching to a dough hook attachment when it gets stiff, and scraping sides as necessary. (Note: You may not need all the flour.) Once the dough becomes very stiff, transfer it to a clean, flat surface and knead by hand until it forms a firm but still malleable ball.
- Divide the dough in half and form it into two round disks. At this point, you can wrap the dough in plastic wrap and refrigerate it until you are ready to roll it out. It can be made up to three days in advance.
- When you are ready to make the base of your 3D structure, line a 10-by-15-inch baking sheet with a piece of parchment paper large enough that it hangs over the edges. (This will help you remove the base from the pan after it’s baked.) Find a heatproof bowl that fits on the baking sheet upside-down and covers about half of the surface area. Cover the bowl with foil, adding additional foil around the edges if you want to change the slope of the “hill.” Place it on another parchment-lined baking sheet.
- Remove one disk of dough from the refrigerator and let it sit at room temperature for at least 10 minutes. Spread parchment paper on a flat surface and dust it lightly with flour. With a lightly floured rolling pin, roll out the dough to a thickness of about ¼ inch. Cut it to roughly the size of your baking sheet and roll it around your rolling pin to transfer it to the baking sheet. If it breaks during the transfer, press the pieces together in the pan. (Note: If your dough is really crumbly, like mine was, dip a pastry brush in water and dampen the places that crack to get them to stick together again.) Trim the edges of the dough to fit neatly inside the baking sheet. Reserve the unused scraps of dough.
- Roll out the other half of the dough into a circle large enough to fit over the bowl. Transfer it to the bowl in the same way. Press it around the bowl, making vertical cuts in the dough if needed to eliminate wrinkles and pleats. Trim it around the bottom.
- Bake these base pieces at 350°F for 11-15 minutes, until the dough feels firm to the touch and the edges are just beginning to darken. Rotate baking sheets 180 degrees about halfway through baking time for more even browning.
- Meanwhile, draw the figures you wish to use in your 3D scene onto graph paper, and then trace them onto vellum or stiff paper. Cut out the patterns. Using the reserved dough scraps, trace around the patterns with a sharp knife and carefully transfer the figures to a parchment-lined baking sheet. (It helps to remove the cookie dough around each figure first, then lift them off the surface with a palette knife or small metal spatula.) Bake at 350°F for 5-8 minutes until just slightly firm to the touch.
- When the large base pieces are done, remove them from the oven and let them cool completely on the baking sheets. Then transfer them to a cooling rack, flip over the baking sheet used for the flat base and put the flat gingerbread on top. This will give your base stability while you’re working on it and portability when it’s done. Peel the foil off the underside of the bowl-shaped piece and place the “hill” on top of the flat base.
- When the smaller figures are done, remove them from the oven and slide the parchment paper off the baking sheet and onto a cooling rack.
Nutty Butter Balls (For trees and snowman)
Ingredients
- 1 c. butter, softened
- ½ c. sugar
- ½ t. salt
- 1 t. almond extract
- 2 c. sifted flour
- 1 c. finely ground nuts (I used a mixture of pecans and almonds)
- Green food coloring
Directions
- Cream butter and sugar together until creamy. Add salt, almond extract, flour and nuts; mix well. Divide dough into two unequal portions. Add food coloring to the larger portion and mix until uniform in color. Chill dough until firm.
- Preheat oven to 350°F. Shape the uncolored dough into small balls of graduated size to form snowmen. Shape the green dough into tree sections, experimenting with star shapes or circles of graduated sizes. Place on ungreased baking sheets and bake for 12-15 minutes until lightly browned. (Smaller pieces may be done earlier — watch carefully!) Let cool slightly. While still warm, roll snowman pieces in powdered sugar. Leave tree pieces bare.
Fondant
Ingredients
- 1 T. unflavored gelatin
- ¼ c. water
- ½ c. corn syrup
- 1 T. vegetable oil
- 2 T. shortening
- 8 c. confectioners’ sugar
- ¼ c. cornstarch, for rolling out the dough
- Gel food coloring (optional)
Directions
- Combine the corn syrup, vegetable oil, shortening, and confectioners’ sugar in the bowl of a stand mixer fitted with a paddle attachment.
- In a small saucepan over low heat, place gelatin and water. Stir until gelatin is melted, then remove from heat.
- Turn the mixer on low and pour in the gelatin mixture. Beat on low speed until a paste is formed, switching to a dough hook if it becomes too stiff.
- To use, roll the fondant to ¼-inch thickness, using cornstarch to coat the work surface and the rolling pin. Transfer fondant by rolling it around the rolling pin. Place fondant over the gingerbread hill and unroll it, stretching and smoothing it into place as necessary. Use a paring knife to cut away the excess.
- If desired, knead food coloring into small pieces of fondant and use to form a scarf and hat for the snowman. Store unused fondant in an airtight container.
Royal Icing
Ingredients
- 1 egg white
- 1 1/3 c. powdered sugar, sifted and divided in half
Directions
- In a heatproof mixing bowl, whisk the egg white with half of the powdered sugar until the sugar is dissolved. Place the bowl over a pan of simmering water over low heat. (The bottom of the bowl should be higher than the surface of the water.) Whisk the egg white and powdered sugar mixture constantly until it reaches 160°F. (This will cook the egg whites enough so they are safe to eat.)
- When the mixture has reached 160°F, remove the bowl from the pan and, using an electric mixer, beat the egg white mixture on medium speed while adding the remaining 2/3 cup of powdered sugar, a spoonful at a time. When all the sugar is incorporated, beat on high speed until the icing holds stiff peaks when the beaters are lifted out of the bowl. If needed, add more powdered sugar, a tablespoon at a time. Place a clean, damp towel over the bowl of icing to prevent it from drying out until you’re ready to use it.
- Fill a piping bag fitted with a small round tip (or a freezer bag with a small hole cut from a corner) with royal icing. Twist the top closed and tie it tightly with a string or wire twist-tie to keep the icing from squeezing out the top. Place a damp paper towel in the bottom of a glass and put the pastry bag in the glass, tip side down, when not in use. This will help prevent the icing at the opening of the tip from drying up.
- Use the royal icing to “glue” the pieces of your snowman and trees together. I also used it to glue the runners onto the sleds, draw details on the sleds, and attach trees and figures to the fondant-covered hill where I wasn’t planning to cover it with meringue. Use whatever icing is leftover to spread “snow” onto the trees. Let dry completely.
Marshmallow Meringue
Ingredients
- 3 egg whites
- ¾ c. superfine (baker’s) sugar
- 2 T. golden syrup
- ½ t. salt
- ¾ t. vanilla extract
Directions
- Place all the ingredients in a large, heatproof bowl over a pan of simmering water (making sure the bottom of the bowl doesn’t touch the surface of the water), and whisk until the sugar is dissolved and the temperature of the mixture reaches 160°F. (This should take 5-7 minutes.) Remove bowl from the pan and begin whipping the mixture with an electric mixer fitted with a whisk attachment. Whip on high speed until stiff peaks form (about 6-8 minutes).
- Spread the meringue over the gingerbread base to form a layer of “snow.” (Do this at the very end, right before assembling. Meringue will keep for a couple days in the fridge.) Stick the trees and figures into this meringue layer.
Next week: Rye Rolls
Discover more from Here's the Dish
Subscribe to get the latest posts sent to your email.

1 thought on “3D Biscuit Scene”