
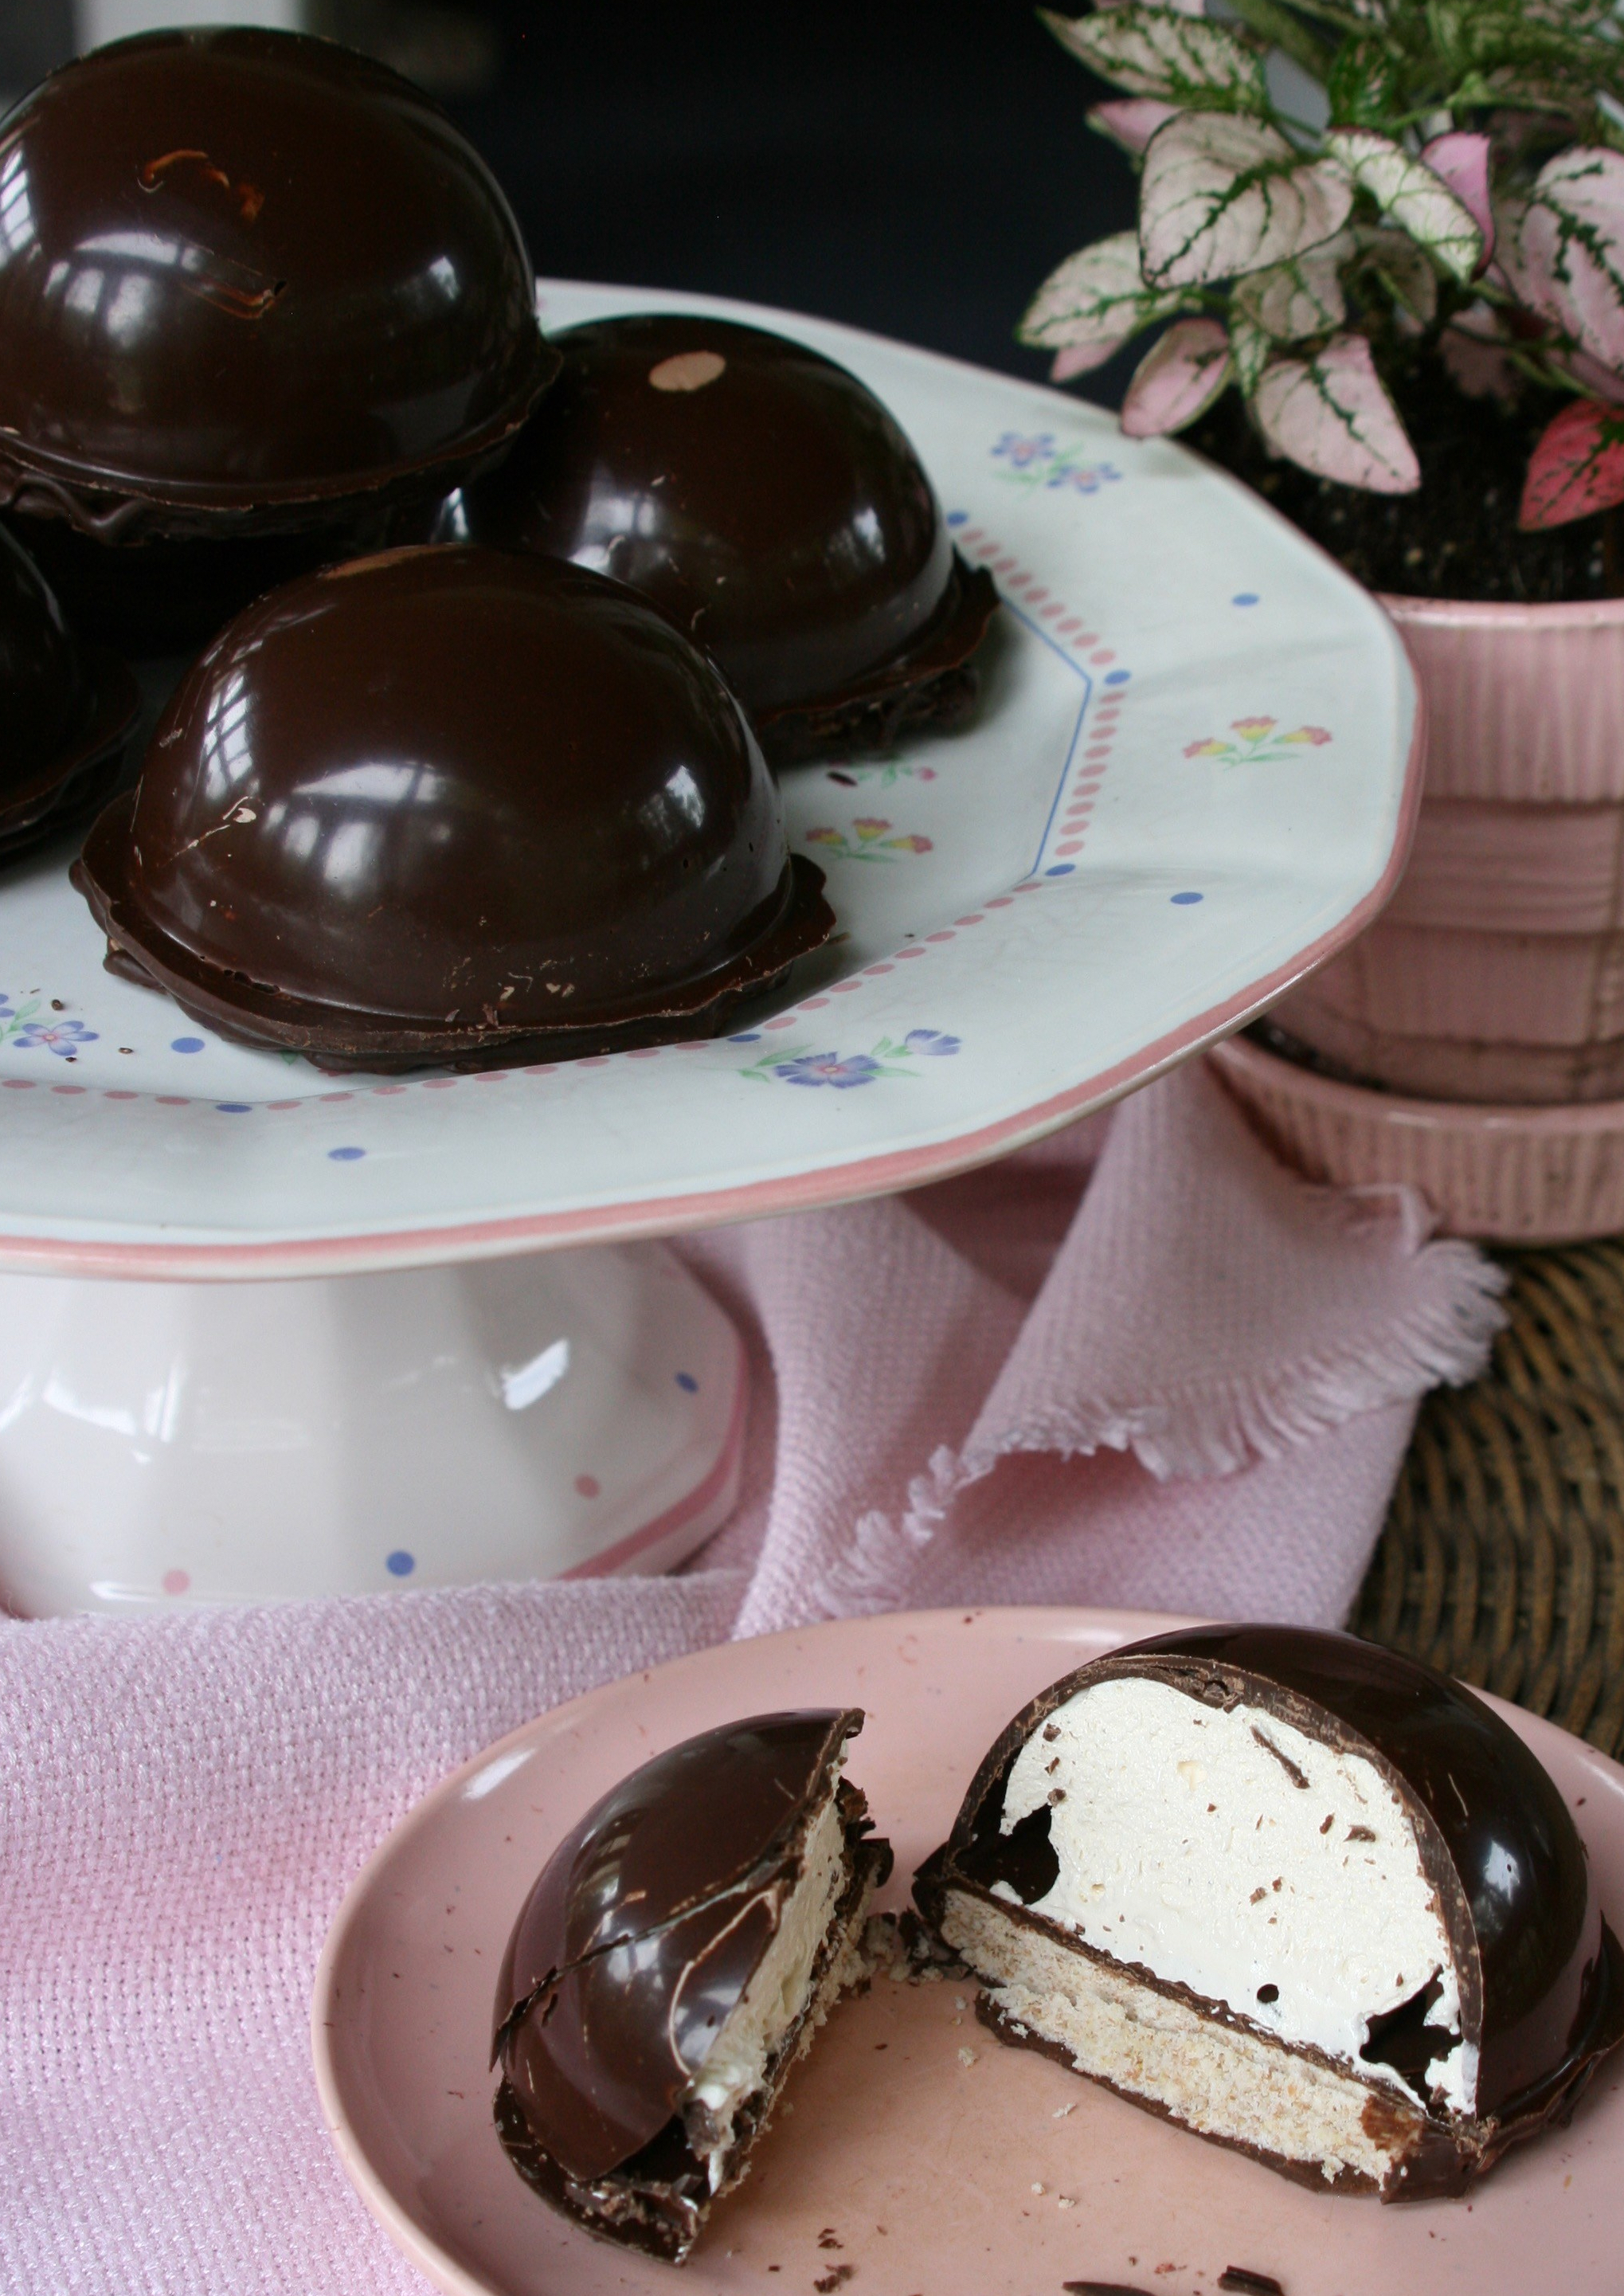
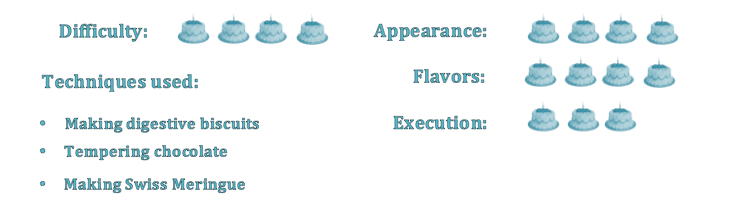
It’s biscuit week in the Great White Tent, and Paul Hollywood’s technical challenge is a chocolate tea cake, whose only connection to biscuits is a thin, wafer-like cookie at the base of a meringue-filled chocolate dome, the whole effect of which seems more like a candy bar than a biscuit.
Paul seems practically gleeful at setting this challenge, especially in light of the 30°C (86°F) heat in Somerset, where The Great British Bake Off was being filmed that summer. Part of the challenge of making the tea cakes is tempering the chocolate, which has to be heated to 45°C and then cooled to 32°C, barely above the ambient temperature under the tent.
Chocolate tea cakes are apparently considered an iconic Scottish confection, having been “invented” in 1956 by Sir Boyd Tunnock, grandson of the founder of Tunnock’s, a bakery in Uddingston, Scotland. The chocolate-covered marshmallowy treat seems to have appeared in other countries much earlier, however, beginning in Denmark or Germany in the early 1800s (known as Schokokuss, or chocolate kiss), and even across the pond in Canada as early as 1901 (under the name Empire but later marketed as Whippets). Even in the U.S., Nabisco began selling its chocolate-coated graham cracker and marshmallow cookies, Mallomars, way back in 1913.
Since Mallomars are mostly an East Coast phenomenon, I didn’t grow up eating them, so what these tea cakes remind me of the most are the chocolate-covered marshmallow eggs we would sometimes find in our Easter baskets.
For the most part, I’m not a big marshmallow fan, and I’m surprised at the relish with which Paul tucks in to one of these on the Masterclass episode, in which he shows Mary Berry how to make (and eat—with your fingers, apparently, getting it all over your mustache in the process) them. Having railed on American pies during pie week as being too sweet, he doesn’t seem to mind these sugary half-spheres of pure meringue with a biscuit base enrobed in dark chocolate.
But to be honest, I found the combination quite tantalizing, and quite unlike the gelatin-based marshmallow eggs that always ended up in the bottom of my Easter basket, mingling with the black jellybeans under the green plastic “grass” after all the favored candies had been devoured.
The dark chocolate provides a nice counterpoint to the sweet meringue, which isn’t overly sweet thanks to the golden syrup and “pinch of salt” that’s added to the recipe “so it’s not too sweet,” Paul tells Mary in the Masterclass. The half pod of vanilla seeds gives it a rich flavor not found in commercial marshmallows, elevating these tea cakes to a delicacy worth savoring, even if they are too much for one sitting.
They are also a lot of work.
First I made the biscuits. They are basically a digestive biscuit, as the recipe calls for half whole wheat flour and half regular flour. (Apparently we have the Scots to thank for digestives, as well.) This part of the recipe is fairly straightforward. The only thing I did differently was to add a teaspoon or two more milk so I could get the dough to stick together.
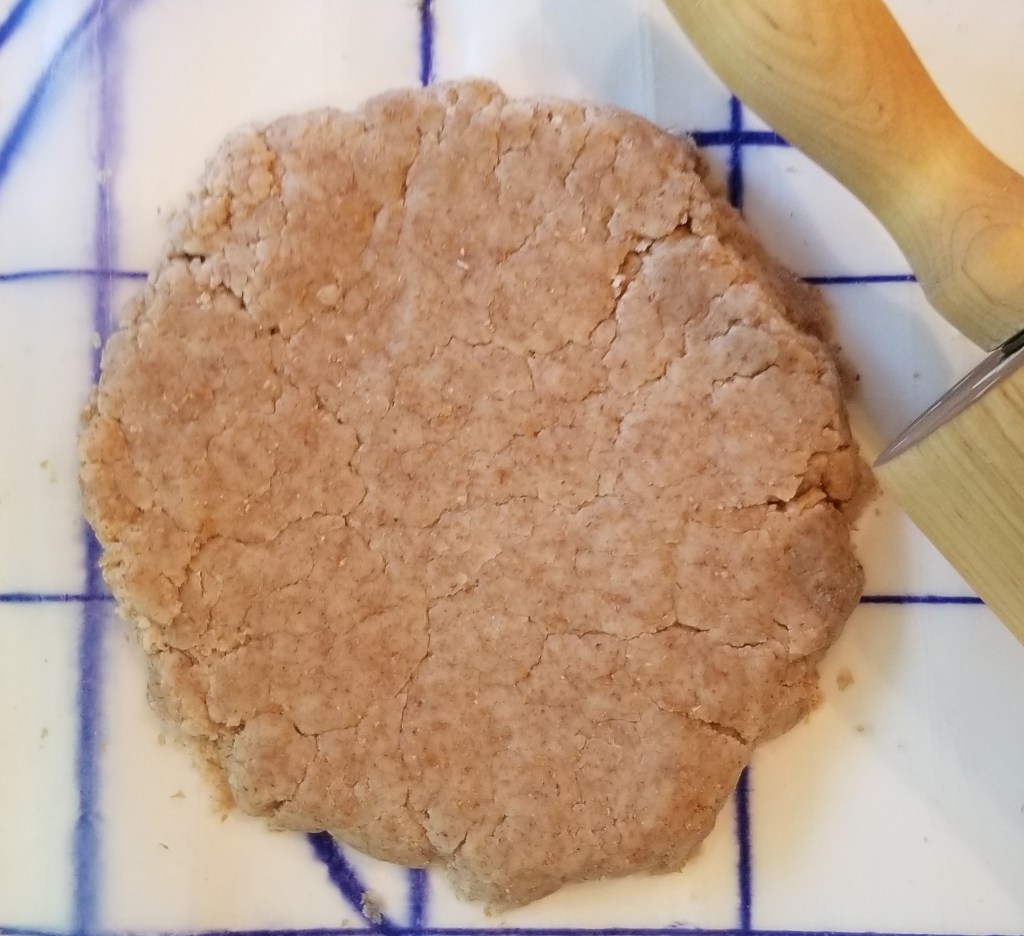
The biscuit dough is very short, meaning high in fat and crumbly. 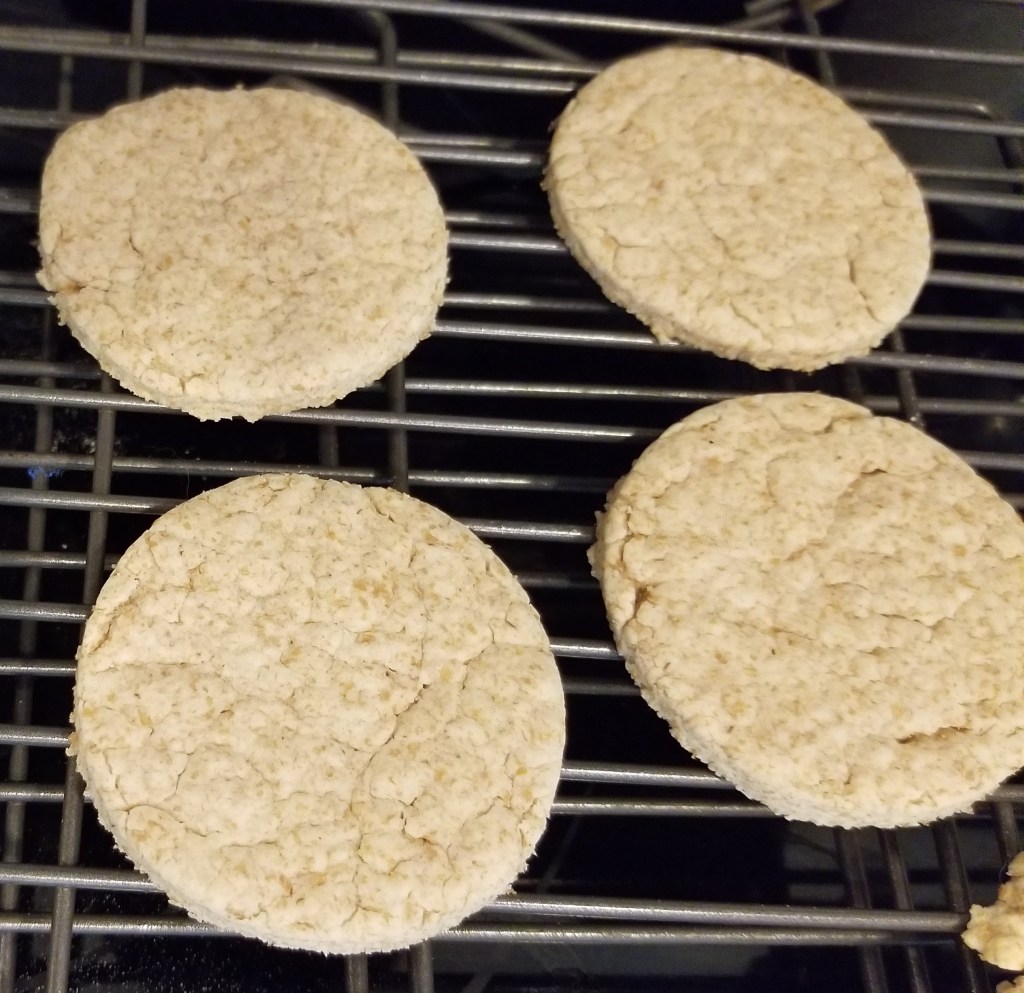
When baked, the biscuits won’t be very browned, but they should be stiff.
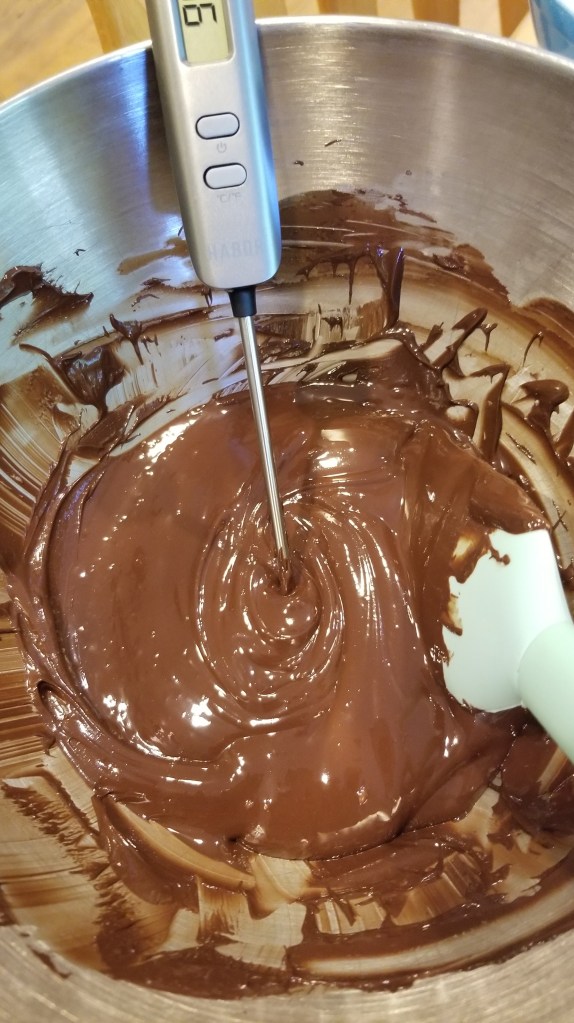
Once the biscuits were baked and cooling, I tempered the chocolate. As mentioned before, this involves gently melting the chocolate, usually over a bain-marie, or double-boiler, to a temperature not exceeding 120°F (or 105°F for milk or white chocolate). It’s important to keep stirring the chocolate while heating it. Once it’s reached the maximum temperature (or just under—some sources I found said not to exceed 115°F), take it off the heat and begin “seeding” it by adding unmelted chocolate to bring the temperature down to 90°F, again while stirring constantly. This should result in chocolate that, when cool, is shiny, is hard enough to snap when broken and isn’t tacky to the touch.
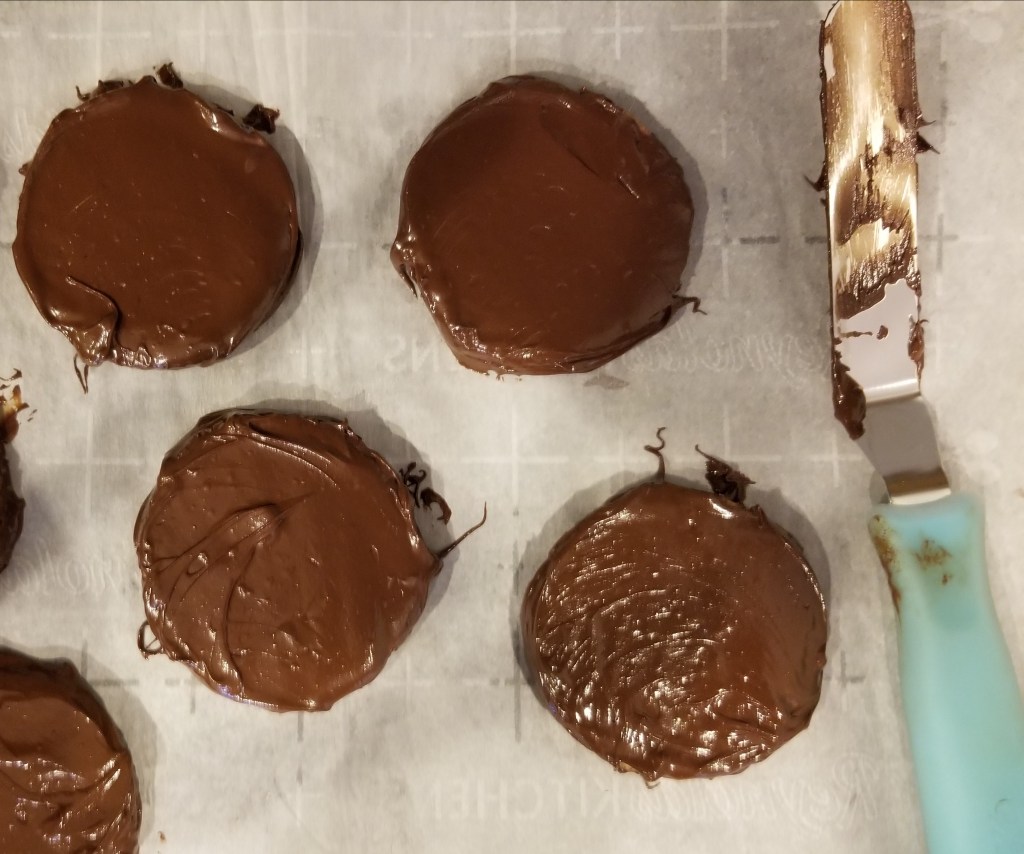
Once I got my chocolate down to 90°F, I coated the inside of my molds, using the back of a spoon as Paul had demonstrated to Mary—not too thick, not too thin. Then I coated the biscuits, spreading the chocolate on all sides with an offset spatula rather than using the dipping method. I left them on parchment paper to cool and harden while I made the marshmallow filling.

I’ve made marshmallows before, but I’ve always used gelatin, so this version is different. This marshmallow filling is basically a Swiss meringue, which means whipping egg whites and sugar over simmering hot water until the sugar is dissolved and stiff peaks form. Paul’s recipe also calls for the addition of some golden syrup for stability. The problem with Paul’s recipe (I can’t believe I just typed that.) is that the egg whites aren’t completely cooked, which leaves open the possibility of food poisoning. Having married a chemist, I knew I couldn’t cook and serve something without doing my best to make sure it’s safe to eat.
I should have researched this sooner, before I started making the meringue. Instead I waited till I had already whipped the egg whites over the bain-marie for the 6-8 minutes the recipe specifies. Then I googled how hot the egg whites should be to make them safe to eat. The answer is 160°F. So I had to keep beating my meringue over the hot water bath for another 10 minutes or so until it reached that temperature. Then I had to let the meringue cool enough that it wouldn’t melt the chocolate the minute I put it in the mold. I wish I had found a recipe like this one first, which has you whisk the egg whites and sugar in a double boiler until they reach 160°F, then remove them from the heat and beat them until stiff peaks form, which also serves to cool down the meringue.
By the time my meringue cooled enough to put it into the chocolate molds, it was very stiff. I tried piping it but found that spooning it into the molds was a bit easier. I then used Paul’s technique of piping a bit of chocolate on top of the meringue to help the chocolate-covered biscuit stick to the meringue. I placed the biscuit base on top of the meringue and sealed it with more chocolate, then let them cool overnight.
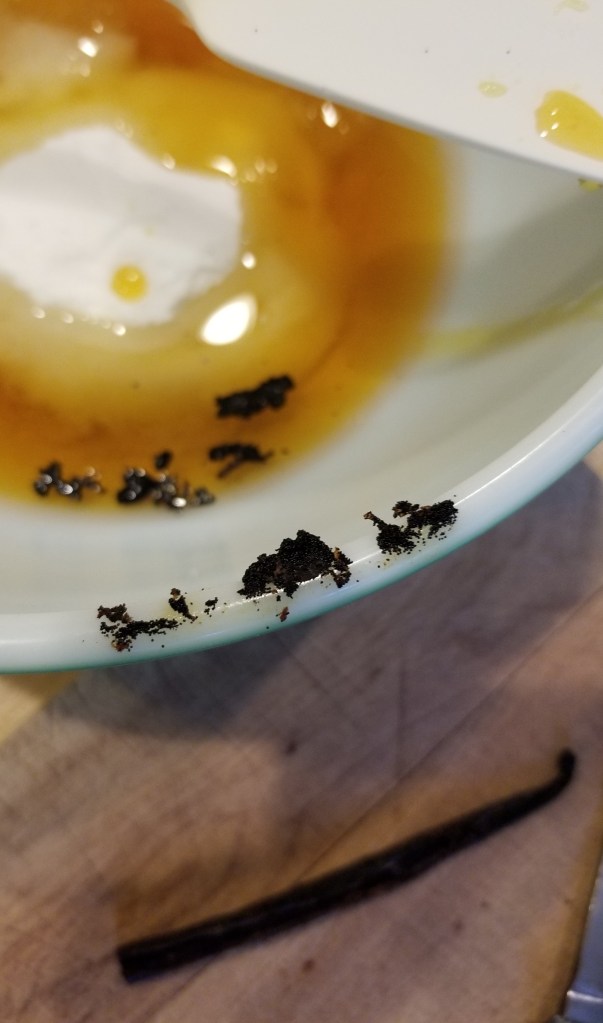
Yummy vanilla bean seeds! 
Finally reached 160°F!! 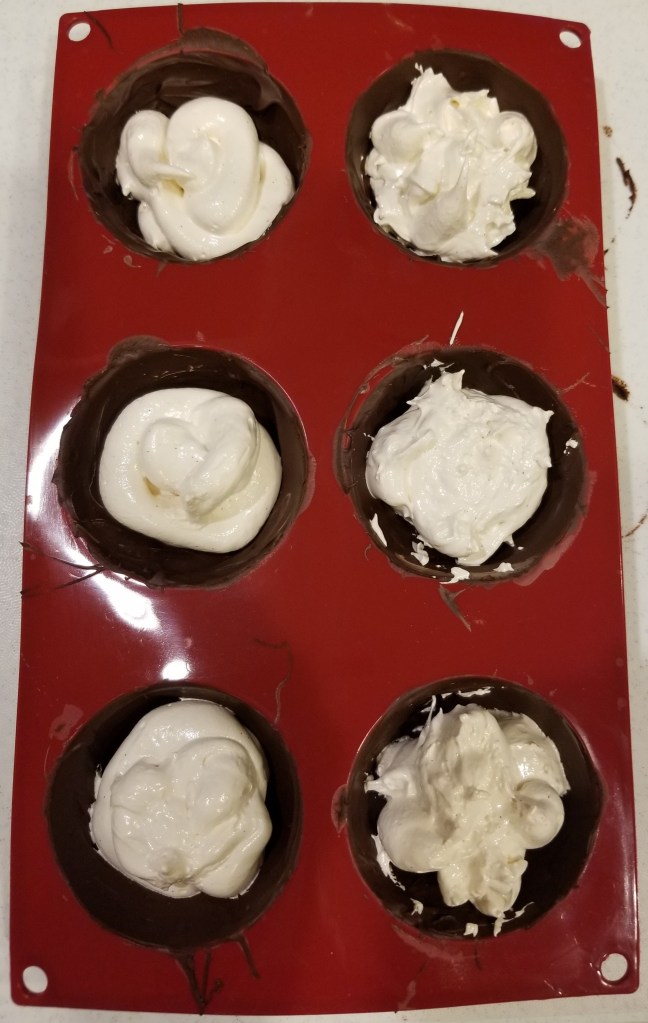
Piped on the left, scooped on the right
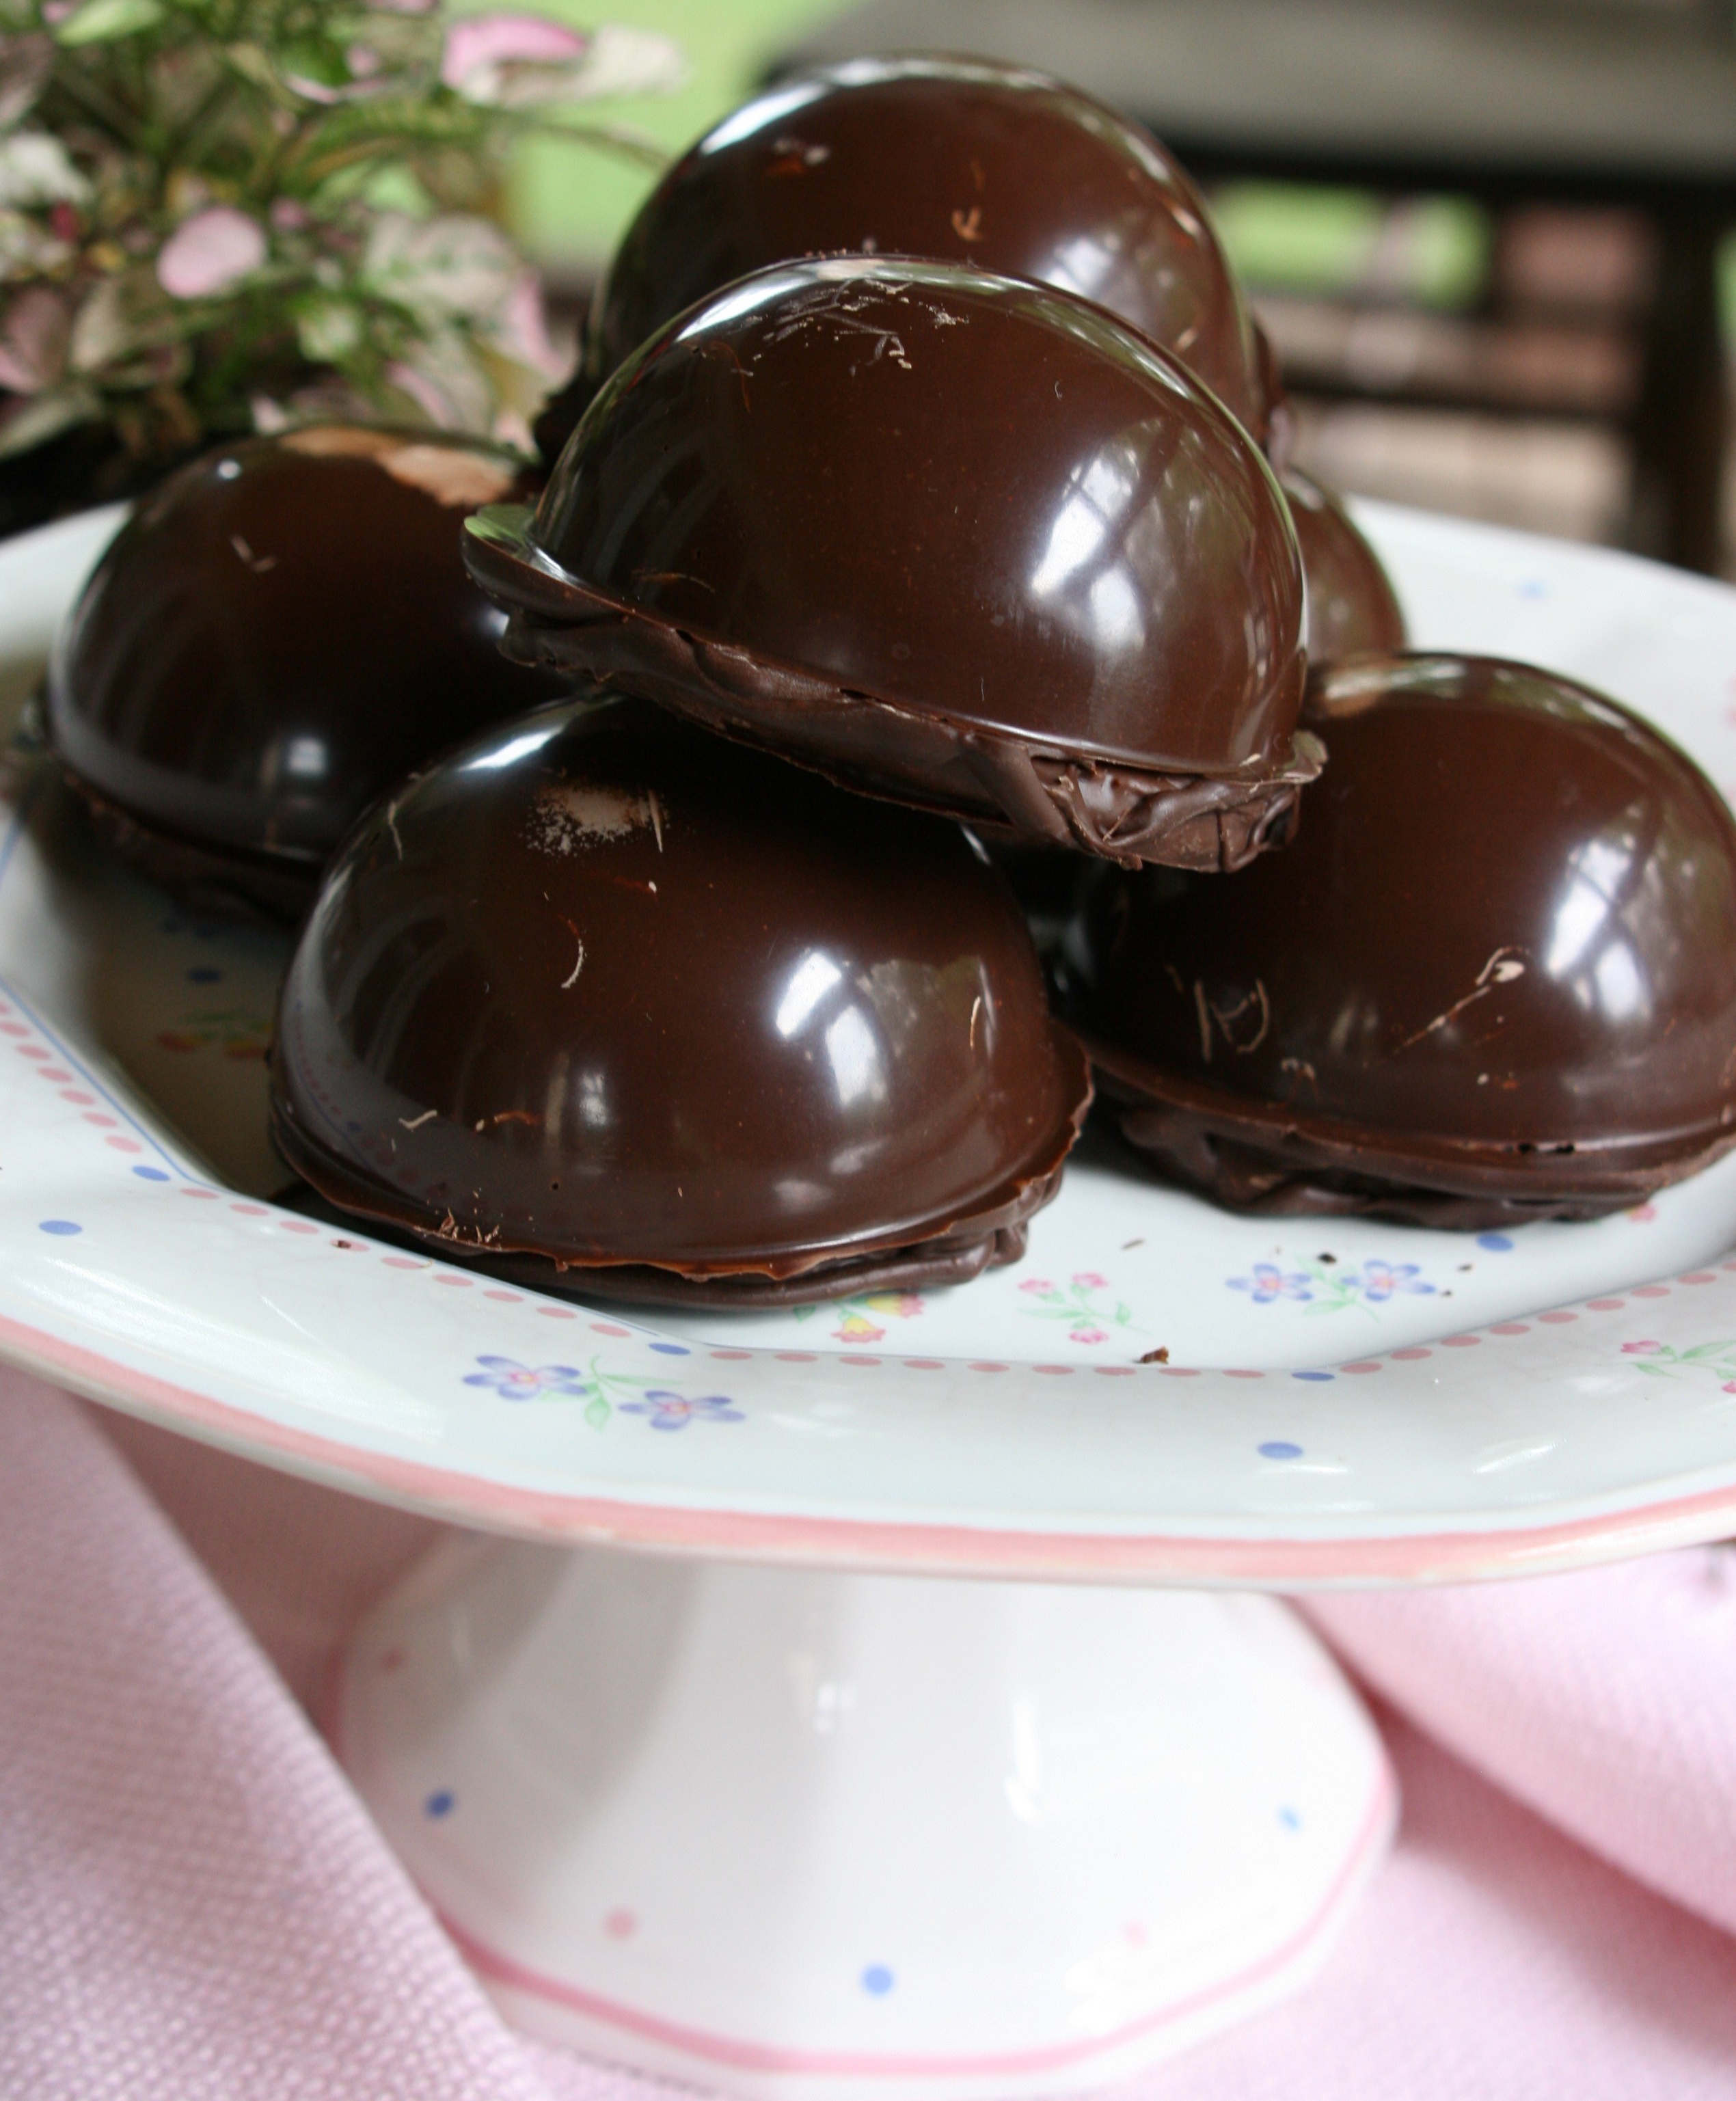
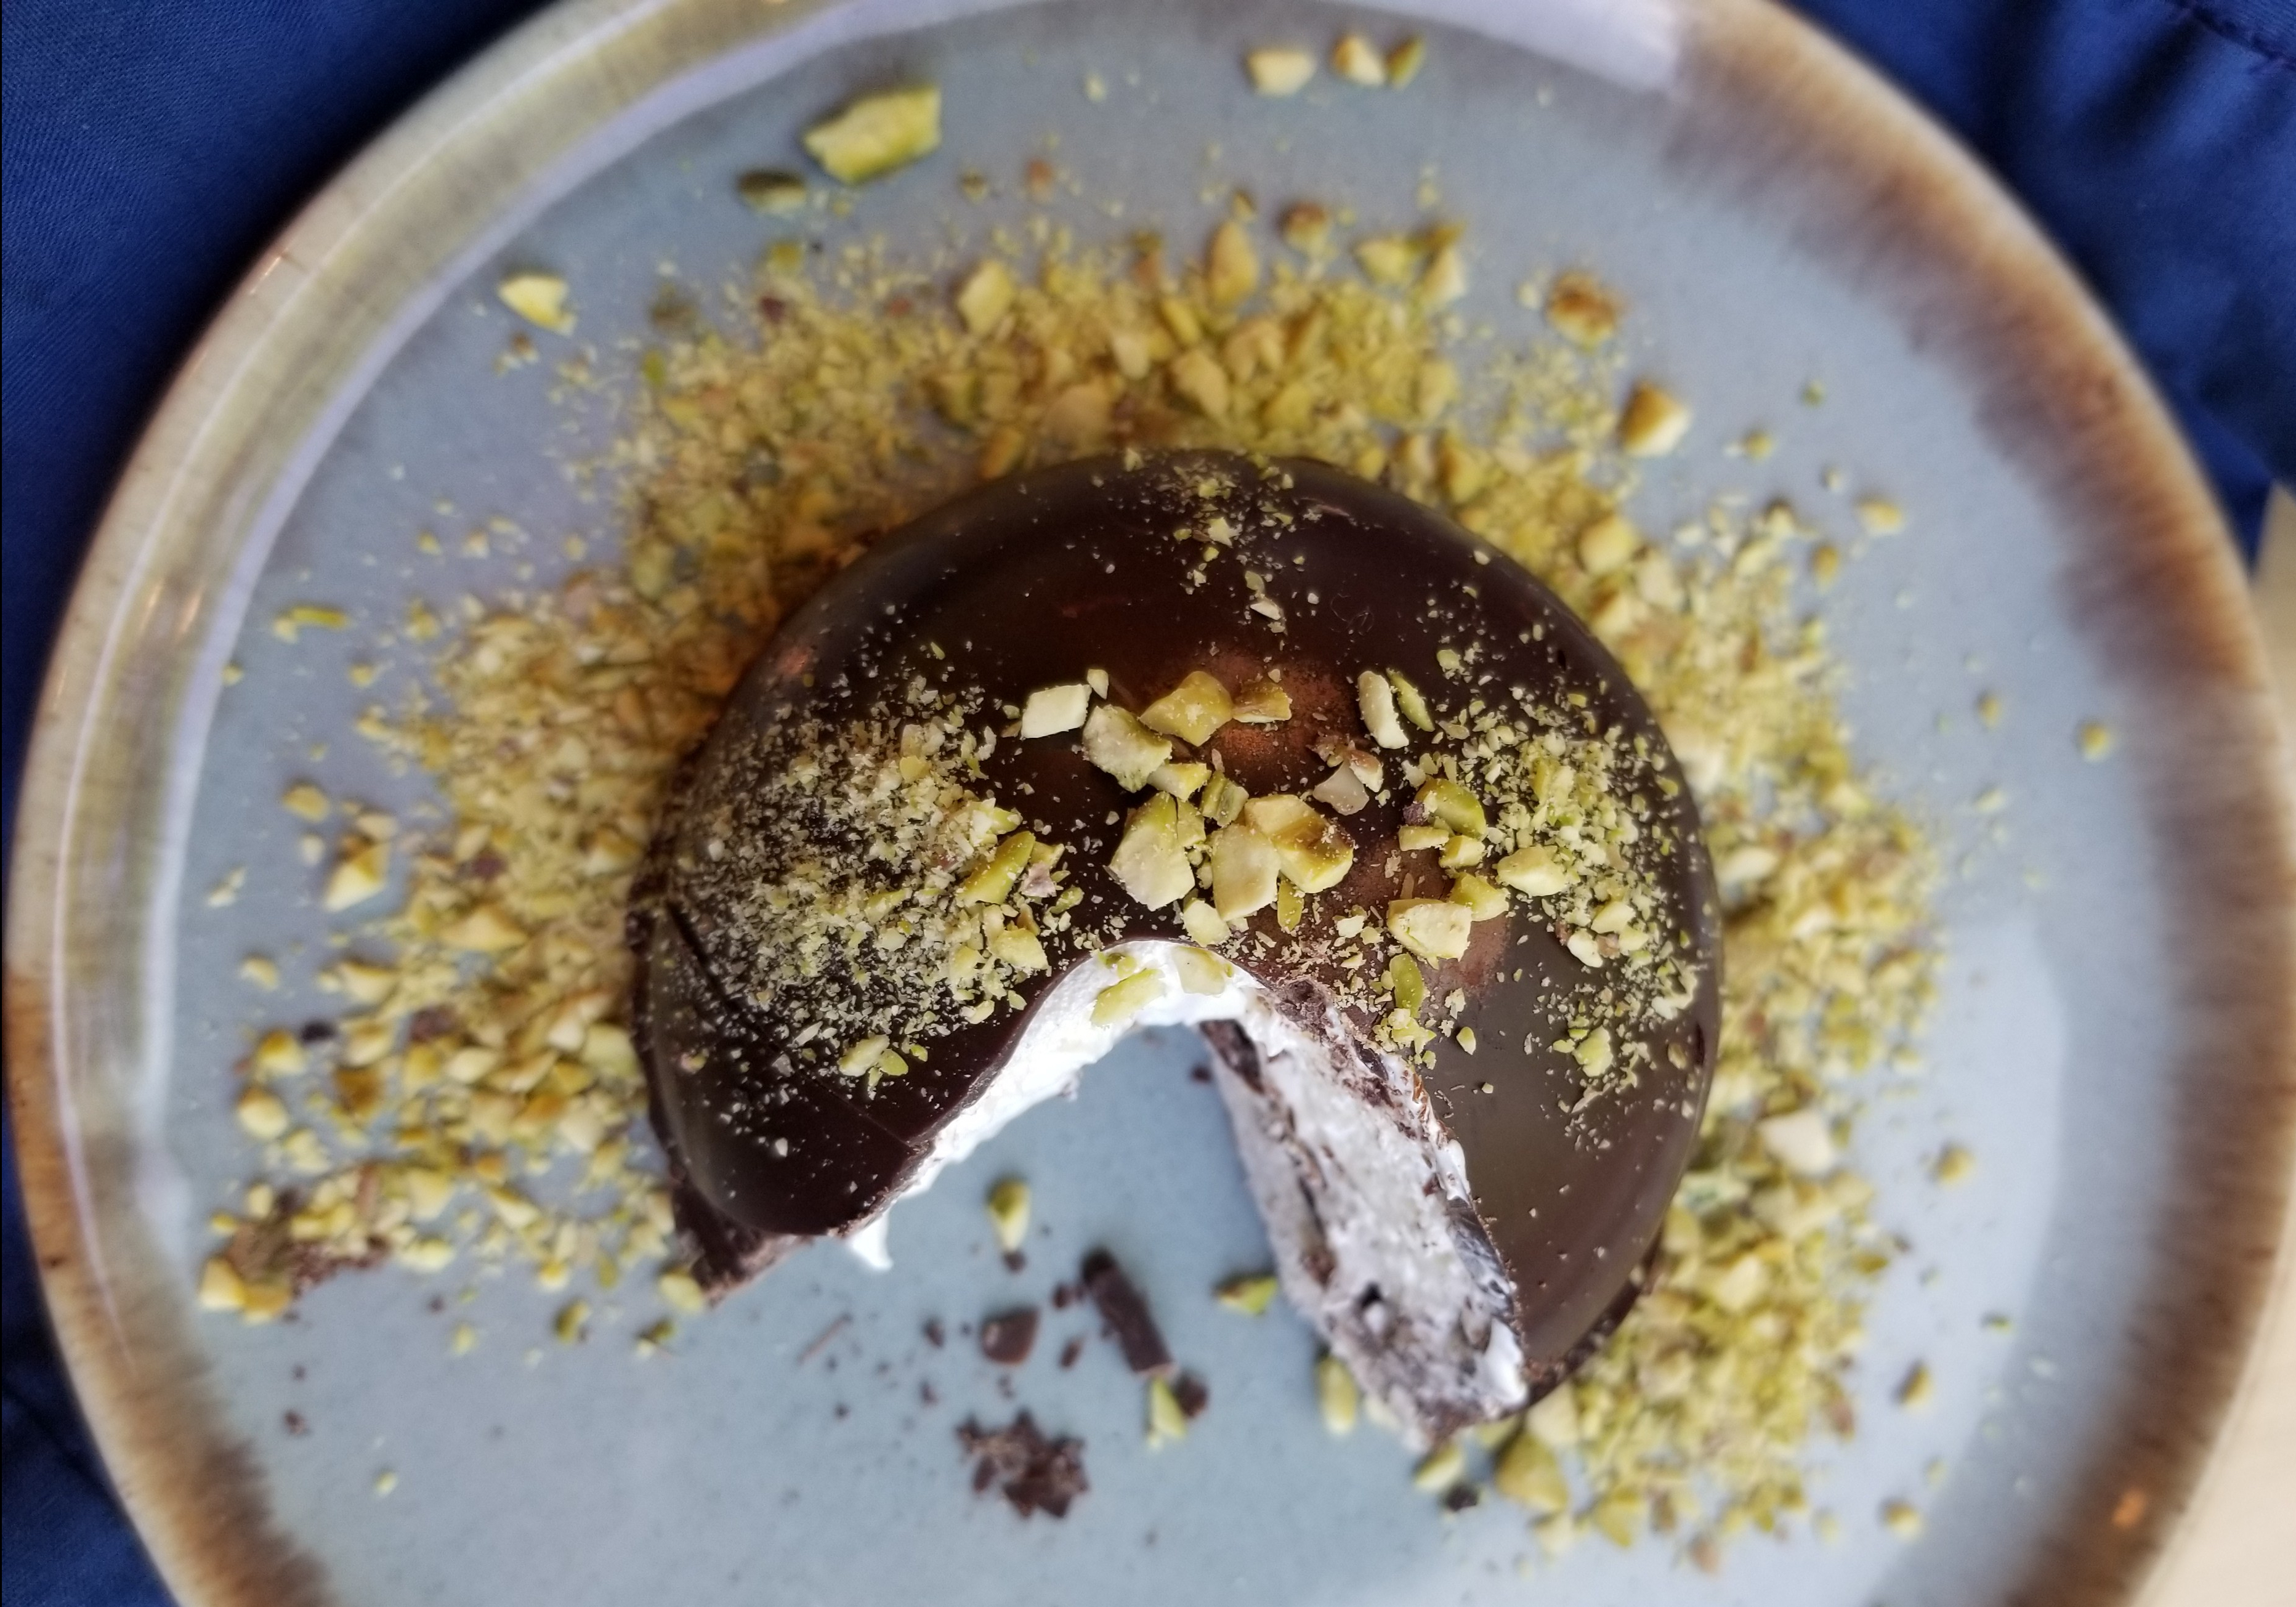
Even though you’re not supposed to put chocolate in the refrigerator because it might “bloom,” the temperatures in the Great White Tent were so high during the filming of this episode that the bakers had to use the fridge to get their chocolate to set. While I have the advantage of air conditioning, the temperatures outside were in the 80s the day I made my chocolate tea cakes, and I decided to put them in my basement overnight, where the temperature was probably 15-20 degrees cooler than in my kitchen. When I turned them out of the molds the next day, most of the surface was nice and shiny, but each one had a spot where it had bloomed. I’m not sure why, but I wonder if it’s because the surface of the table where I put the container was colder than the air temperature, and that may have caused the cloudy spot on each of my chocolate tea cakes (which you can see in the photos).
If any of you readers are experts in chocolate making, I’d love to hear your theories. In the meantime, I’ll work on improving my chocolate tempering techniques!
Paul Hollywood’s Chocolate Marshmallow Teacakes
Adapted for American bakers
For the biscuits:
For the chocolate casings:
- 14 oz. dark chocolate, chopped (I used Kroger’s Private Selection Semi-Sweet Chocolate Chips made with Belgian unsweetened chocolate, 43% cacao)
- 6 half-sphere silicone molds, about 3 inches in diameter
For the marshmallow:
- 3 egg whites
- ¾ c. superfine (or baker’s) sugar
- 6 t. golden syrup
- ½ t. salt
- ½ vanilla pod, seeds only
Directions
- To make the biscuits, put the flours, pinch of salt, baking powder and 2 T. sugar into a mixer bowl and rub the butter in with your fingers. Add 1 T. milk and mix together to form a ball. If it’s still too crumbly to form a ball with your hands, add another teaspoon or two of milk, one at a time, until it sticks together.
- On a floured surface, roll out the dough to about ¼ inch thick. Cut out six circles about the same diameter as the molds you are using, or slightly smaller. (They will expand a bit when baking, and the chocolate will add a bit to the diameter, so it’s okay if they’re 1/8 inch or so smaller.)
- Place the biscuits on a piece of parchment paper on a flat plate or board and chill in the fridge for 10 minutes. This will keep them from shrinking when baked. Meanwhile, preheat the oven to 325°F.
- Bake the biscuits for 10-12 minutes. They may not brown, but they should feel stiff to the touch when done. Remove to a wire rack to cool.
- In a heat-proof bowl set over a simmering pan of water (making sure the bottom of the bowl doesn’t touch the water), melt about ¾ of the chocolate, stirring constantly until it reaches 115-120°F. Remove from heat and begin to seed the chocolate by adding the rest of the unmelted chocolate, a little at a time, stirring constantly until it reaches 90°F.
- If the chocolate is too runny, let it cool slightly. It should be thin enough to spread on the inside of the molds, but thick enough that it doesn’t all run out when turned upside down. Using the back of a spoon, cover the inside of the domes completely, so the walls of chocolate will be sturdy, but not too thick, when turned out.
- Set aside to cool. Do not put the molds in the refrigerator or the chocolate will lose its shine.
- Next, coat the cooled biscuits with the remaining melted chocolate, covering them completely either by dipping the biscuits into the chocolate or spreading the chocolate onto the biscuits with a palette knife. Place the coated biscuits on a piece of parchment paper to set.
- For the marshmallow, place the rest of the ingredients in a large heat-proof bowl over a pan of simmering water (making sure the bottom of the bowl doesn’t touch the water) and whisk until the sugar is dissolved and the temperature reaches 160°F. Remove from heat and begin whipping with an electric mixer. Beat on high speed until stiff peaks form and the meringue is stiff enough to pipe.
- Spoon the meringue into a piping bag and pipe into the chocolate molds (or skip the piping bag and spoon it in). Leave room at the top for the biscuit base to sit on top of the marshmallow. Don’t overfill!
- Using the remaining melted chocolate (remelt if necessary), put it into a small piping bag and pipe a little chocolate onto the marshmallow in each of the molds. Then pipe a stream of chocolate around the inside rim of each mold. Place a chocolate-covered biscuit on top of the marshmallow. Pipe more chocolate around the edges to fill any gaps, if needed. Smooth with a knife. Leave the teacakes to set until completely cooled.
- Carefully remove the teacakes from the molds, trying not to leave fingerprints on the glossy domes. Enjoy!
- Store leftovers in an airtight container in a cool place. (Even though the recipe says not to refrigerate, I did store my leftovers in the refrigerator—I’m still not sure how shelf-stable that meringue is!)
Next week: A Gingerbread Structure
Discover more from Here's the Dish
Subscribe to get the latest posts sent to your email.

They are delicious, and really lovely to look at!
LikeLiked by 1 person
They look perfect to me! 🙂
LikeLiked by 1 person
I’m so impressed by what you’re doing Marilyn! These look amazing!
LikeLiked by 1 person
Thanks, Peg! It’s a lot of fun, and I’m learning a lot!!
LikeLike
They look amazing! I love the name of your blog…so clever!
LikeLike
Thanks!
LikeLike