
The prinsesstårta, in a way, is what started me on this journey of baking through the Bake Off. I remember watching this episode for the first time and being mesmerized by the prinsesstårta. Never having seen one before, I was enchanted by the pastel green marzipan covering delicate layers of sponge, jam and cream. The single pink rose and swirls of chocolate on top made it truly look like a cake fit for a princess.

I set out to make it then, but not being confident in my skills, I decided to make miniature ones instead. Accomplishing that small feat boosted my confidence enough to think that maybe, just maybe, I could attempt all the other challenges set before the bakers in the Great White Tent. … And a blog was born.
The prinsesstårta is a modern Swedish classic. Although it first appeared in a 1948 cookbook under the name grön tårta (green cake), it has royal roots. The woman who wrote the cookbook, Jenny Åkerström, taught cooking and other domestic skills to the three daughters of Prince Carl, brother to King Gustav V of Sweden. Apparently she had a close relationship with the three princesses, since her cookbooks — she published a series of four, beginning in 1929 — were titled Princesses Cookbook: Home Cooking and Holiday Food and featured their likenesses on the cover. It’s the third book in this series that contains the recipe for “green cake.”
From there it’s difficult to know why the name was changed, except that this particular green cake was reported to be a favorite of Princesses Margaretha, Märtha and Astrid. And its popularity has only grown since then — so much so that the fourth week of September is now known as Princess Cake Week, when, for every prinsesstårta sold in Sweden, 10 Krona are donated to the Crown Princess Victoria’s Fund, supporting children and young people with disabilities and chronic illness. Overall, around 500,000 prinsesstårta are sold in Sweden every year.

So how does one make a prinsesstårta? There are variations, but generally it consists of eight or nine layers: a sponge base topped with raspberry jam, then a layer of custard (or, in Mary Berry’s recipe, diplomat cream) topped with another layer of sponge, followed by another layer of custard (or diplomat cream), another sponge and a mound of whipped cream, all covered in green marzipan. Some recipes put the mound of whipped cream on top of the second layer of custard so that the final sponge layer is molded over the cream before the marzipan is added. That might serve to make the cake more stable, which is a problem I ran into. But more about that later.
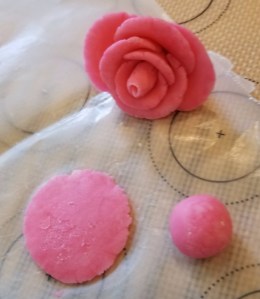
As we are now coming out of the COVID-19 pandemic and my friends and I are fully vaccinated, I planned to take my prinsesstårta to a small brunch party. I wanted to get as much of the prep work as possible done the day before, so I started with the decoration — the fondant rose. This may have been the easiest element as well, since Mary’s recipe calls for ready-made fondant. All I had to do was color it pink and shape it into a rose. Mary’s instructions are pretty easy to follow, but if you’re more of a visual learner, you can follow this tutorial.
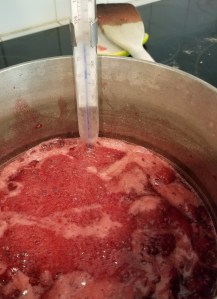
The next step was to make the jam. This is also fairly easy, but it helps if you have a candy thermometer so you’ll know when your fruit reaches the jelly stage (220°F). Mary’s recipe calls for jam sugar, which is hard to find in the U.S. It’s basically sugar with pectin already in it, so I looked at the recipes in my box of Sure-Jell pectin and used the amount it called for based on the amount of sugar in Mary’s recipe. In this case, I used 1¼ teaspoons of pectin to a little over 1 cup of sugar.
After that I made the custard, which is also pretty straightforward: Bring the milk and a vanilla bean to a simmer while whisking together egg yolks, sugar and cornstarch. Slowly pour the warm milk into the egg mixture while continuing to whisk (I use an electric mixer.), then pour it all back into the pan and whisk by hand over low heat until it thickens. Cover it with plastic wrap to prevent a skin from forming and leave it to cool. This can be made up to three days in advance and stored in the fridge.

For the sponge, I simply whisked the eggs and sugar together until they reached ribbon stage, then sifted the dry ingredients over the egg mixture and folded it in gently, trying to keep as much air in the batter as possible. After folding in the melted butter, I poured the mixture into a parchment-lined springform pan and baked it for about 25 minutes.
The idea then was to slice the cooled cake into three even layers. I was worried about this step because my cake had sunk a bit in the middle — I’m not sure why, possibly because I used a 10-inch pan instead of the 9-inch pan the recipe calls for — so knowing it would be easier to slice when frozen, I stuck it in the freezer overnight.

The final element was the marzipan. Mary’s recipe calls for 2 whole eggs, but because the eggs wouldn’t be cooked, I opted to use the equivalent volume of pasteurized egg whites. (Pasteurized whole eggs are not readily available in the U.S.) I did a little digging and discovered that marzipan can be made in a number of different ways. Some use whole eggs, or just yolks, or just whites, or no eggs at all. I wanted to remain as close to Mary’s recipe as possible, though, so I just switched to egg whites.
With all of my elements completed except the whipped cream, I waited until the morning of the brunch to assemble my prinsesstårta. I couldn’t find any advice on the internet about how to store the assembled cake or how long it would keep, and fearing that if I put it together too soon the whipped cream would deflate, I kept everything chilled until the next day.
The next morning, I was able to cut the frozen cake into three layers, although the topmost layer was micro-thin in the middle. I spread a thin layer of custard over the bottom layer, then piped a ring of custard around the outside, filling the center with jam. Then I whipped the cream (adding a little corn starch and powdered sugar for stability) and folded half of it into the remaining custard to make the diplomat cream. I spread a layer of that over the jam, followed by the second cake layer, which I then topped with another layer of diplomat cream. The third cake layer was next, on top of which I piled a mound of whipped cream and then covered the whole cake with a thin layer of whipped cream to act as a crumb coat.
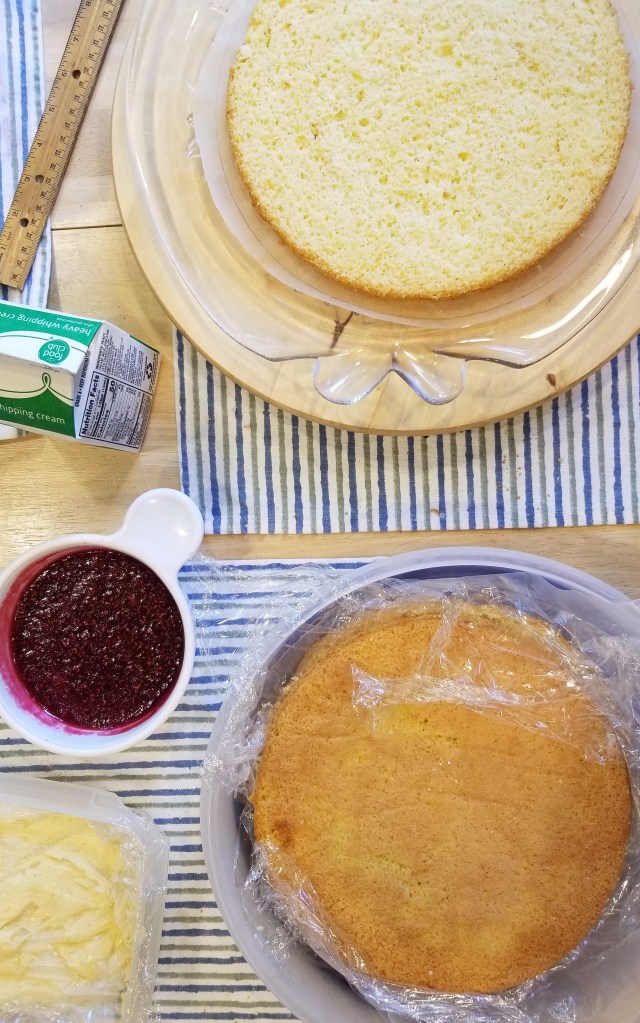
Ready to assemble! 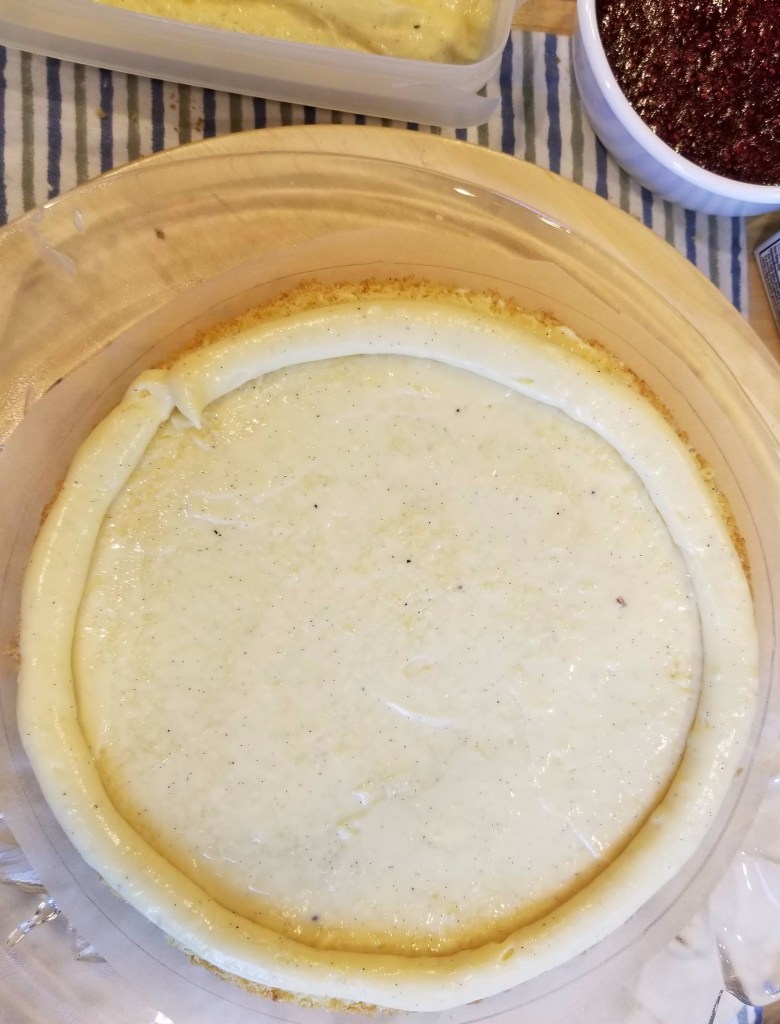
A ring of custard… 
filled with jam… 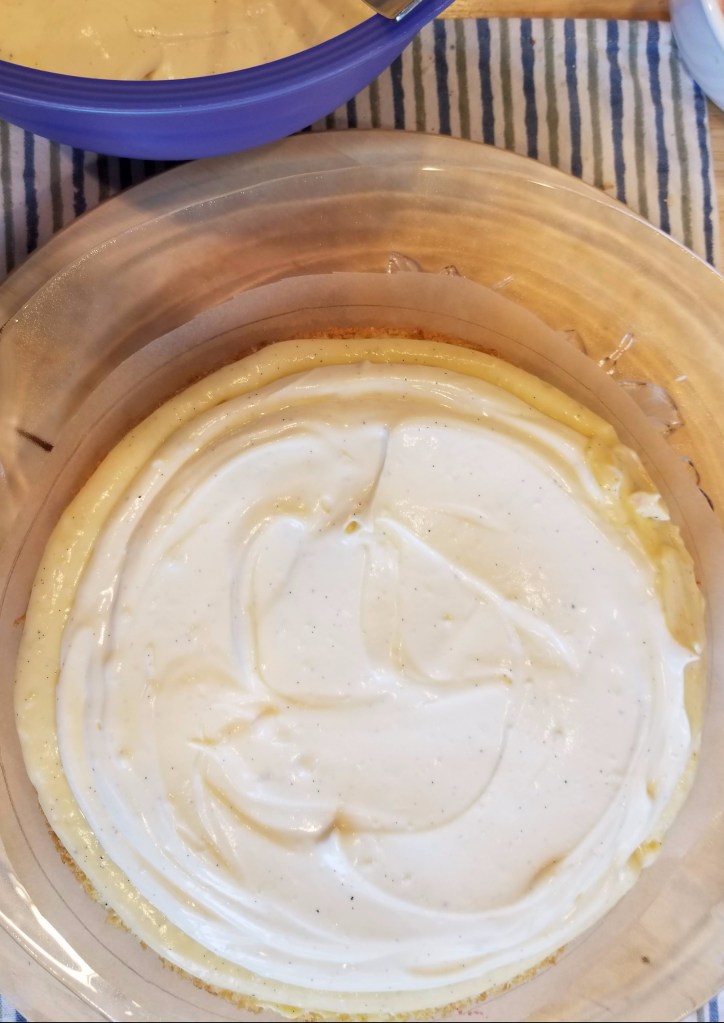
topped with diplomat cream… 
another layer of sponge… 
topped with more cream and another sponge.
Did I mention we were having a heat wave? By this time, my layers were beginning to slide off of one another. The recipe said to refrigerate it for an hour, but I was running out of time, so I popped it in the freezer instead. This felt like a real Great British Bake Off moment!
I rolled out the marzipan and covered it with plastic wrap to keep it from drying out while the cake chilled. Although my marzipan was perfectly smooth when I rolled it over my rolling pin to transfer it to the cake, it formed cracks and wrinkles during the transfer process, so half of my cake was smooth and the other half was cracked. Thinking quickly, I cut a bunch of leaf shapes out of the excess marzipan I had cut off around the bottom of the cake and used those to cover the cracks and wrinkles. I then piped a chocolate vine connecting the leaves to one another and, ultimately, the fondant rose.
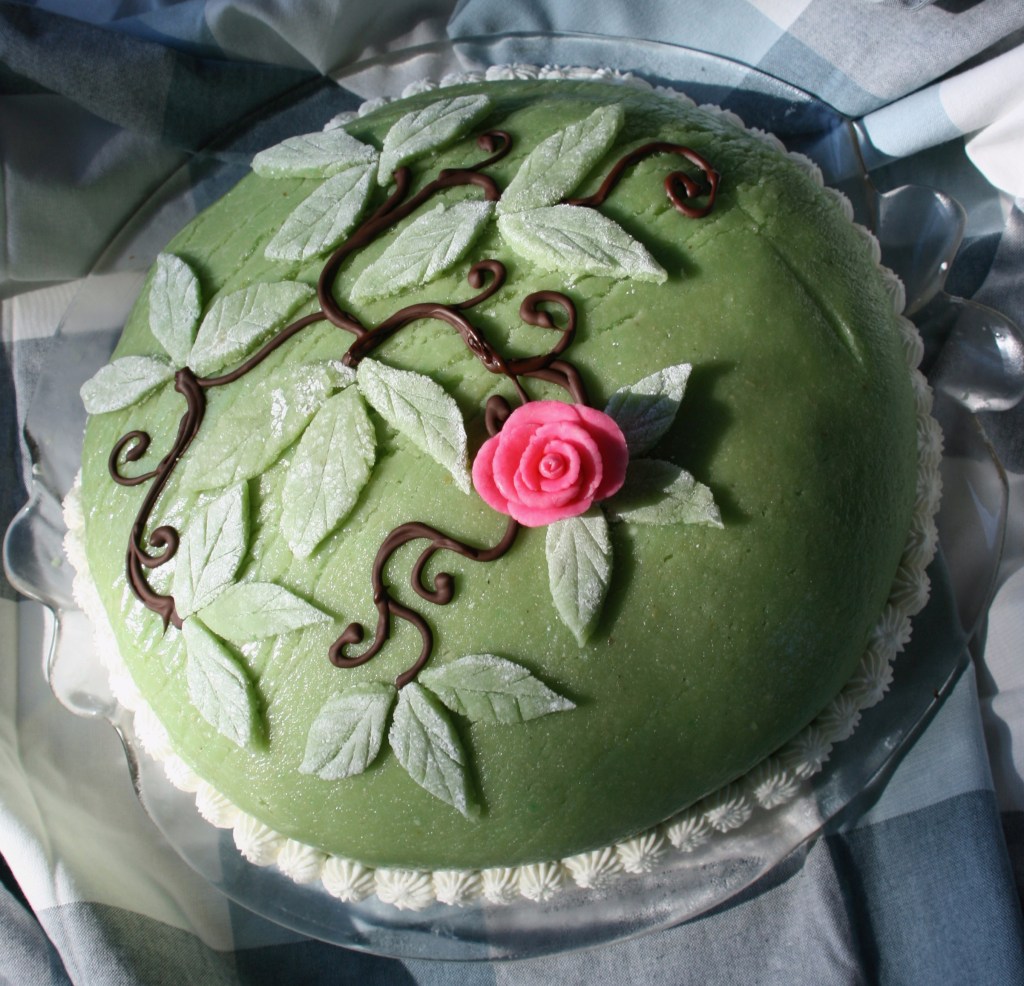
I was pretty satisfied with the way it turned out (see “before” picture), but I knew I had to act fast to photograph it before taking it to the brunch. I then packed it into a cooler with lots of ice packs and crossed my fingers as I drove through a bunch of road construction to my friend’s house. Unfortunately, by the time I got there, my prinsesstårta had pretty much collapsed (see “after” picture).

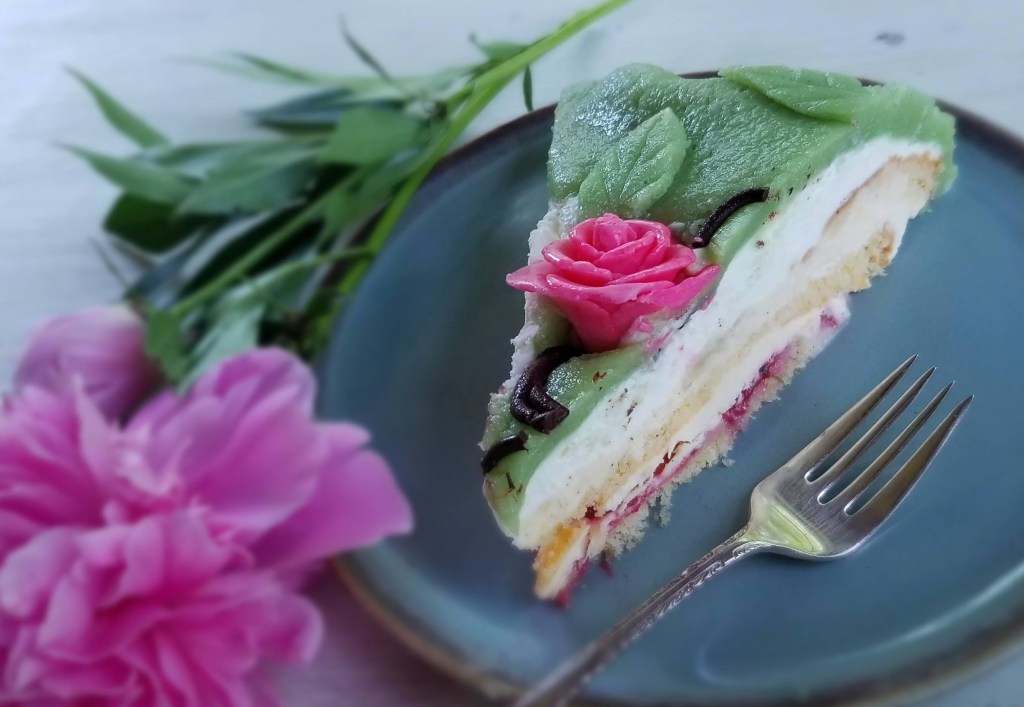
After serving the somewhat melted cake in bowls, I popped the rest in the freezer. By the next day, I was able to cut into the half that hadn’t completely collapsed in order to get pictures of the layers (see below). All in all, though, it still tasted good, and I was able to share the frozen leftovers with neighbors.
On the bright side, I learned from experience — after the fact — that you can, indeed, freeze the assembled prinsesstårta. My advice is to leave it in the freezer until an hour or so before serving, then transfer it to the fridge to thaw. This will keep the marzipan from sweating too much. My takeaway from all this? While I might tackle it again, I find making cupcake-sized prinsesstårtor easier (see photo below). That will be a blog post for another day, but I followed the directions found on this website.

Here is a link to Mary’s recipe, but I have adapted it for American bakers below. For a helpful video on how to assemble the prinsesstårta and cover it with marzipan, watch this. (It’s in Swedish, but you really don’t need to understand the words, although I find her voice very soothing!)

Mary Berry's Prinsesstårta
(Adapted for American bakers)
For the fondant rose:
- 1 oz. pink fondant
- Powdered sugar (for dusting)
For the jam:
- 7 oz. raspberries
- 1 c. sugar
- 1¼ t. pectin
- 2 T. water
For the custard:
- 1 vanilla bean
- 2½ c. milk
- 6 egg yolks
- ½ c. superfine (baker’s) sugar
- 5 T. corn starch
- 3½ T. butter
For the sponge:
- 3½ T. butter
- 4 large eggs
- ¾ c. superfine (baker’s) sugar
- ½ c. corn starch
- ½ c. + 1 T. all-purpose flour
- 1 t. baking powder
For the marzipan:
- 3 ¾ c. ground almonds
- ¾ c. superfine (baker’s) sugar
- 2 1/3 c. powdered sugar (plus extra for dusting)
- ½ c. pasteurized egg whites
- 1 t. almond extract
- Green food coloring paste (NOT liquid)
To assemble and decorate:
- 3 c. heavy whipping cream, divided
- ¼ c. powdered sugar
- 1 T. corn starch
- 2 oz. dark chocolate, melted
Directions
- To make the fondant rose, roll 10 little pieces of fondant into small balls about the size of a pea. Dust two pieces of wax paper with powdered sugar and, one at a time, place the balls of fondant between the two pieces of wax paper and flatten with your fingers into thin circles about 1-inch in diameter. These are for the petals. Roll the first petal up like a sausage to form a bud, and then wrap the remaining petals around the bud to make a rose. Bend and curl the edges of the petals to make them look more realistic. Leave to dry for at least an hour.
- While the rose is drying, make the jam: Tip the raspberries into a saucepan with the sugar, pectin and water. Cook gently over a low heat, stirring occasionally, until the sugar is dissolved. Bring the mixture to a boil and let it boil vigorously for about 4 minutes or until the temperature reaches 220°F on a candy thermometer. Transfer to a heatproof bowl and leave to cool completely.
- Then make the custard: Split the vanilla bean in half lengthwise and scrape out the seeds. Pour the milk into a pan with the vanilla seeds and the bean pod and place the pan over low heat until it just begins to simmer. Then remove it from the heat.
- In a large bowl, whisk the egg yolks, sugar and corn starch together until pale and creamy.
- Remove the vanilla pod from the warm milk. (You can rinse this off and let it dry to use in making vanilla sugar: https://www.foodnetwork.com/recipes/alton-brown/vanilla-sugar-recipe-1914687.) Continue whisking the egg yolk mixture while slowly adding the warm milk. Pour the mixture back into the pan and cook over a low heat for 4-5 minutes, whisking continuously, until the mixture thickens. (It should be very thick.)
- Remove pan from the heat and beat in the butter until it’s melted and fully incorporated. Transfer the custard to a bowl, cover the surface with plastic wrap to prevent a skin from forming and leave to cool. Set aside to chill in the fridge.
- Then make the sponge: Preheat the oven to 350°F. Cut a circle of parchment paper to fit the bottom of a 9-inch springform pan. Grease the bottom (not the sides) of the pan and line the base with the parchment. Melt the butter and set it aside to cool.
- Put the eggs and sugar into a large mixer bowl and, using an electric mixer, whisk them together until the mixture is very pale and thick and the whisk leaves a trail on the surface when lifted, about 5 minutes.
- Sift the corn starch, flour and baking powder over the egg mixture and carefully fold it in using a large metal spoon or silicone spatula. Fold in the melted butter, taking care not to overmix.
- Pour the mixture into the prepared pan and bake for 25-30 minutes, until the sponge is golden-brown and has just started to shrink away from the sides of the pan. (It shouldn’t be jiggly, and a toothpick inserted in the center should come out clean.) Remove from the oven and set aside to cool. When pan is cool enough to handle, turn sponge out onto a wire rack to cool completely. (If you wish to freeze the sponge to make it easier to slice, wrap it in plastic wrap and then foil and stick it in the freezer for up to three days.)
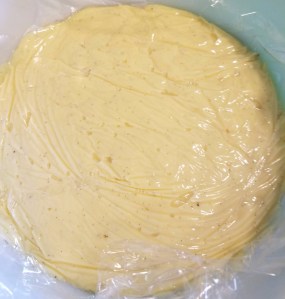
- While the sponge is cooling, make the marzipan. Pour the ground almonds and sugars into the bowl of a mixer fitted with a dough hook, then add the almond extract. Add the egg white a little at a time, mixing until a stiff dough forms. (If it’s too stiff after adding ½ cup of egg whites, add a tablespoon more.) Turn out onto a surface dusted with powdered sugar. Using a toothpick, add a tiny amount of green food coloring and knead until it reaches an even pastel green color. Cover with plastic wrap and refrigerate it until you’ve assembled the cake.
- NOTE: Everything up to this point can be done 1-3 days in advance. The sponge can be frozen, and all the other elements can be refrigerated in airtight containers.
- When ready to assemble the cake, use a serrated knife to cut the sponge horizontally into three even layers. (This is easier if the sponge is frozen. I measured the height of my sponge and placed toothpicks all around it to mark where I wanted to cut.) Place one of the layers onto a serving plate. Spread a very thin layer of custard onto the first layer.
- Spoon a quarter of the remaining custard into a piping bag fitted with a plain nozzle and pipe a border around the edge of the sponge – this is to contain the jam. Spoon the jam over the sponge, and spread it evenly within the border.
- In a bowl, whip 2½ cups of the heavy cream with ¼ cup powdered sugar and 1 tablespoon corn starch until it forms stiff peaks. Fold half of the whipped cream into the remaining custard to make a diplomat cream. Spread one-third of the diplomat cream over the jam.
- Place the second cake layer on top of the cream and spread the remaining diplomat cream over the cake. Place the third cake layer on top of that. Spoon the remaining whipped cream over the cake, smoothing it into a dome on top and covering the sides of the cake with a thin layer of cream. Set aside in the fridge for an hour (or in the freezer for at least half an hour).
- Cut two large pieces of parchment paper and sprinkle one with powdered sugar. Place the marzipan on the piece with the powdered sugar and sprinkle more powdered sugar on top. Place the other piece of parchment over the marzipan and roll it out to a 16-inch-diameter circle, large enough to cover the cake. (Lift the parchment occasionally to remove any wrinkles, then flip the two pieces of parchment upside down and do the same on the other side.) When it’s rolled out to about 1/8-inch thick, peel off the top layer of parchment and roll the marzipan onto the rolling pin. Transfer it to the cake and gently unroll the marzipan, peeling off the other piece of parchment as it covers the cake. Using your hands, shape the marzipan around the sides of the cake to get a smooth finish. Trim any excess. (If there are flaws in the marzipan, feel free to cut the extra marzipan into fun shapes and use them to cover the flaws.)
- Whip the remaining ½ cup of cream to stiff peak stage and spoon into a piping bag fitted with a small star nozzle. Pipe stars around the base of the cake.
- Spoon the melted chocolate into a small piping bag or zip-lock bag. Snip off the corner and pipe swirls over the top of the cake. Top with the fondant rose.
- Keep cake in the fridge until ready to serve. Leftovers can be refrigerated or frozen. Thaw frozen cake in the fridge before serving.
Next week: Dobos Torte
Discover more from Here's the Dish
Subscribe to get the latest posts sent to your email.
