
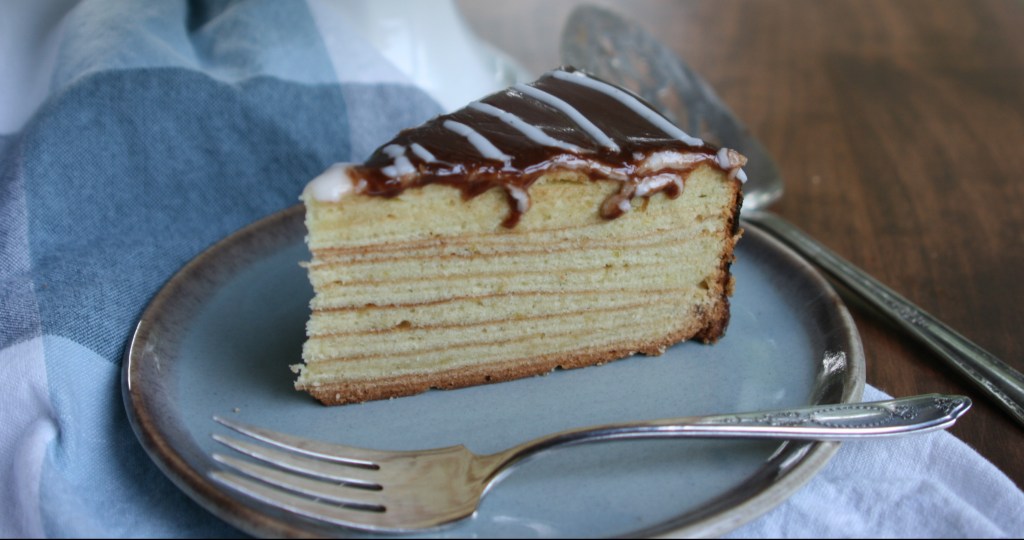
What is a Schichttorte? I’m glad you asked! It is derived from a German cake called a Baumkuchen (“tree cake”) that is cooked on a spit, with thin layers of batter added as it rotates over a heat source, resulting in a round cake with a hole in the middle and multiple vertical layers that look like growth rings on a tree. Because most people don’t have a spit at home on which to bake a cake, the Schichttorte (“layer cake”) was developed. This adaptation uses a common oven broiler to bake thin layers — each layer of batter brushed on top of the previous one — until the cake has up to 20 horizontal layers that are visible when the cake is cut.

There are problems inherent in this process, the biggest one being the possibility that the bottom layers get overbaked as the upper layers are added. Unfortunately, this leads to a dry, rubbery texture which some have likened to a stack of cold pancakes.
Because this was a technical challenge, I couldn’t alter Paul Hollywood’s recipe, but in researching this cake I discovered many recipes for Schichttorte that seem to have solved the problem of dryness by brushing apricot jam or orange marmalade between the layers. Some also add marzipan to the batter, which I think would also make the cake moister.
I encountered the additional problem of the cake pulling away from the edges of the pan as it baked, so my cake was not perfectly round. I ended up trimming off its rougher edges, and the chocolate glaze covered some of the flaws, but I’m sure Paul and Mary would not have been fooled.
The recipe calls for an 8-inch springform pan, which is not a standard size in the U.S., apparently. I found one at my local baking supply store, but other bloggers have used non-springform pans successfully. Just make sure to line the bottom with parchment paper to make it easier to get the finished cake out of the pan. If you choose to use a 9- or 10-inch springform pan, don’t count on getting all 20 layers, as it will take more batter to cover the pan.
Making the batter was not difficult. It is a typical sponge cake batter, with the egg yolks whisked separately until pale and creamy. The butter and sugar are creamed together with the flavorings, then the egg yolks are added, followed by the dry ingredients. Finally, the egg whites are beaten to soft-peak stage and gently folded into the batter.
I must say, this recipe uses a lot of bowls. I used all three bowls that go to my stand mixer. (If you only have one or two, be prepared to wash them between steps.) Before I started, I actually had to determine which bowls to use for (1) egg yolks, (2) butter and sugar, (3) sifted flour and cornstarch, and (4) egg whites.
If you want to make sure your layers are even, you’ll need to weigh the batter. But first, you must weigh the empty bowl. The bowl in which you cream the butter and sugar is the one you need to weigh empty, as it is the one the batter will end up in. (Make sure you write down the weight of the empty bowl, because if you’re like me, you’ll forget what it was by the time you weigh the bowl with the batter in it!) After making the batter, weigh the bowl again. Deduct the weight of the empty bowl from the weight of the full bowl and divide by 20. This will tell you how much batter to use for each layer. (I did this, but I may have forgotten to remove the spatula when weighing the batter in the bowl, because as I was nearing the finish line I could tell I wouldn’t have enough batter, so my layers got smaller and smaller toward the end.)


To weigh out the batter for each layer, place the cake pan on your scale, tare it and spoon in the batter a little at a time until it reaches the desired weight. (Mine was around 50 grams.) Because I didn’t know if my scale could withstand the heat of a pan that had just come out from under the broiler, I placed two small canning jars on the scale and rested the hot pan on those. This also raised the pan away from the surface of the scale so I could read the weight better.
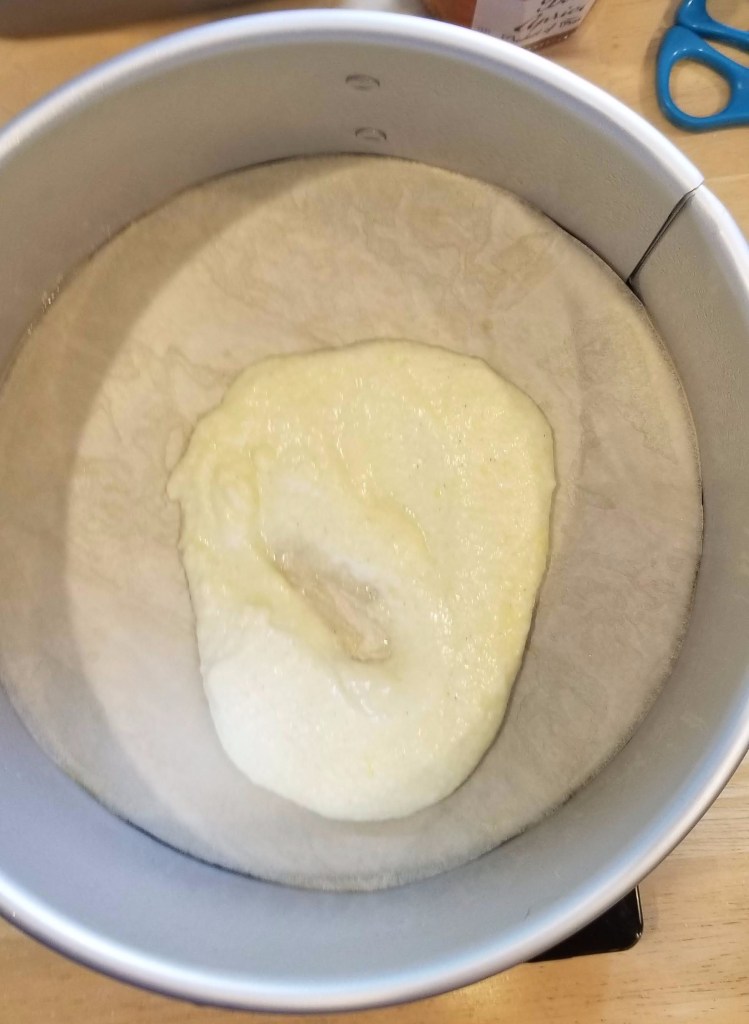
This is how much batter I needed for each layer. 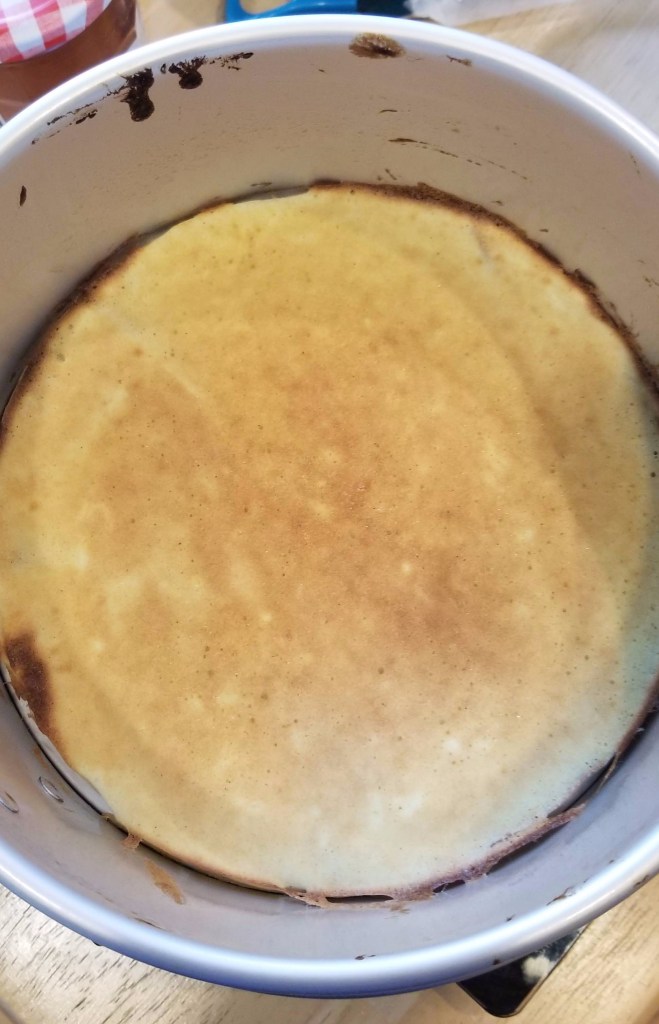
A few layers in, the cake begins to take shape. 
As I added more layers, they pulled away from the pan. Not pretty!
Another problem with this technique of baking under a broiler (or “grill” as it’s called in the UK) is that every oven is different. Paul’s recipe says to “Preheat the grill to high.” My oven gives me the choice of broiling on high or low, but some ovens don’t have that option. And I have no idea what temperature each setting is. Paul’s recipe also says to place the shelf 10 cm/4 inches below the heating element. When I did that, my pan didn’t fit below the heating coil, so I had to drop the shelf to about 6 inches below the coil. I knew this would affect the baking time for each layer, so I had to watch carefully.
Speaking of baking time, the recipe says to cook the first layer for two minutes, the second layer for three, and then alternate between two and three minutes to create alternate dark and light layers. This is tricky. It worked for me for awhile, but as the cake grew taller, I found that each layer needed less time. (This may have also been because I was reducing the amount of batter on the upper layers since I was running low!) So you must keep an eye on this cake at all times. The layers are so thin they really don’t need any color at all to be done, so the darker layers just need a hint of gold for them to be done.
One more tip the bakers didn’t have in the Great White Tent: Use a pastry brush to spread the batter. This is easier than trying to use a spatula or tilting the pan to get it to spread on its own.
When the final layer is done, let the cake sit in the pan for a few minutes before releasing it onto a wire rack to cool. Rather than turn it upside down, like I do for most cakes, I decided to keep mine right-side up to glaze it. I liked the look of the top layers better and, as I found out later, the bottom layers were a bit overcooked and tough.
To glaze the cake, mix together butter, golden syrup, rum and vanilla, and bring them to a boil on the stove, then pour the mixture over chopped chocolate. Stir until the chocolate melts, and then let it cool until it’s the right consistency to coat the cake. You then make a simple vanilla icing to drizzle over the chocolate glaze. I tried one of those spiderweb designs, with mediocre results.

Once you get past the texture of the cake, the flavors — vanilla with a hint of lemon in the sponge, chocolate in the glaze — go well together; some say they taste even better a day or so after it’s made. In the tradition of European cakes, this cake is not overly sweet. My husband, who doesn’t care for sweet desserts, has gone back for more, so I know it wasn’t a total failure!
Having researched many different recipes for Schichttorte since making this cake, I’ve decided that next time I make it I will use Jamie Oliver’s recipe, which he calls a Baumkuchen. If you want to read about another blogger’s experience making Schichttorte, I recommend BeneathTheCrust.com’s post. She has made it several times and actually created her own recipe combining elements of both Paul’s and Jamie’s.
You can find Paul Hollywood’s recipe here, but I have adapted it for American bakers below. If you do decide to make this, please let me know in the comments section how it turned out. I’d love to hear your opinion, and if you made any changes to Paul’s recipe!

Paul Hollywood’s Schichttorte
For the cake:
- 10 large eggs, separated
- 7 T. unsalted butter
- ¾ c. superfine (baker’s) sugar
- Zest of 1 large lemon
- 1 t. vanilla bean paste
- 1¼ c. all-purpose flour, sifted
- ½ c. cornstarch, sifted
- 6 T. apricot jam
For the chocolate glaze:
- 3½ T. unsalted butter
- 1 T. golden syrup
- 1 T. rum
- 1 t. vanilla bean paste
- 2½ oz. milk chocolate, finely chopped
For the vanilla icing:
- 2 2/3 c. icing sugar
- 1 T. rum
- ½ t. vanilla bean paste
- 2-3 T. milk
Directions
- Whisk the egg yolks in the bowl of an electric mixer on high speed for five minutes or until pale, thick and creamy.
- Weigh another mixer bowl. (TIP: Don’t forget to write down the weight of the empty bowl!) Put the butter and sugar in that bowl and beat until pale and creamy. Add lemon zest and vanilla paste, and mix well. Add the whisked egg yolks and beat well. Then add the flour and corn starch, and mix.
- In a clean, grease-free bowl, whisk the egg whites to soft peak stage. Stir one-third of the egg whites into the batter to loosen the consistency, then gently fold the remaining egg whites into the egg yolk mixture. Weigh the bowl with the batter in it, and subtract the weight of the empty bowl. Divide that number by 20. That is the amount of batter to use in each layer. (TIP: Shoot for a slightly smaller number to give yourself a bit of leeway.)
- Position the oven shelf about 4-6 inches below the heat source, making sure the pan will fit on the shelf. Preheat the oven broiler to high. Grease an 8-inch round springform pan with oil, and line the base with an 8-inch circle of parchment paper.
- Place the pan on the scale and push the “tare” button to bring it to zero. Spoon batter into the pan a little at a time until it reaches the weight you have determined each layer should be. Use a pastry brush to spread the batter evenly across the bottom of the pan. Place the pan in the broiler and cook for two minutes or until the cake is light golden-brown.
- Remove pan from the broiler, place it back on the scale (use a hot pad or a couple empty jars or cans to protect the scale, if necessary), press “tare” and spoon in more batter, bringing it to the desired weight. Spread the batter with a pastry brush to cover the first layer, and place the pan under the broiler for three minutes or until dark golden-brown. Continue layering and broiling until you have 20 layers alternating in color from light golden-brown to dark golden-brown. (Or continue until you have used all the batter.)
- When the final layer is done, leave the pan on a wire rack to cool for five minutes. Then carefully release the cake from the pan and turn it out onto the wire rack to cool.
- Melt the apricot jam in a small pan over a low heat. Pass it through a fine sieve, then brush the top and sides of the cake with jam.
- For the chocolate glaze, melt the butter in a small pan with the golden syrup, rum and vanilla paste, and bring it to a boil. Remove from heat, and let it cool for five minutes. Stir in the chocolate until melted. Let cool until it reaches a coating consistency.
- Place a large piece of wax paper under the wire rack holding the cake. Pour the glaze evenly over the cake to cover completely. Any excess glaze will be caught on the wax paper and can be reused to fill in any unglazed areas of the cake.
- For the vanilla icing, sift the powdered sugar into a bowl. Add the rum, vanilla paste and just enough milk to make a runny icing, stirring until it’s completely smooth. Drizzle the icing over the chocolate glaze.
- Some say the cake is best the day after it’s made, but it should be eaten within a few days. It can be frozen before being glazed if wrapped tightly in plastic.
Next week: Entremets
Discover more from Here's the Dish
Subscribe to get the latest posts sent to your email.

Love the simple tweaks and hints you added. This is my second attempt at a schichttorte. First time I followed Paul’s recipe but it came out dry. I added the apricot glaze between each layer and am looking forward to trying the result. if I might suggest another hint, when doing the math, divide by 21 rather than 20. This will account for inevitable losses (batter stuck to spoon, brush, etc.).
LikeLiked by 1 person
Thank you! Let me know how it turned out. And thanks for the hint. That’s a great idea!
LikeLike