
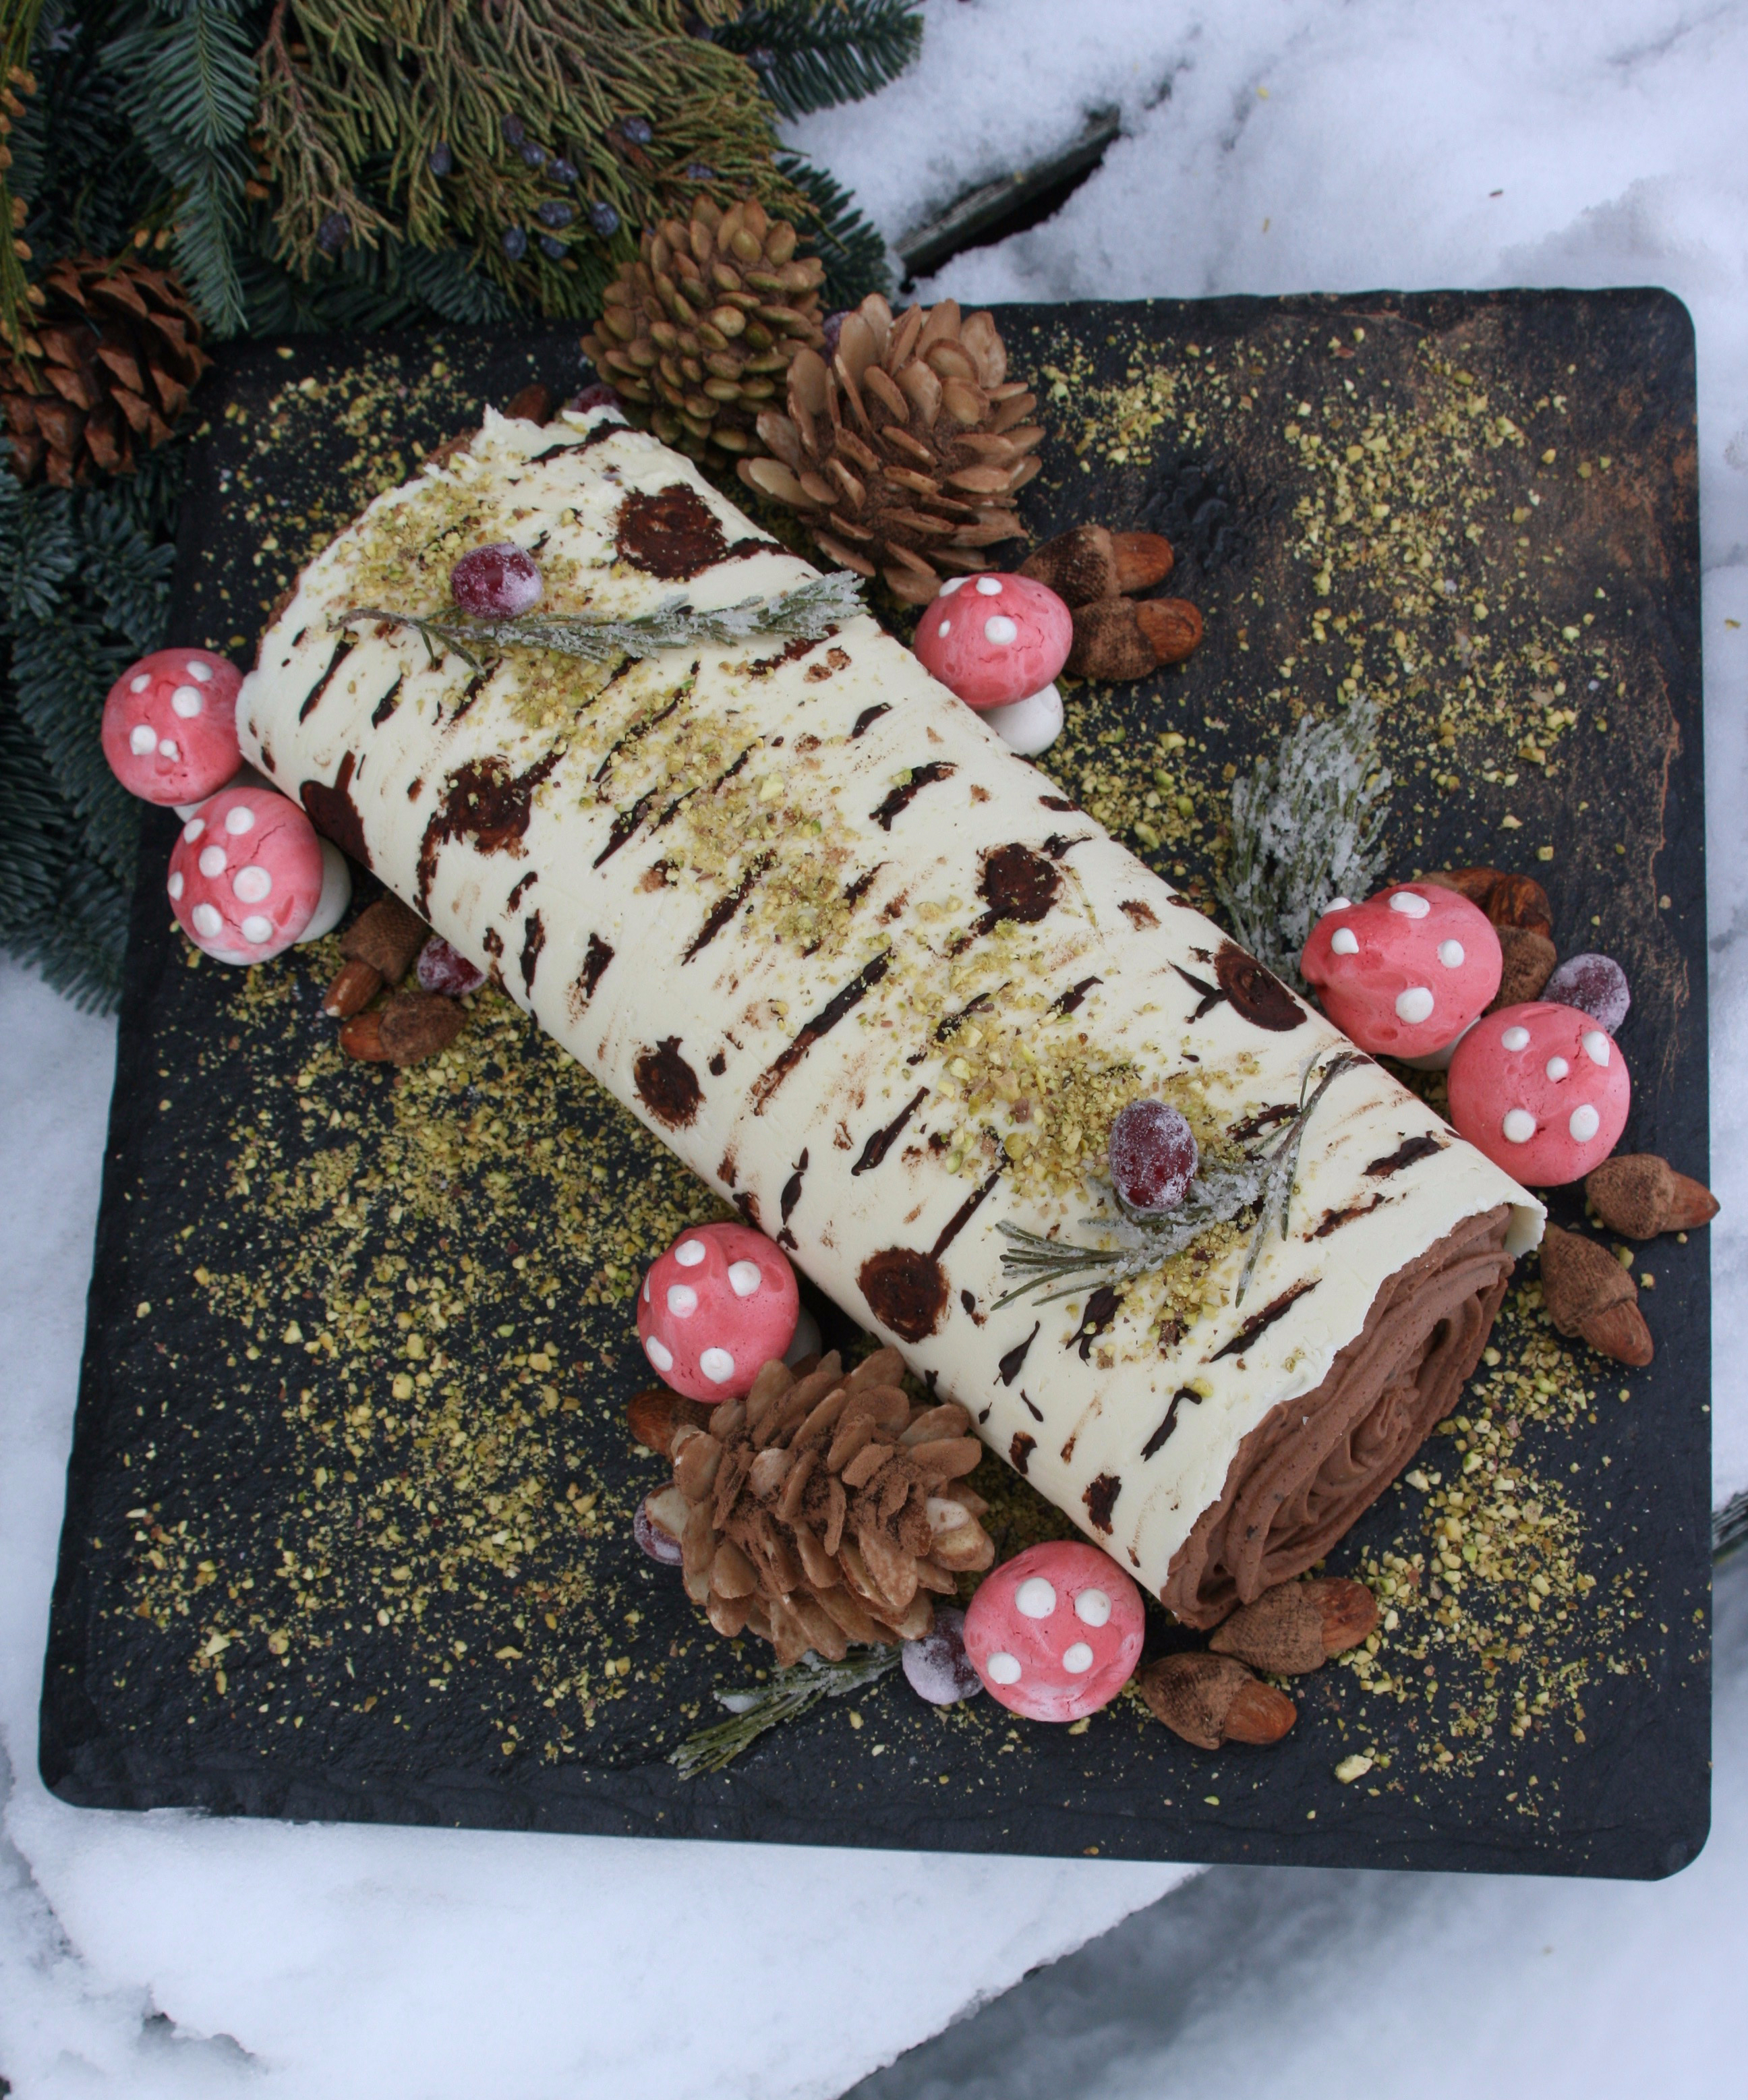
I guess I’m still in the Christmas mood. When I saw that this week’s challenge was a chocolate cake, all I could think of was Bûche de Noël. A friend of mine had shown me her holiday issue of Bake From Scratch magazine, and it featured a couple different versions of this Christmas classic, as well as a clever use of white chocolate to create a “birch bark” bark. I borrowed her magazine to use the Classic Bûche de Noël recipe as the basis for my showstopper, but I put my own take on the rest.
This is going to be one of those blog posts where I don’t post the recipe (although I will provide links to the recipes I used) but instead explain the steps I took to achieve the final result, because there are a lot of elements involved in this bake. Unlike the bakers in the Great White Tent, who had 4 hours to complete their chocolate cake, I tackled mine over a week’s time, working on the decorations a little each day, then baking the cake on Friday and finally assembling it on Saturday.
Meringue Mushrooms

First, I made meringue mushrooms. Every self-respecting Bûche de Noël (or in this case, Bûche d’hiver, because it may not be Christmas, but it’s still winter!) is adorned with meringue mushrooms. I tried making these for the first time late last year, and when I showed them to my daughters, they said, “You should make them red!” (Just like in the fairy tales we used to read together when they were young.) So I was determined to figure out how to create red mushrooms with white spots. Like the one on the right.
It didn’t take me long to find this blog, where the author explains how to make white meringue mushrooms and red ones. So I followed her directions. The only problems I had were:
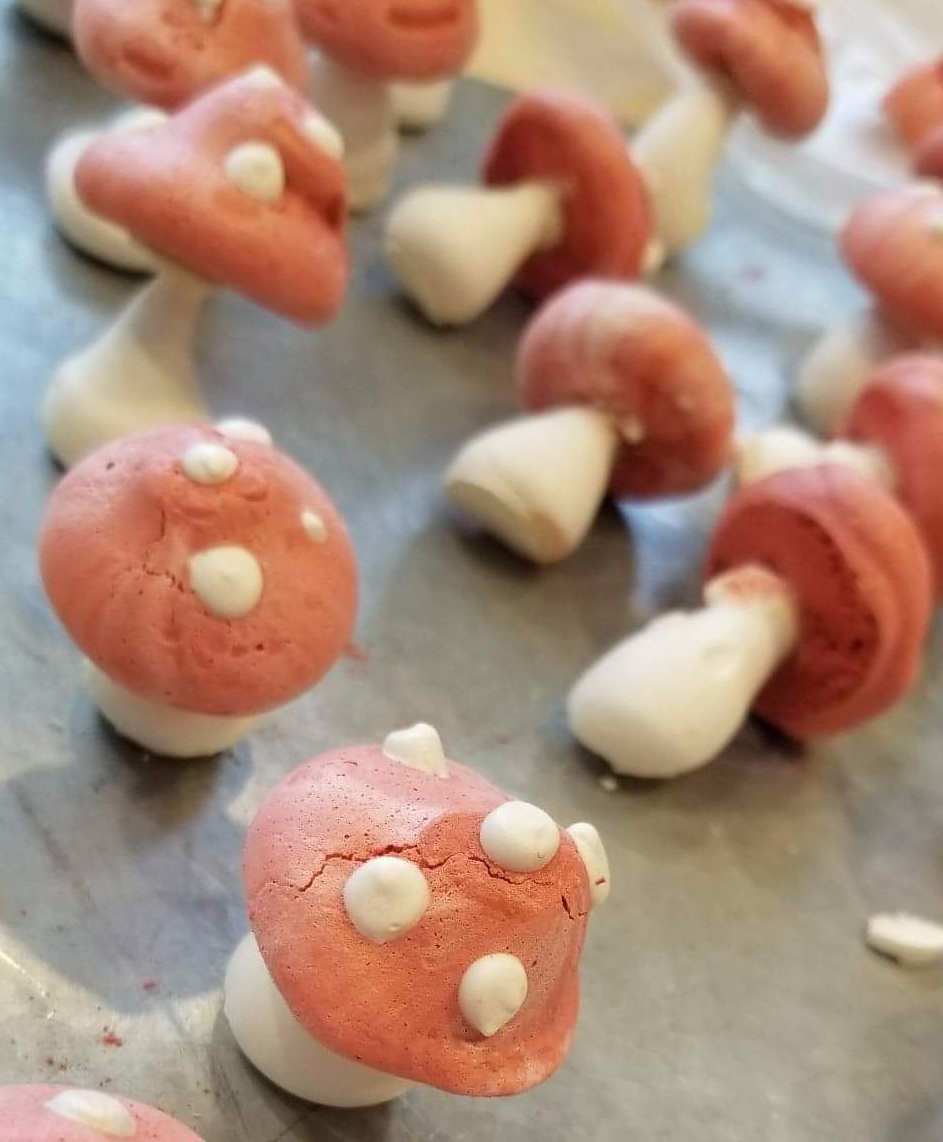
- The gel food coloring I bought was called Tulip Red. I figured that would give me a more realistic red than, say, Christmas Red or Really Red. After all, tulips and mushrooms are both natural; they grow in the wild. The red tulips I’ve seen are pretty red, and pretty, and red. But it turns out that Tulip Red is actually more like orange, or coral. I tried adding more of it. When that didn’t work, I added Neon Pink. That helped a little, but also made it brighter. So I added a little purple, hoping that would tone it down a bit. Again, only a little. So I finally used liquid red food coloring (the only other red I had). That worked better, but I didn’t want to water down my meringue too much. Finally, I got a sort of coral-red, so I had to settle for that. Once they were baked, they were more of a pink-red. But at least they were passable.
- I think she has the oven temperature too high, or the baking time too long, or both. She says to set the oven to 100°C (which is 212°F), and leave them in for two hours, then turn off the oven and let them cool completely in the oven before taking them out. I set my oven to 200F, followed her timing, but when I took my mushrooms out of the oven, most of the tops had cracked, and some of the stems were slightly browned. Other recipes I found called for baking them at 200°F for an hour and a half, or at 275°F for 30-40 minutes. One said to leave them in the oven to cool but leave the oven door slightly ajar, so they don’t keep cooking after the oven is turned off. Next time I’ll do that.
Edible Pine Cones & Acorns
Next, I made some pine cones and acorns. The pine cone idea came from Frances Quinn (winner of the 2013 season of The Great British Baking Show, which I’m currently baking through), whose Secret Squirrel Cake for this episode was something of an inspiration for my chocolate cake showstopper. She demonstrates how to make her edible pine cones in this Instagram post.
I love how Frances applies her design experience to her baking, often creating elaborate drawings and schematics for her fanciful bakes before actually constructing them, like this Banoffee Pie-Chart Pie for Pi Day, or these David Hockney–inspired edible eyeglasses. She’ll often even post the songs she listened to while creating a particular bake!
But I digress. While I was playing around with the pine cones, I thought I would try making some acorns as well. For both creations, I used a ganache truffle recipe, which uses a 2-to-1 ratio of chocolate to cream, plus a little butter, to make it thick but also pliable enough so you can mold it into any shape you want.

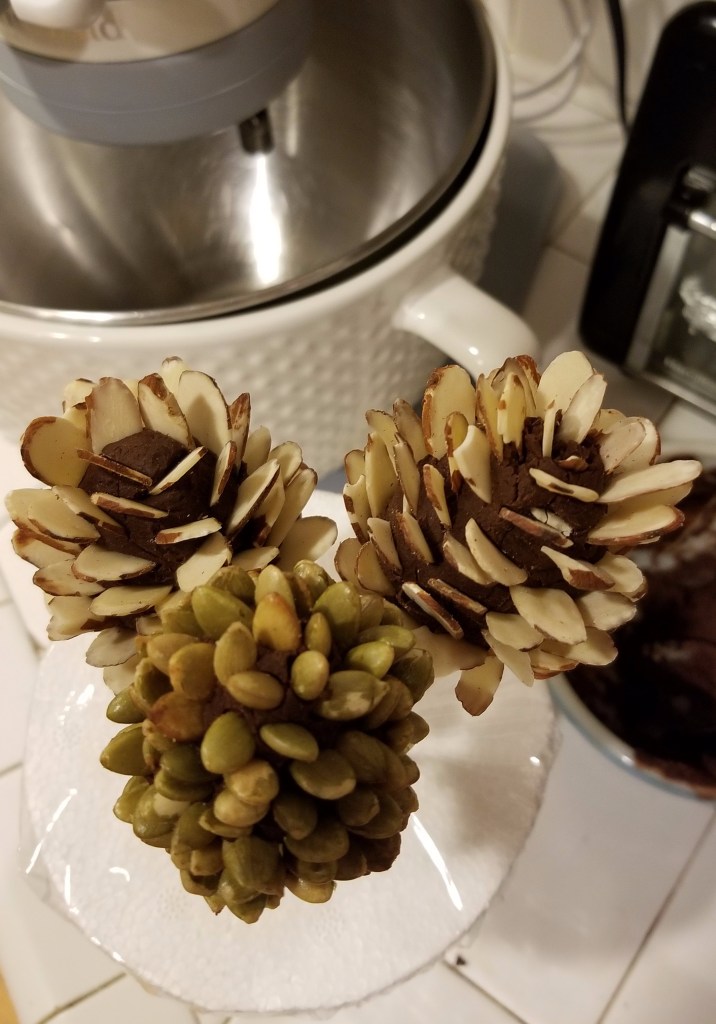

For the pine cones, I started by forming a small egg-shaped core out of ganache. (This gets messy, so either wear food-safe gloves or just embrace it, like a kid making mud pies!) I then stuck it on a bamboo skewer so I’d have something to hold onto while I inserted almond slices all around it. When I thought it had enough almond slices to make it look like a pine cone, I sprinkled it with cocoa powder to give it a more realistic look. I made two pine cones with almond slices and one with roasted pumpkin seeds, also called pepitas, which are green and smaller than almonds, so it looked like a younger pinecone that hadn’t fully opened up yet.
For the acorns, I took a small ball of ganache (about 3/8 inch in diameter) and inserted a whole almond into it so that half the nut was sticking out. Then I molded the chocolate around one end of the almond, so the ganache formed the cap of the acorn. I also experimented with cutting a few of the pepitas in half and inserting that into the top of the chocolate “cap” to create a stem on the acorn. I rolled the caps in cocoa powder and then pressed them against a wire mesh strainer to form a grid pattern, similar to what you find on real acorns. (Again, it gets messy, and the acorns may get smudged with chocolate, but I think it just adds to the “real” effect.)


Coffee Mascarpone Mousse Filling
With most of the decorations taken care of, I then made the mousse filling for my roulade. I wanted something that would complement the chocolate sponge, and chose to use coffee as my flavoring. I still had some of the excellent French coffee extract I used in the coffee buttercream for my Raspberry Mocha Layered Meringue Dessert, which came from LittleFrenchBakery.com. So I followed this recipe for coffee mascarpone mousse, but I substituted 1 tablespoon of my French coffee extract for the espresso. I made it the night before I planned to make the sponge, and kept it in the fridge to chill.
Chocolate Spice Genoise Sponge
Finally, the day came for me to make the chocolate sponge. As I said before, I used this recipe from Bake From Scratch as the sponge for my roulade, but I made a few changes. One I regret, the others I don’t:
- Because the original recipe calls for an 18-by-13-inch pan, and I only had a 15-by-10-inch pan, I decided to cut the recipe by one-third. While this made sense logically (and mathematically), in the end I wish I had made the full amount, mostly because the cake was quite thin and one corner broke off since I hadn’t spread the batter evenly enough. Next time, I will try making the full batch even with the smaller pan.
- Wanting a more complex chocolate flavor, I added a teaspoon of cinnamon and a pinch of cloves to the flour. I’ve always liked chocolate spice cake, and I thought the combination would go well with the coffee mousse filling. I was not disappointed.
- I also decided to roll my sponge from the short end instead of doing it lengthwise. Rather than cut off one end to create a “branch” on my “log,” as the recipe calls for, I chose to make a shorter, fatter, single bûche, which I then covered with a birch-patterned white chocolate collar.
The basis for most Swiss rolls is a genoise sponge, which, as explained by LawsOfBaking.com, “is a sponge cake that is leavened naturally with eggs using the foaming method which is the gentle warming of the eggs with sugar and beating them until they are foamy and thick.” Basically, that means you whisk together the eggs and sugar over a bain-marie until they reach 110°F. Then you whip them with an electric mixer until they are light in color and about three times their original volume. They should also reach what is called the “ribbon stage,” which means that the batter falls into a thick ribbon when the beater is lifted out of the bowl.
After that, the flour and chocolate are gently folded into the aerated egg mixture, in stages, so as not to deflate the eggs. Finally, a small amount of melted butter is folded in, and then the batter is spread into a parchment-lined jelly roll pan and spread evenly, since it won’t spread on its own in the oven.

Unroll it after it’s cooled. 
One corner broke a little. 
But in the end I got a good roll!
The sponge only bakes for 10-12 minutes, and as soon as it’s taken out of the oven, it’s inverted onto a dishtowel that’s been sprinkled with cocoa powder. Roll the cake up in the towel and let it cool that way. Then, when it’s cooled, you gently unroll the cake, brush it with a coffee simple syrup to keep it moist, spread the mousse filling over the cake and roll it up (this time without the towel). After chilling my rolled and filled cake until firm, I placed it on a serving platter and covered it with a browned butter icing. Then it was ready to decorate!
Birch Bark Chocolate Collar
This was my first time attempting a chocolate collar. I got the idea from Bake From Scratch magazine, which featured a vertical Bûche de Noël with birch-patterned white chocolate bark on the outside. They did theirs in pieces, though, and I wanted to create one piece that would wrap around my roulade like a horizontal cake collar.
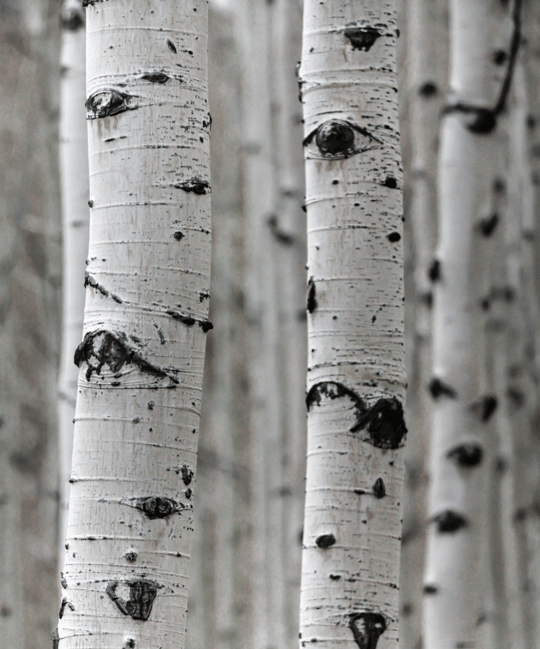
Wanting to impress the Mary and Paul in my head, I decided to temper my chocolate using the seeding method, rather than the shortcut microwave method that I usually use. First, I cut a piece of acetate the same size as the outside of my cake roll. (You can also use parchment paper, but supposedly the acetate gives the chocolate a shinier surface.) Then I tempered a small amount of dark chocolate, following the instructions here. Using a food-safe paintbrush, I painted lines and circles on the acetate with the dark chocolate to look like the pattern on a birch tree.
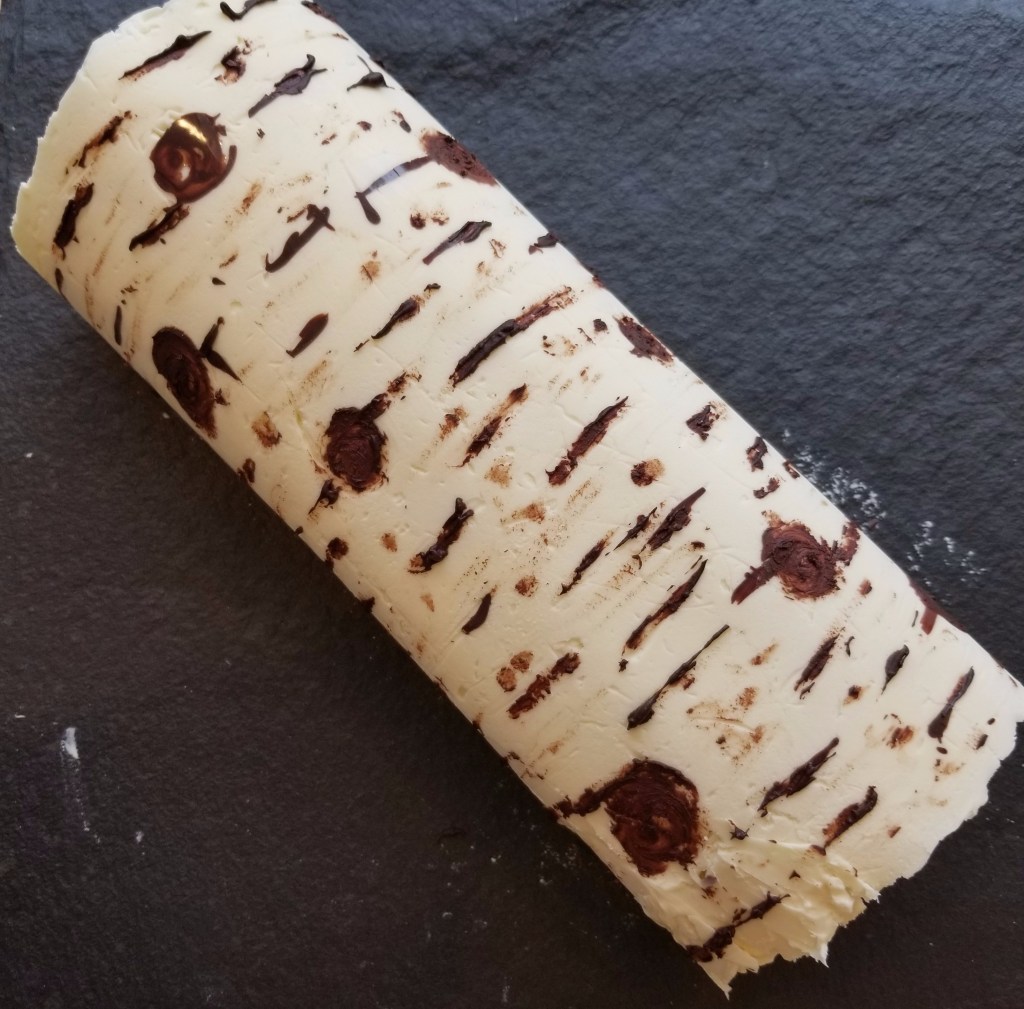
After that, I tempered about 250 grams of white chocolate using the same method (but noting the lower temperatures for white chocolate than for dark). I’d only attempted this tempering method once previously, and that was for my chocolate tea cakes. I was marginally successful that time — ending up with a few dull spots on my chocolate — so I tried to be extra careful this time. Unfortunately, I think I let the white chocolate get too hot to begin with. I stepped away from the bain-marie for just a minute or two, and when I checked the temperature of the just-beginning-to-melt chocolate, it had already surpassed 110°F, which is a no-no. Not wanting to waste my good white chocolate, I kept going, hoping it hadn’t burned. It still looked and acted okay, but I thought I detected a bit of graininess. Still, I prayed it would be salvageable. When I finally got it down to 82°F and then back up to 84°F per the instructions, I spread it onto the acetate over the dark chocolate I had painted on.
It didn’t take long for the chocolate to cool and harden enough for me to pick it up and wrap it around my chilled roulade. When I felt that it had set enough, I gently lifted a corner of the acetate and slowly peeled it off the chocolate. I could tell right away that something was wrong. The dark chocolate stuck to the acetate instead of the white chocolate! I tried rubbing it, like those old rub-on transfers we used to play with as kids. That didn’t work, so I gave up and kept peeling. At least the white chocolate didn’t stick to the acetate. So I decided to paint the birch pattern directly onto the white chocolate collar. This worked fairly well, and I was satisfied with the outcome. The only problem with the white chocolate was that it wasn’t shiny. I chalked that up to allowing it to get too hot during the tempering. But as it turned out, it looked more realistic this way.
Final Assembly
Finally, it was time to put together all the pieces for my showstopper. I gathered everything I had prepared: the mushrooms, pine cones and acorns; some ground pistachios for a little “moss”; and even leftover sugared cranberries and rosemary sprigs from my Chai-Spiced Orange Cake with Cranberry Curd Filling — anything to make my Bûche de Noël look like it had just fallen onto the forest floor.
First, I piped a swirl of chocolate frosting onto the ends of my “log.” (I used the rest of the browned butter icing, mixing in a little cocoa powder and a teaspoon or two of half & half until I achieved the color and texture I was looking for.) Then I placed all my props and accessories in strategic locations, “gluing” the mushrooms down with a dab of chocolate ganache.

I was very pleased with the effect, but of course the proof of the pudding is in the eating, as they say. This time, I was able to share my bake with a group of friends, who devoured it quite quickly. While I didn’t hear any complaints, my personal opinion was that the cake was a little too thin and maybe even a little rubbery. (Perhaps when I folded in the eggs I let too much of the air out, but also, as I mentioned before, I wouldn’t scale down the original recipe if I make it again.) I did enjoy the flavor combinations, though. The coffee mousse really complemented the chocolate cake, and you could just taste the spices, which brought more depth to the overall flavor profile.


Next week: Breadsticks
Discover more from Here's the Dish
Subscribe to get the latest posts sent to your email.
