
This one felt more like a test. The challenge — to create three different kinds of petits fours (the canapés of desserts) using different baking techniques — seemed like a test of all that the bakers on The Great British Baking Show had learned so far.
And for me, too.
The recipes I chose used pastry-making skills I learned when I made my showstopper fruit tart, ganache techniques I learned from my chocolate-orange torte, jam making from the queen of puddings, and chocolate-tempering skills I used for the chocolate tea cakes. I even used up some leftovers — lime curd from my American pie, coffee extract from my raspberry mocha layered meringue, and pistachios left from my celebratory king cake!
It was also a test of time management and multitasking, something I admit I’m not very good at when it comes to baking. The bakers in the Great White Tent were given three hours to complete their three creations. While I didn’t constrict my bakes to the same time limit, I did time myself to see how long it would take me. In that respect, I failed miserably. It took me twice as long!
But overall, I was pretty happy with the results. My petits fours looked professional and tasted out of this world! I would definitely make any one of these recipes again, but hopefully one at a time rather than all at once!
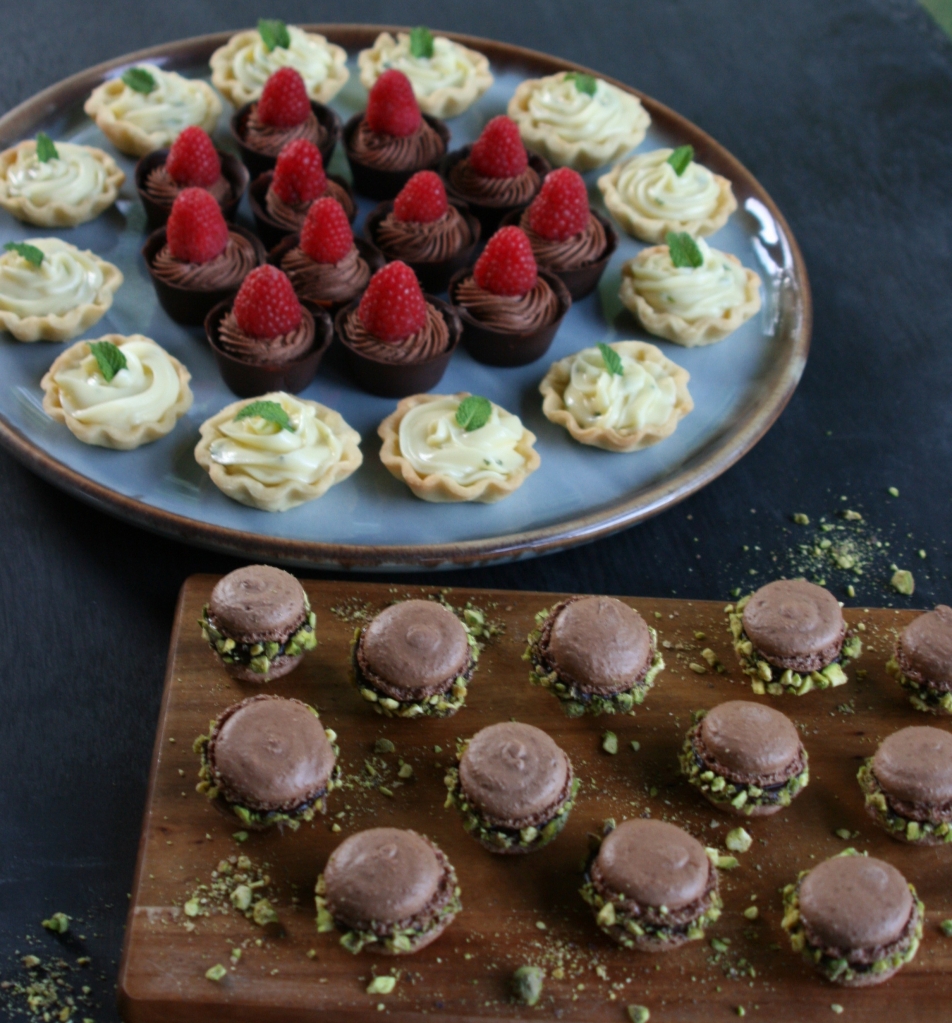
For my three petits fours, I made:
- Chocolate macarons with mocha ganache filling, rolled in crushed pistachios
- Lime/mint/white chocolate mousse tartlets
- Raspberry–chocolate mousse in chocolate cups
Although I tried to work on all three simultaneously, I probably should have thought it through more carefully. For instance, I decided to start by tempering my chocolate, but I forgot that the pastry dough has to chill for an hour before being rolled out, and then should be chilled again before baking. So I probably should have begun with the pastry dough, then started the raspberry jam for the chocolate mousse cups, since it can simmer on the stove while you’re doing other things. Then I could have been tempering my chocolate while my dough was chilling and my jam was simmering.


Anyway, I began by tempering my chocolate, which takes quite a while. When it finally cooled enough to work with, I lined the cavities of a silicone mini-muffin tin with it to make my chocolate cups, then set them aside to cool. I then boiled the raspberries for raspberry jam. After it had thickened, I strained out the seeds and left it in the fridge to cool. Then I made the ganache that would be whipped into a mousse to fill my chocolate cups. After that, I made the pastry dough for the tartlet shells and put it in the refrigerator while I whipped up the white chocolate mousse tart filling. That had to chill, too, so while it was in the fridge I started making the macarons, which have to sit for half an hour before baking. While waiting to pop them in the oven, I made the mocha ganache filling. As it turned out, almost everything I was making had to chill for at least an hour!
Finally, the chocolate cups were set, so while the macarons were baking, I took them out of the muffin tin and put a dab of raspberry jam in the bottom of each. Then I whipped up the chocolate ganache and piped it on top of the jam and stuck them in the fridge while I finished my other petits fours.


I still had to roll and cut my pastry dough, so once the macarons were out of the oven I did that, skipping the second chill for the dough and baking six tart shells at a time because I only have six molds. While they were baking, I piped the mocha ganache onto the cooled macarons and rolled them in pistachios. Once the tart shells were cooled, I filled them with the white chocolate mousse and garnished each with a tiny mint leaf. Finally, I topped each chocolate mousse cup with a fresh raspberry. Whew!

What I learned from this semifinal signature bake:
- While I enjoy making miniatures, I don’t enjoy juggling multiple bakes at once!
- If I do have to juggle more than one bake at a time, take more time planning before executing!


Chocolate Macarons with Mocha Ganache Filling
For the macarons:
- 1 c. powdered sugar
- ½ c. finely ground almonds (or almond flour)
- 3 T. unsweetened cocoa powder
- ¼ t. fine salt
- 2 large egg whites, at room temperature
- 5 T. granulated sugar
For the filling:
- 4 oz. bittersweet chocolate, chopped
- 1 t. espresso powder (alternatively, use 1 T. French coffee extract from my blog post for a layered meringue dessert, originally found in LittleFrenchBakery.com’s recipe for Dacquoise au Café)
- ½ c. heavy cream
- 2 T. unsalted butter, room temperature and cut into chunks
- ½ c. chopped pistachios
Directions
- First, prepare two pieces of parchment paper the same size as your baking sheets by tracing 1¼-inch circles about 1 inch apart on each of them. Then turn them over and place the papers on the baking sheets. Fit a large pastry bag with a ½-inch plain tip.
- To make the macarons, combine the powdered sugar, ground almonds, cocoa powder and salt in a food processor. Pulse several times to combine. Continue processing until the mixture is very fine, about 30 seconds. Sift with a fine strainer into a large bowl.
- Place the egg whites in a large, clean mixer bowl and beat with a whisk attachment until fluffy and white, about 1-2 minutes. Gradually add the granulated sugar and continue beating until shiny stiff peaks form when the beater is lifted out of the bowl, about 1-2 more minutes. Do not overwhip.
- Fold the dry ingredients, one third at a time, into the egg whites. Do not overmix. Fold just until there are no large lumps or white streaks left.
- Transfer the mixture to the pastry bag. Pipe the batter onto the circles on the parchment paper. When the baking sheet is full, rap the sheet on the counter several times, helping the surfaces of the macarons to flatten and smooth out. Leave the baking sheets out at room temperature for at least 30 minutes, until a skin forms on top of the macarons and they are no longer sticky to the touch. (At this point, you can also use your finger to gently push down any tips that are still sticking up.)
- In a preheated 350°F oven, place the baking sheets on the middle racks and bake for about 14 minutes, rotating the sheets 180 degrees halfway through the baking time to ensure even baking. The macarons should be smooth, firm and dry when done. Do not overbake. Transfer the baking sheets to cooling racks and allow to cool completely before removing macarons from the parchment paper.
- To make the ganache filling, place the chocolate and espresso powder (or coffee extract) in a large, heatproof bowl. Heat the cream in a small saucepan over medium heat until it just reaches the boiling point. (You should see small bubbles forming around the edge.) Pour the hot cream over the chocolate and let it stand for 1 minute. Then add the butter and stir until the chocolate is melted and the mixture is smooth. Chill ganache until it is firm but still spreadable, about 30 minutes. Transfer to a smaller piping bag fitted with a small plain tip.
- To assemble, divide the macarons into pairs of similar size. Place chopped pistachios in a small bowl. Pipe about a teaspoon of ganache onto the center of one macaron. Place the other macaron on top, pressing and twisting slightly to bring the ganache to the edge. Roll in the chopped pistachios and set aside. Repeat for all the other pairs. Store in an airtight container in the refrigerator.

Lime, Mint & White Chocolate Mousse Tartlets
Mousse filling adapted from: Tea & Sweets, © 2014 by Hoffman Media, LLC
For the pastry:
- ½ c. unsalted butter, room temperature and cut into 8 pieces
- ¼ c. sugar
- ½ t. kosher salt
- 1 c. unbleached, all-purpose flour
- 1 egg yolk
For the filling:
- 10 oz. lime curd (I used homemade curd using the recipe from AlaskaFromScratch.com)
- 8 oz. mascarpone cheese, room temperature
- 4 oz. white chocolate, melted
- Zest of 1 lime
- Small handful of mint leaves + 12 small leaves reserved for garnish
Directions
- To make the pastry, use a standard mixer fitted with a paddle attachment to cream together butter, sugar and salt on medium speed for 2-3 minutes, or until pale and light. Scrape sides and bottom of bowl with rubber spatula. Add flour and beat on low for about 30 seconds, until the flour is blended with the butter-sugar mixture. The mixture will look like wet sand. Add the egg yolk, and continue to mix on low speed for about 30 more seconds or until the dough comes together.
- Transfer dough to a sheet of plastic wrap, and flatten into a disk about 1 inch thick. Wrap the dough tightly in the plastic wrap and refrigerate for about an hour, or up to five days.
- While dough is chilling, make the mousse filling: Whisk the lime curd in a large bowl until softened. Add mascarpone cheese, whisking until incorporated. Add melted white chocolate and whisk to blend.
- In a small food processor, combine lime zest and mint leaves and process on pulse setting for a few seconds at a time until they are finely chopped. Stir into lime curd mixture. Cover and refrigerate for at least an hour until needed.
- When you’re ready to roll out the dough, remove the dough from the refrigerator and let it soften at room temperature for about 30 minutes. Use a rolling pin to bang and flatten the dough to about ½-inch thickness.
- Flour the work surface and sprinkle a little flour on the dough. Working quickly so the dough doesn’t get too warm, roll from the center of the disk outward, gently rotating the disk one quarter turn after each roll to ensure the dough is evenly stretched. (Make sure the work surface is well floured so the dough doesn’t stick to it, and make sure the dough itself is floured well enough to keep the rolling pin from sticking to it.)
- Roll out the dough until it is about 1/8-inch thick. Cut it into six 3-inch circles using a round cookie cutter or a biscuit cutter. Transfer the circles to small, silicone tart molds (like these https://3.bp.blogspot.com/V7dlwH2qhdw/UPwqOjM5SQI/AAAAAAAASR8/OrrhSN4S50A/s640/IMG_0790+copy.jpg) or individual-sized tart pans, and center the dough circles in the bottom of the molds. Use a chopstick to mold the dough into the grooves of the molds. (The dough may not come all the way up the sides of the mold, which is fine. You want them to be small.) Place molds on a clean baking sheet and use a fork to prick holes in the bottom of the dough to prevent it from bubbling. Preheat oven to 350°F.
- Wrap up the leftover dough and refrigerate it while the first six shells bake. (If you have 12 molds, you can bake them all at once, but I found my dough was getting too warm after cutting out the first six, so it needed to chill again anyway.)
- Place a small piece of foil inside the unbaked shells, and add a small handful of pie weights or dry beans to each shell. Transfer baking sheet to the middle rack of the oven and bake for 8-12 minutes or until shells are slightly golden brown around the edges. Remove baking sheet from oven and gently remove the foil with the pie weights from the molds. Carefully transfer molds to a cooling rack and cool to room temperature before removing pastry shells from the molds.
- Repeat with remaining dough to make six more pastry shells.
- When shells are completely cool, place filling mixture in a piping bag fitted with a large open star tip. Pipe mousse rosettes into each tartlet shell. Garnish each tart with one small mint leaf.

Raspberry-Chocolate Mousse Cups
Ingredients
- 18 oz. dark chocolate, chopped and divided
- ½ lb. fresh raspberries + 12 reserved for garnish
- 1 c. superfine (baker’s) sugar
- 8 oz. (1 c.) heavy cream
- 1 oz. raspberry liqueur (or to taste)
Directions
- To make the chocolate cups: In a heat-proof bowl set over a simmering pan of water (making sure the bottom of the bowl doesn’t touch the water), melt about 10 ounces of the chocolate, stirring constantly until it reaches 115-120°F. Remove from heat and begin to seed the chocolate by adding 4 ounces of unmelted chocolate, a little at a time, stirring constantly until it reaches 90°F.
- The chocolate will thicken as it cools. When it is thick enough to coat the inside of a silicone mold, use the back of a spoon to cover the insides of a silicone mini-muffin pan with the chocolate, keeping it as thin as possible but thick enough that it will not fall apart when taken out of the molds. Use an offset spatula to smooth the top edges of the molds and clean off any excess chocolate.
- Leave in a cool, dry place to set. Do not put the molds in the refrigerator or the chocolate will lose its shine.
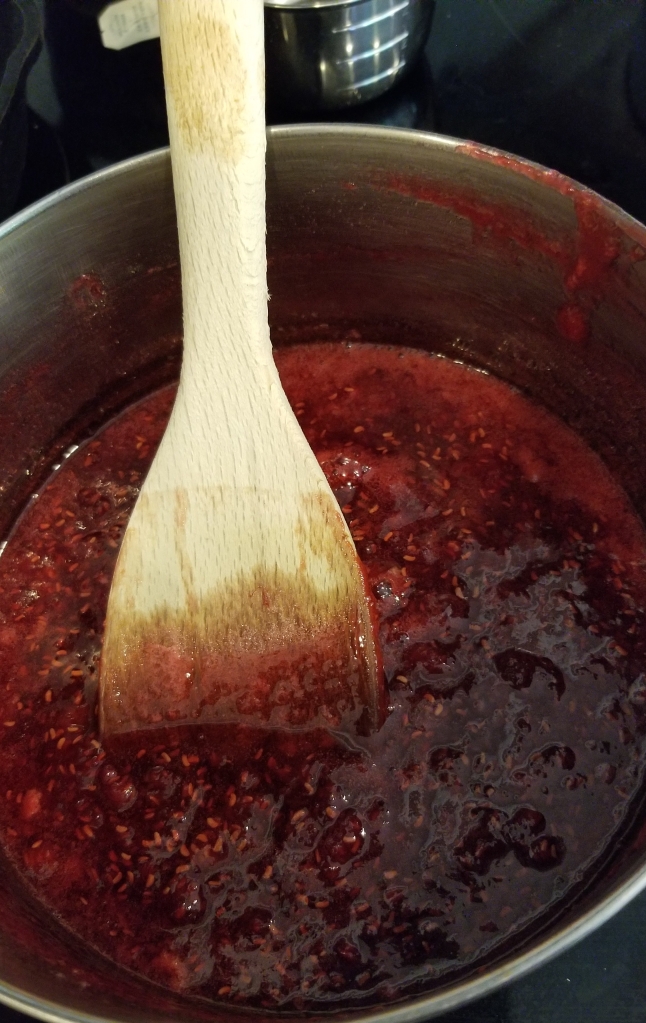
- While chocolate is setting, make the jam: Put ½ pound of raspberries in a pan over medium heat. Cook until fruit is soft and has released its juices. Add the sugar and stir until it is dissolved. When the mixture comes to a boil, regulate the heat so it remains at a soft boil until thickened to a jam-like consistency. To see if the jam is thick enough, dip a spoon that’s been in the freezer for a few minutes into the hot jam, pull the spoon out immediately and run your finger through the jam on the cold spoon—If it makes a clear path through the jam and doesn’t fill in, then you have a good set. Pour the jam through a sieve to remove the seeds, then refrigerate until cool and set.
- To make the mousse, put the remaining 4 ounces of chocolate in a heatproof bowl. Pour the cream into a small saucepan and cook over medium-high heat just until it begins to boil. (Small bubbles should form around the edge.) Remove from heat and pour the hot cream over the chopped chocolate and let stand for 5-10 minutes. Then vigorously whisk the mixture until it’s smooth and creamy. Add raspberry liqueur a little at a time, tasting it until you get the flavor just right. (TIP: If you want it extra boozy, use a little less cream to offset the liquid the liqueur adds.) Chill the mixture in the refrigerator until slightly thickened, about 1 hour.
- While ganache is chilling, carefully remove chocolate cups from the molds and arrange them on a serving plate. When jam is chilled and set, place ½-1 teaspoon of jam in the bottom of each cup.
- When the ganache is thoroughly chilled, use an electric mixer fitted with a whisk attachment to whip the chocolate, starting at low speed and gradually increasing to medium-high. Whip until chocolate is light in color and firm enough to be pipeable. (Be careful not to overwhip, which will lead to a grainy texture. If this happens, reheat the ganache in a double boiler, then strain and start again.)
- Transfer whipped ganache to a piping bag fitted with a small star tip. Fill the chocolate cups with whipped ganache. Top each with a single raspberry for garnish. Refrigerate until ready to serve.

This challenge sounds exhausting! But the results are so professional looking, and the flavors sound delicious!
LikeLiked by 1 person
Thanks, Lori. It was a lot of work, but really yummy! I’ll try to get you some “leftovers.” ;^D
LikeLike